sbt 之书 (草稿)
语言:
![]()
sbt 是一个用于 Scala 和 Java 的简单构建工具。 sbt 通过 Coursier 下载您的库依赖, 增量编译和测试项目, 并与 IntelliJ 和 VS Code 等 IDE 集成, 打包 JAR 文件并发布到 Central repo, 这是 JVM 社区的包注册表。
scalaVersion := "3.8.4"
您只需要在 build.sbt 中添加一行代码即可开始使用 Scala。
链接
- 此文档的源代码托管在 sbt/website
- sbt 1.x 的文档
安装 sbt runner
要构建 sbt 工程,你需要经过以下几步:
- 安装 JDK(建议使用 Eclipse Adoptium 的 Temurin JDK 17)。
- 安装 sbt runner。
sbt runner 是一个 shell 脚本,它会在必要时提前下载指定版本的 sbt 并调用它。通过这种机制,构建作者可以精确控制 sbt 的版本,而不是依赖用户的机器环境。
软件需求
sbt 可在所有主流操作系统上运行;但是,运行它需要 JDK 17 或更高版本。
java --version
# openjdk 17.0.12 2024-07-16 LTS
通过 SDKMAN 安装
要同时安装 JDK 和 sbt,可以考虑使用 SDKMAN。
sdk install java $(sdk list java | grep -o "\b17\.[0-9]*\.[0-9]*\-zulu" | head -1)
sdk install sbt
通用的包安装
验证 sbt runner
sbt --script-version
# 2.0.1
sbt 示例教程
本页面假设您已经安装了 sbt runner。
让我们从示例开始,而不是解释 sbt 如何工作或为什么这样工作。
创建一个最小的 sbt 构建
mkdir foo-build
cd foo-build
touch build.sbt
mkdir project
echo "sbt.version=2.0.1" > project/build.properties
启动 sbt shell
$ sbt
[info] welcome to sbt 2.0.1 (Azul Systems, Inc. Java)
....
[info] started sbt server
sbt:foo-build>
退出 sbt shell
要退出 sbt shell,请输入 exit 或使用 Ctrl+D(Unix)或 Ctrl+Z(Windows)。
sbt:foo-build> exit
编译一个项目
按照惯例,我们将使用 sbt:...> 或 > 提示符来表示我们正在 sbt 交互式 shell 中。
$ sbt
sbt:foo-build> compile
[success] elapsed time: 0 s, cache 0%, 1 onsite task
代码更改时重新编译
在 compile 命令(或任何其他命令)前加上 ~ 会导致该命令在项目中的源文件被修改时自动重新执行。例如:
sbt:foo-build> ~compile
[success] elapsed time: 0 s, cache 100%, 1 disk cache hit
[info] 1. Monitoring source files for foo-build/compile...
[info]    Press <enter> to interrupt or '?' for more options.
创建一个源文件
保持前一个命令运行。从另一个 shell 或在您的文件管理器中,在 foo-build 目录下创建以下嵌套目录:src/main/scala/example。然后,使用您喜欢的编辑器在 example 目录中创建 Hello.scala,内容如下:
package example

@main def main(args: String*): Unit =
  println(s"Hello ${args.mkString}")
运行中的命令应该会检测到这个新文件:
[info] Build triggered by /tmp/foo-build/src/main/scala/example/Hello.scala. Running 'compile'.
[info] compiling 1 Scala source to /tmp/foo-build/target/out/jvm/scala-3.3.3/foo/backend ...
[success] elapsed time: 1 s, cache 0%, 1 onsite task
[info] 2. Monitoring source files for foo-build/compile...
[info]    Press <enter> to interrupt or '?' for more options.
按 Enter 键退出 ~compile。
运行先前的命令
在 sbt shell 中,按两次向上箭头键找到您在开始时执行的 compile 命令。
sbt:foo-build> compile
获取帮助
使用 help 命令获取关于可用命令的基本帮助。
sbt:foo-build> help

  <command> (; <command>)*                       Runs the provided semicolon-separated commands.
  about                                          Displays basic information about sbt and the build.
  tasks                                          Lists the tasks defined for the current project.
  settings                                       Lists the settings defined for the current project.
  reload                                         (Re)loads the current project or changes to plugins project or returns from it.
  new                                            Creates a new sbt build.
  new                                            Creates a new sbt build.
  projects                                       Lists the names of available projects or temporarily adds/removes extra builds to the session.

....
显示特定任务的描述:
sbt:foo-build> help run
Runs a main class, passing along arguments provided on the command line.
运行您的应用
sbt:foo-build> run
[info] running example.main
Hello
[success] elapsed time: 0 s, cache 50%, 1 disk cache hit, 1 onsite task
从 sbt shell 设置 scalaVersion
sbt:foo-build> set scalaVersion := "3.8.4"
[info] Defining scalaVersion
[info] The new value will be used by Compile / bspBuildTarget, Compile / dependencyTreeCrossProjectId and 51 others.
[info]  Run `last` for details.
[info] Reapplying settings...
[info] set current project to foo (in build file:/tmp/foo-build/)
检查 scalaVersion 设置:
sbt:foo-build> scalaVersion
[info] 3.8.4
将会话保存到 build.sbt
我们可以使用 session save 保存临时设置。
sbt:foo-build> session save
[info] Reapplying settings...
[info] set current project to foo-build (in build file:/tmp/foo-build/)
[warn] build source files have changed
[warn] modified files:
[warn]   /tmp/foo-build/build.sbt
[warn] Apply these changes by running `reload`.
[warn] Automatically reload the build when source changes are detected by setting `Global / onChangedBuildSource := ReloadOnSourceChanges`.
[warn] Disable this warning by setting `Global / onChangedBuildSource := IgnoreSourceChanges`.
build.sbt 文件现在应该包含:
scalaVersion := "3.8.4"
命名您的项目
使用编辑器,按如下方式更改 build.sbt:
scalaVersion := "3.3.3"
organization := "com.example"
name := "Hello"
重新加载构建
使用 reload 命令重新加载构建。该命令会导致 build.sbt 文件被重新读取,并应用其设置。
sbt:foo-build> reload
[info] welcome to sbt 2.x (Azul Systems, Inc. Java)
[info] loading project definition from /tmp/foo-build/project
[info] loading settings for project hello from build.sbt ...
[info] set current project to Hello (in build file:/tmp/foo-build/)
sbt:Hello>
请注意,提示符现在已更改为 sbt:Hello>。
将 toolkit-test 添加到 libraryDependencies
使用编辑器,按如下方式更改 build.sbt:
scalaVersion := "3.3.3"
organization := "com.example"
name := "Hello"
libraryDependencies += "org.scala-lang" %% "toolkit-test" % "0.1.7" % Test
使用 reload 命令使 build.sbt 中的更改生效。
sbt:Hello> reload
运行增量测试
sbt:Hello> test
持续运行增量测试
sbt:Hello> ~test
编写测试
保持前一个命令运行,使用编辑器创建一个名为 src/test/scala/example/HelloSuite.scala 的文件:
package example

class HelloSuite extends munit.FunSuite:
  test("Hello should start with H") {
    assert("hello".startsWith("H"))
  }
end HelloSuite
~test 应该会检测到更改:
example.HelloSuite:
==> X example.HelloSuite.Hello should start with H  0.012s munit.FailException: /tmp/foo-build/src/test/scala/example/HelloSuite.scala:5 assertion failed
4:  test("Hello should start with H") {
5:    assert("hello".startsWith("H"))
6:  }
    at munit.FunSuite.assert(FunSuite.scala:11)
    at example.HelloSuite.$init$$$anonfun$1(HelloSuite.scala:5)
[error] Failed: Total 1, Failed 1, Errors 0, Passed 0
[error] Failed tests:
[error]   example.HelloSuite
[error] (Test / testQuick) sbt.TestsFailedException: Tests unsuccessful
[error] elapsed time: 1 s, cache 50%, 3 disk cache hits, 3 onsite tasks
使测试通过
使用编辑器,将 src/test/scala/example/HelloSuite.scala 更改为:
package example

class HelloSuite extends munit.FunSuite:
  test("Hello should start with H") {
    assert("Hello".startsWith("H"))
  }
end HelloSuite
确认测试通过,然后按 Enter 键退出持续测试。
添加库依赖
使用编辑器,按如下方式更改 build.sbt:
scalaVersion := "3.3.3"
organization := "com.example"
name := "Hello"
libraryDependencies ++= Seq(
  "org.scala-lang" %% "toolkit" % "0.1.7",
  "org.scala-lang" %% "toolkit-test" % "0.1.7" % Test,
)
使用 reload 命令使 build.sbt 中的更改生效。
使用 Scala REPL
我们可以查询纽约的当前天气。
sbt:Hello> console
Welcome to Scala 3.3.3 (1.8.0_402, Java OpenJDK 64-Bit Server VM).
Type in expressions for evaluation. Or try :help.
scala>
import sttp.client4.quick.*
import sttp.client4.Response
val newYorkLatitude: Double = 40.7143
val newYorkLongitude: Double = -74.006
val response: Response[String] = quickRequest
.get(
uri"https://api.open-meteo.com/v1/forecast?latitude=$newYorkLatitude&longitude=$newYorkLongitude¤t_weather=true"
)
.send()
println(ujson.read(response.body).render(indent = 2))
// press Ctrl+D
// Exiting paste mode, now interpreting.
{
"latitude": 40.710335,
"longitude": -73.99307,
"generationtime_ms": 0.36704540252685547,
"utc_offset_seconds": 0,
"timezone": "GMT",
"timezone_abbreviation": "GMT",
"elevation": 51,
"current_weather": {
"temperature": 21.3,
"windspeed": 16.7,
"winddirection": 205,
"weathercode": 3,
"is_day": 1,
"time": "2023-08-04T10:00"
}
}
import sttp.client4.quick._
import sttp.client4.Response
val newYorkLatitude: Double = 40.7143
val newYorkLongitude: Double = -74.006
val response: sttp.client4.Response[String] = Response({"latitude":40.710335,"longitude":-73.99307,"generationtime_ms":0.36704540252685547,"utc_offset_seconds":0,"timezone":"GMT","timezone_abbreviation":"GMT","elevation":51.0,"current_weather":{"temperature":21.3,"windspeed":16.7,"winddirection":205.0,"weathercode":3,"is_day":1,"time":"2023-08-04T10:00"}},200,,List(:status: 200, content-encoding: deflate, content-type: application/json; charset=utf-8, date: Fri, 04 Aug 2023 10:09:11 GMT),List(),RequestMetadata(GET,https://api.open-meteo.com/v1/forecast?latitude=40.7143&longitude...
scala> :q // to quit
创建子项目
按如下方式更改 build.sbt:
scalaVersion := "3.3.3"
organization := "com.example"

lazy val hello = rootProject
  .settings(
    name := "Hello",
    libraryDependencies ++= Seq(
      "org.scala-lang" %% "toolkit" % "0.1.7",
      "org.scala-lang" %% "toolkit-test" % "0.1.7" % Test,
    ),
  )

lazy val helloCore = (project in file("core"))
  .settings(
    name := "Hello Core",
  )
使用 reload 命令使 build.sbt 中的更改生效。
列出所有子项目
sbt:Hello> projects
[info] In file:/tmp/foo-build/
[info]   * hello
[info]     helloCore
编译子项目
sbt:Hello> helloCore/compile
将 toolkit-test 添加到子项目
按如下方式更改 build.sbt:
scalaVersion := "3.3.3"
organization := "com.example"

val toolkitTest = "org.scala-lang" %% "toolkit-test" % "0.1.7"

lazy val hello = rootProject
  .settings(
    name := "Hello",
    libraryDependencies ++= Seq(
      "org.scala-lang" %% "toolkit" % "0.1.7",
      toolkitTest % Test,
    ),
  )

lazy val helloCore = (project in file("core"))
  .settings(
    name := "Hello Core",
    libraryDependencies += toolkitTest % Test,
  )
广播命令
设置 aggregate 以便发送到 hello 的命令也会广播到 helloCore:
scalaVersion := "3.3.3"
organization := "com.example"

val toolkitTest = "org.scala-lang" %% "toolkit-test" % "0.1.7"

lazy val hello = rootProject
  .autoAggregate
  .settings(
    name := "Hello",
    libraryDependencies ++= Seq(
      "org.scala-lang" %% "toolkit" % "0.1.7",
      toolkitTest % Test,
    ),
  )

lazy val helloCore = (project in file("core"))
  .settings(
    name := "Hello Core",
    libraryDependencies += toolkitTest % Test,
  )
reload 之后,~test 现在会在两个子项目上运行:
sbt:Hello> ~test
按 Enter 键退出持续测试。
使 hello 依赖于 helloCore
使用 .dependsOn(...) 添加对其他子项目的依赖。同时,让我们将 toolkit 依赖移至 helloCore。
scalaVersion := "3.3.3"
organization := "com.example"

val toolkitTest = "org.scala-lang" %% "toolkit-test" % "0.1.7"

lazy val hello = rootProject
  .autoAggregate
  .dependsOn(helloCore)
  .settings(
    name := "Hello",
    libraryDependencies ++= Seq(
      "org.scala-lang" %% "toolkit" % "0.1.7",
      toolkitTest % Test,
    ),
  )

lazy val helloCore = (project in file("core"))
  .settings(
    name := "Hello Core",
    libraryDependencies += toolkitTest % Test,
  )
使用 uJson 解析 JSON
让我们在 helloCore 中使用 toolkit 中的 uJson。
添加 core/src/main/scala/example/core/Weather.scala:
package example.core
import sttp.client4.quick._
import sttp.client4.Response
object Weather:
def temp() =
val response: Response[String] = quickRequest
.get(
uri"https://api.open-meteo.com/v1/forecast?latitude=40.7143&longitude=-74.006¤t_weather=true"
)
.send()
val json = ujson.read(response.body)
json.obj("current_weather")("temperature").num
end Weather
接下来,按如下方式更改 src/main/scala/example/Hello.scala:
package example

import example.core.Weather

@main def main(args: String*): Unit =
  val temp = Weather.temp()
  println(s"Hello! The current temperature in New York is $temp C.")
让我们运行应用,看看它是否正常工作:
sbt:Hello> run
[info] compiling 1 Scala source to /tmp/foo-build/core/target/scala-2.13/classes ...
[info] compiling 1 Scala source to /tmp/foo-build/target/scala-2.13/classes ...
[info] running example.Hello
Hello! The current temperature in New York is 22.7 C.
临时切换 scalaVersion
sbt:Hello> ++3.3.3!
[info] Forcing Scala version to 3.3.3 on all projects.
[info] Reapplying settings...
[info] Set current project to Hello (in build file:/tmp/foo-build/)
检查 scalaVersion 设置:
sbt:Hello> scalaVersion
[info] helloCore / scalaVersion
[info]  3.3.3
[info] scalaVersion
[info]  3.3.3
此设置将在 reload 之后消失。
批处理模式
您也可以在批处理模式下运行 sbt,直接从终端传递 sbt 命令。
$ sbt clean "testOnly HelloSuite"
sbt new 命令
您可以使用 sbt new 命令快速设置一个简单的 "Hello world" 构建。
$ sbt new scala/scala-seed.g8
....
A minimal Scala project.

name [My Something Project]: hello

Template applied in ./hello
当提示输入项目名称时,请输入 hello。
这将在名为 hello 的目录下创建一个新项目。
致谢
本页面基于 William "Scala William" Narmontas 编写的 Essential sbt 教程。
sbt 入门
sbt 使用少数的几个概念来支撑它灵活并且强大的构建定义。其实没有太多的概念,但是 sbt 并不完全像其他的构建体系,而且如果您没有看过文档的话,您偶尔将会遇到一些细节问题。
这篇入门指南覆盖了一些您在创建和维护一个 sbt 构建定义时需要知道的概念。
强烈建议看完该入门指南。
sbt 的存在理由
预备知识
在 Scala 中,库或程序使用 Scala 编译器 scalac 进行编译,正如 Scala 3 Book 中所记录的:
@main def hello() = println("Hello, World!")
$ scalac hello.scala
$ scala hello
Hello, World!
如果我们直接调用 scalac,这个过程会变得乏味且缓慢,因为我们必须传递所有 Scala 源文件名。
此外,大多数非平凡的程序可能会有库依赖,因此也会传递性地依赖于它们的依赖项。对于 Scala 生态系统来说,这更加复杂,因为我们有 Scala 2.12,2.13 生态系统,Scala 3.x 生态系统,以及 JVM,JS 和 Native 平台。
与其使用 JAR 文件和 scalac,我们可以通过引入更高级别的子项目抽象概念并使用构建工具来避免手动劳作。
sbt
sbt 是为 Scala 和 Java 创建的简单构建工具。它允许我们声明子项目及其各种依赖项和自定义任务,以确保我们始终能获得快速,可重复的构建。
为了实现这一目标,sbt 做了几件事:
- sbt 本身的版本记录在
project/build.properties中。 - 定义了一种称为 build.sbt DSL 的领域特定语言,可以在
build.sbt中声明 Scala 版本和其他子项目信息。 - 使用 Coursier 获取子项目依赖及其依赖项。
- 调用 Zinc 增量编译 Scala 和 Java 源代码。
- 在可能的情况下自动并行运行任务。
- 定义了如何将包发布到 Maven 仓库的约定,以便与更广泛的 JVM 生态系统进行互操作。
在很大程度上,sbt 标准化了构建给定程序或库所需的命令。
build.sbt DSL 的必要性
sbt 采用基于 Scala 的 build.sbt DSL 来声明子项目和任务图。如今,使用 DSL 而非 YAML 和 XML 等配置格式几乎不再是 sbt 的独特之处。许多构建工具,如 Gradle,Google 的 Bazel,Meta 的 Buck 以及 Apple 的 SwiftPM 都使用 DSL 来定义子项目。
build.sbt 最初几乎可以像 YAML 文件一样,仅声明 scalaVersion 和 libraryDependencies,但随着您对构建系统需求的增长,它可以进行扩展:
- 为了避免重复相同的信息,例如库的版本号,
build.sbt可以使用val声明变量。 - 在需要时使用 Scala 语言结构(如
if)来定义设置和任务。 - 静态类型的设置和任务,可在构建开始前捕获拼写错误和类型错误。类型还有助于将数据从一个任务传递到另一个任务。
- 通过
Initialized[Task[A]]提供结构化并发。DSL 使用所谓的直接风格.value语法来简洁地定义任务图。 - 使社区能够通过插件扩展 sbt,这些插件提供自定义任务或语言扩展,如 Scala.JS。
创建新的构建
要使用 sbt 开始新的构建,请使用 sbt new。
$ mkdir /tmp/foo
$ cd /tmp/foo
$ sbt new

Welcome to sbt new!
Here are some templates to get started:
 a) scala/toolkit.local               - Scala Toolkit (beta) by Scala Center and VirtusLab
 b) typelevel/toolkit.local           - Toolkit to start building Typelevel apps
 c) sbt/cross-platform.local          - A cross-JVM/JS/Native project
 d) scala/scala3.g8                   - Scala 3 seed template
 e) scala/scala-seed.g8               - Scala 2 seed template
 f) playframework/play-scala-seed.g8  - A Play project in Scala
 g) playframework/play-java-seed.g8   - A Play project in Java
 i) softwaremill/tapir.g8             - A tapir project using Netty
 m) scala-js/vite.g8                  - A Scala.JS + Vite project
 n) holdenk/sparkProjectTemplate.g8   - A Scala Spark project
 o) spotify/scio.g8                   - A Scio project
 p) disneystreaming/smithy4s.g8       - A Smithy4s project
 q) quit
Select a template:
如果您选择 "a",您将会收到更多问题的提示:
Select a template: a
Scala version (default: 3.3.0):
Scala Toolkit version (default: 0.2.0):
按回车键选择默认值。
[info] Updated file /private/tmp/bar/project/build.properties: set sbt.version to 1.9.8
[info] welcome to sbt 1.9.8 (Azul Systems, Inc. Java 1.8.0_352)
....
[info] set current project to bar (in build file:/private/tmp/foo/)
[info] sbt server started at local:///Users/eed3si9n/.sbt/1.0/server/d0ac1409c0117a949d47/sock
[info] started sbt server
sbt:bar> exit
[info] shutting down sbt server
以下是此模板创建的文件:
.
├── build.sbt
├── project
│   └── build.properties
├── src
│   ├── main
│   │   └── scala
│   │       └── example
│   │           └── Main.scala
│   └── test
│       └── scala
│           └── example
│               └── ExampleSuite.scala
└── target
让我们看一下 build.sbt 文件:
val toolkitV = "0.2.0"
val toolkit = "org.scala-lang" %% "toolkit" % toolkitV
val toolkitTest = "org.scala-lang" %% "toolkit-test" % toolkitV

scalaVersion := "3.3.0"
libraryDependencies += toolkit
libraryDependencies += (toolkitTest % Test)
这被称为构建定义,它包含 sbt 编译项目所需的信息。这是用 .sbt 格式编写的,它是 Scala 语言的一个子集。
以下是 src/main/scala/example/Main.scala 中的内容:
package example

@main def main(args: String*): Unit =
  println(s"Hello ${args.mkString}")
这是一个 Hello world 模板。我们可以通过启动 sbt --client 并在 shell 中输入 run <您的名字> 来从 sbt shell 运行它:
$ sbt --client
[info] entering *experimental* thin client - BEEP WHIRR
[info] server was not detected. starting an instance
....
info] terminate the server with `shutdown`
[info] disconnect from the server with `exit`
sbt:bar> run Raj
[info] running example.main Raj
Hello Raj
[success] Total time: 0 s, completed Feb 18, 2024 2:38:10 PM
Giter8 模板
除了几个 .local 模板外,sbt new 还与 Giter8 集成,这是一个使用 GitHub 托管模板的开放模板系统。例如,scala/scala3.g8 由 Scala 团队维护,用于创建新的 Scala 3 构建:
$ /tmp
$ sbt new scala/scala3.g8
Giter8 wiki 列出了 100 多个可以快速启动您新构建的模板。
sbt 组件
sbt runner
sbt 构建使用 sbt 运行器执行,也称为 "sbt-the-shell-script" 以区别于其他组件。需要注意的是,sbt runner旨在运行任意版本的 sbt。
使用 project/build.properties 指定 sbt 版本
sbt runner执行名为 sbt launcher 的子组件,该组件读取 project/build.properties 以确定构建的 sbt 版本,并在未缓存时下载相应的构件:
sbt.version=2.0.1
这意味着:
- 任何检出您构建的人都会获得相同的 sbt 版本,无论其机器上安装的 sbt runner 是什么。
- sbt 版本的变更可以通过版本控制系统(如 git)进行跟踪。
sbtn(sbt --client)
sbtn(原生代码瘦客户端)是 sbt runner的子组件,当您向 sbt runner传递 --client 标志时会被调用,用于向 sbt server发送命令。之所以称为 sbtn,是因为它使用 GraalVM native-image 编译为原生代码。sbtn 与 sbt server之间的协议足够稳定,应在 sbt 的大多数最新版本之间兼容。
sbt server(sbt --server)
sbt server是实际的构建工具,其版本通过 project/build.properties 指定。sbt 服务器充当收银员,接收来自 sbtn 和编辑器的命令。
Coursier
sbt server将 Coursier 作为子组件运行,用于解析 Scala 库、Scala 编译器以及您的构建所需的任何其他库依赖。
Zinc
Zinc 是 Scala 的增量编译器,由 sbt 项目开发和维护。Zinc 的一个常被忽视的方面是,它提供了稳定的 API 来调用 Scala 编译器的任何现代版本。结合 Coursier 可以解析任何 Scala 版本这一事实,使用 sbt 我们只需在 build.sbt 中写一行即可调用任何现代版本的 Scala:
scalaVersion := "3.8.4"
BSP server
sbt server支持 Build Server Protocol (BSP) 来列出构建目标、构建它们等。这使得 IntelliJ 和 Metals 等 IDE 能够以编程方式与运行中的 sbt server通信。
连接到 sbt server
让我们看看连接到 sbt server的三种方式。
使用 sbtn 的 sbt shell
在您的构建工作目录中运行 sbt:
sbt
这应该会显示类似以下的内容:
$ sbt
[info] server was not detected. starting an instance
[info] welcome to sbt 2.0.0-alpha7 (Azul Systems, Inc. Java 1.8.0_352)
[info] loading project definition from /private/tmp/bar/project
[info] loading settings for project bar from build.sbt ...
[info] set current project to bar (in build file:/private/tmp/bar/)
[info] sbt server started at local:///Users/eed3si9n/.sbt/2.0.0-alpha7/server/d0ac1409c0117a949d47/sock
[info] started sbt server
[info] terminate the server with `shutdown`
[info] disconnect from the server with `exit`
sbt:bar>
不带命令行参数运行 sbt 会启动 sbt shell。sbt shell 具有命令提示符(支持 Tab 补全和历史记录!)。
例如,您可以在 sbt shell 中输入 compile:
sbt:bar> compile
若要再次编译,请按上箭头键然后按回车。
若要退出 sbt shell,请输入 exit 或使用 Ctrl-D(Unix)或 Ctrl-Z(Windows)。
使用 sbtn 的批处理模式
您也可以以批处理模式运行 sbt:
sbt compile
sbt testOnly TestA
$ sbt compile
> compile
关闭 sbt server
运行以下命令以关闭您机器上的所有 sbt server:
sbt shutdownall
或运行以下命令以仅关闭当前服务器:
sbt shutdown
基本任务
本页介绍在您设置好项目后如何使用 sbt。本页假定您已阅读 sbt 组件。
如果您拉取使用 sbt 的仓库,上手相当容易。首先,从 GitHub 或其他仓库获取包。
$ git clone https://github.com/scalanlp/breeze.git
$ cd breeze
使用 sbtn 的 sbt shell
如 sbt 组件 所述,启动 sbt shell:
$ sbt
这应该会显示类似以下的内容:
$ sbt
[info] entering *experimental* thin client - BEEP WHIRR
[info] server was not detected. starting an instance
[info] welcome to sbt 1.5.5 (Azul Systems, Inc. Java 1.8.0_352)
[info] loading global plugins from /Users/eed3si9n/.sbt/1.0/plugins
[info] loading settings for project breeze-build from plugins.sbt ...
[info] loading project definition from /private/tmp/breeze/project
Downloading https://repo1.maven.org/maven2/org/scalanlp/sbt-breeze-expand-codegen_2.12_1.0/0.2.1/sbt-breeze-expand-codegen-0.2.1.pom
....
[info] sbt server started at local:///Users/eed3si9n/.sbt/1.0/server/dd982e07e85c7de1b618/sock
[info] terminate the server with `shutdown`
[info] disconnect from the server with `exit`
sbt:breeze-parent>
projects 命令
让我们使用 projects 命令列出子项目来探索构建:
sbt:breeze-parent> projects
[info] In file:/private/tmp/breeze/
[info]     benchmark
[info]     macros
[info]     math
[info]     natives
[info]   * root
[info]     viz
这表明该构建有 6 个子项目,包括名为 root 的当前子项目。
tasks 命令
同样,我们可以使用 tasks 命令列出该构建可用的任务:
sbt:breeze-parent> tasks

This is a list of tasks defined for the current project.
It does not list the scopes the tasks are defined in; use the 'inspect' command for that.
Tasks produce values.  Use the 'show' command to run the task and print the resulting value.

  bgRun            Start an application's default main class as a background job
  bgRunMain        Start a provided main class as a background job
  clean            Deletes files produced by the build, such as generated sources, compiled classes, and task caches.
  compile          Compiles sources.
  console          Starts the Scala interpreter with the project classes on the classpath.
  consoleProject   Starts the Scala interpreter with the sbt and the build definition on the classpath and useful imports.
  consoleQuick     Starts the Scala interpreter with the project dependencies on the classpath.
  copyResources    Copies resources to the output directory.
  doc              Generates API documentation.
  package          Produces the main artifact, such as a binary jar.  This is typically an alias for the task that actually does the packaging.
  packageBin       Produces a main artifact, such as a binary jar.
  packageDoc       Produces a documentation artifact, such as a jar containing API documentation.
  packageSrc       Produces a source artifact, such as a jar containing sources and resources.
  publish          Publishes artifacts to a repository.
  publishLocal     Publishes artifacts to the local Ivy repository.
  publishM2        Publishes artifacts to the local Maven repository.
  run              Runs a main class, passing along arguments provided on the command line.
  runMain          Runs the main class selected by the first argument, passing the remaining arguments to the main method.
  test             Executes all tests.
  testOnly         Executes the tests provided as arguments or all tests if no arguments are provided.
  testQuick        Executes the tests that either failed before, were not run or whose transitive dependencies changed, among those provided as arguments.
  update           Resolves and optionally retrieves dependencies, producing a report.

More tasks may be viewed by increasing verbosity.  See 'help tasks'
compile
compile 任务在解析并下载库依赖后编译源代码。
> compile
这应该会显示类似以下的内容:
sbt:breeze-parent> compile
[info] compiling 341 Scala sources and 1 Java source to /private/tmp/breeze/math/target/scala-3.1.3/classes ...
  | => math / Compile / compileIncremental 51s
run
run 任务运行子项目的主类。在 sbt shell 中,输入 math/run:
> math/run
math/run 表示作用于 math 子项目的 run 任务。这应该会显示类似以下的内容:
sbt:breeze-parent> math/run
[info] Scala version: 3.1.3 true
....

Multiple main classes detected. Select one to run:
 [1] breeze.optimize.linear.NNLS
 [2] breeze.optimize.proximal.NonlinearMinimizer
 [3] breeze.optimize.proximal.QuadraticMinimizer
 [4] breeze.util.UpdateSerializedObjects

Enter number:
在提示符处输入 1。
test
test 任务会运行之前失败、未运行或传递依赖发生变化的测试。
> math/test
这应该会显示类似以下的内容:
sbt:breeze-parent> math/testQuick
[info] FeatureVectorTest:
[info] - axpy fv dv (1 second, 106 milliseconds)
[info] - axpy fv vb (9 milliseconds)
[info] - DM mult (19 milliseconds)
[info] - CSC mult (32 milliseconds)
[info] - DM trans mult (4 milliseconds)
....
[info] Run completed in 58 seconds, 183 milliseconds.
[info] Total number of tests run: 1285
[info] Suites: completed 168, aborted 0
[info] Tests: succeeded 1285, failed 0, canceled 0, ignored 0, pending 0
[info] All tests passed.
[success] Total time: 130 s (02:10), completed Feb 19, 2024
Watch(波浪号)命令
为了加快您的编辑-编译-测试循环,您可以让 sbt 在您保存源文件时自动重新编译或运行测试。
在命令前加上 ~ 前缀,可在一个或多个源文件发生变化时运行该命令。例如,在 sbt shell 中尝试:
> ~test
按回车键停止监视更改。您可以在 sbt shell 或批处理模式中使用 ~ 前缀。
构建定义基础
本页讨论 build.sbt 构建定义。
什么是构建定义?
构建定义在 build.sbt 中定义,由一组项目(类型为 Project)组成。由于项目一词可能产生歧义,本指南中我们通常称其为 subproject(子项目)。
例如,在 build.sbt 中您这样定义位于当前目录的子项目:
scalaVersion := "3.3.3"
name := "Hello"
或更明确地:
lazy val root = rootProject
  .settings(
    scalaVersion := "3.3.3",
    name := "Hello",
  )
每个子项目通过键值对配置。例如,name 是一个键,映射到字符串值,即您子项目的名称。键值对列在 .settings(...) 方法下。
build.sbt DSL
build.sbt 使用名为 build.sbt DSL 的 DSL 定义子项目,该 DSL 基于 Scala。最初您可以像使用 YAML 文件一样使用 build.sbt DSL,仅声明 scalaVersion 和 libraryDependencies,但随着构建规模增大,它支持更多功能以保持构建定义井然有序。
类型化设置表达式
让我们仔细看看 build.sbt DSL:
organization  :=         "com.example"
^^^^^^^^^^^^  ^^^^^^^^   ^^^^^^^^^^^^^
key           operator   (setting/task) body
每个条目称为 setting expression(设置表达式)。其中一些也称为 task expression(任务表达式)。我们将在本页后面更详细地了解两者的区别。
设置表达式由三部分组成:
- 左侧是键。
- 运算符,此处为
:= - 右侧称为主体或设置/任务主体。
在左侧,name、version 和 scalaVersion 是 keys(键)。键是 SettingKey[A]、TaskKey[A] 或 InputKey[A] 的实例,其中 A 是期望的值类型。
由于键 name 的类型为 SettingKey[String],name 上的 := 运算符也专门类型为 String。如果您使用错误的值类型,构建定义将无法编译:
name := 42 // will not compile
val 和 lazy val
为避免重复相同信息(如库的版本号),build.sbt 中可以穿插使用 val、lazy val 和 def。
val toolkitV = "0.2.0"
val toolkit = "org.scala-lang" %% "toolkit" % toolkitV
val toolkitTest = "org.scala-lang" %% "toolkit-test" % toolkitV

scalaVersion := "3.8.4"
libraryDependencies += toolkit
libraryDependencies += (toolkitTest % Test)
在上面的代码中,val 定义变量,变量从上到下初始化。这意味着 toolkitV 必须在被引用之前定义。
以下是一个错误示例:
// bad example
val toolkit = "org.scala-lang" %% "toolkit" % toolkitV // uninitialized reference!
val toolkitTest = "org.scala-lang" %% "toolkit-test" % toolkitV // uninitialized reference!
val toolkitV = "0.2.0"
如果您的 build.sbt 包含未初始化的前向引用,sbt 将无法加载,并因 NullPointerException 而抛出 java.lang.ExceptionInInitializerError。让编译器解决此问题的一种方法是将变量定义为 lazy:
lazy val toolkit = "org.scala-lang" %% "toolkit" % toolkitV
lazy val toolkitTest = "org.scala-lang" %% "toolkit-test" % toolkitV
lazy val toolkitV = "0.2.0"
有些人反对过多使用 lazy val,但 Scala 3 的 lazy val 效率很高,我们认为它使构建定义在复制粘贴时更加稳健。
库依赖基础
本页介绍使用 sbt 进行库依赖管理的基础知识。
sbt 使用 Coursier 实现托管依赖,因此如果您熟悉 Coursier、npm、PIP 等包管理器,不会有太大困难。
与手动下载所需 JAR 文件(unmanaged 依赖)不同,managed(托管)依赖系统可自动为子项目获取外部库。Coursier 等工具会解析声明的 ModuleID,执行依赖解析(展开所有传递依赖并解决版本冲突以确定确切版本),下载并缓存生成的构件,确保 JAR 管理的一致性。
libraryDependencies 键
声明依赖如下所示,其中 groupId、artifactId 和 revision 为字符串:
libraryDependencies += groupID % artifactID % revision
或如下所示,其中 configuration 可以是字符串或 Configuration 值(如 Test):
libraryDependencies += groupID % artifactID % revision % configuration
当您运行:
> compile
sbt 将自动解析依赖并下载 JAR 文件。
使用 %% 获取正确的 Scala 版本
如果您使用 organization %% moduleName % version 而非 organization % moduleName % version(区别在于 organization 后的双 %%),sbt 会将您项目的二进制 Scala 版本添加到构件名称中。这只是一个快捷方式。您也可以不使用 %% 来编写:
libraryDependencies += "org.scala-lang" % "toolkit_3" % "0.2.0"
假设您构建的 scalaVersion 为 3.x,以下写法是等价的(注意 "org.scala-lang" 后的双 %%):
libraryDependencies += "org.scala-lang" %% "toolkit" % "0.2.0"
其思路是许多依赖针对多个 Scala 版本编译,您希望获取与您项目匹配的版本以确保二进制兼容性。
在一处跟踪依赖
project 下的 .scala 文件成为构建定义的一部分,我们可以通过创建名为 project/Dependencies.scala 的文件在一处跟踪依赖。
// place this file at project/Dependencies.scala

import sbt.*

object Dependencies:
  // versions
  lazy val toolkitV = "0.2.0"

  // libraries
  val toolkit = "org.scala-lang" %% "toolkit" % toolkitV
  val toolkitTest = "org.scala-lang" %% "toolkit-test" % toolkitV
end Dependencies
Dependencies 对象将在 build.sbt 中可用。为便于使用其中定义的 val,请在您的 build.sbt 文件中导入 Dependencies.*。
import Dependencies.*

scalaVersion := "3.8.4"
name := "something"
libraryDependencies += toolkit
libraryDependencies += toolkitTest % Test
查看库依赖
在 sbt shell 中输入 Compile/dependencyTree 可显示库依赖树,包括传递依赖:
> Compile/dependencyTree
这应该会显示类似以下的内容:
sbt:bar> Compile/dependencyTree
[info] default:bar_3:0.1.0-SNAPSHOT
[info]   +-org.scala-lang:scala3-library_3:3.3.1 [S]
[info]   +-org.scala-lang:toolkit_3:0.2.0
[info]     +-com.lihaoyi:os-lib_3:0.9.1
[info]     | +-com.lihaoyi:geny_3:1.0.0
[info]     | | +-org.scala-lang:scala3-library_3:3.1.3 (evicted by: 3.3.1)
[info]     | | +-org.scala-lang:scala3-library_3:3.3.1 [S]
....
多项目基础
虽然简单程序可以从单项目构建开始,但更常见的是将构建拆分为多个较小的子项目。
构建中的每个子项目都有自己的源目录,运行 packageBin 时会生成自己的 JAR 文件,总体上与其他项目的工作方式相同。
子项目通过声明类型为 Project 的 lazy val 来定义。例如:
scalaVersion := "3.8.4"
LocalRootProject / publish / skip := true

lazy val core = (project in file("core"))
  .settings(
    name := "core",
  )

lazy val util = (project in file("util"))
  .dependsOn(core)
  .settings(
    name := "util",
  )
val 的名称用作子项目的 ID,用于在 sbt shell 中引用该子项目。
sbt 始终会定义一个根项目,因此在上面的构建定义中,我们将共有三个子项目。
子项目依赖
子项目可以依赖另一个子项目的代码。通过声明 dependsOn(...) 实现。例如,如果 util 需要在其 classpath 上使用 core,您可以将 util 定义为:
lazy val util = (project in file("util"))
  .dependsOn(core)
根项目
构建根目录下的子项目称为 root project(根项目),通常在构建中扮演特殊角色。如果未在构建的根目录定义子项目,sbt 会自动创建一个默认的根项目,用于聚合构建中的所有其他子项目。
任务聚合
任务聚合是指在聚合子项目上运行任务时,也会在被聚合的子项目上运行。
scalaVersion := "3.8.4"

lazy val root = rootProject
  .autoAggregate
  .settings(
    publish / skip := true
  )

lazy val util = (project in file("util"))

lazy val core = (project in file("core"))
在上面的示例中,根子项目聚合了 util 和 core。当您在 sbt shell 中输入 compile 时,所有三个子项目将并行编译。
通用设置
在 sbt 2.x 中,直接在 build.sbt 中编写且不带 settings(...) 的裸设置是 common settings(通用设置),会注入到所有子项目中。
scalaVersion := "3.8.4"

lazy val core = (project in file("core"))

lazy val app = (project in file("app"))
  .dependsOn(core)
在上面的示例中,scalaVersion 设置应用于默认根子项目、core 和 util。
此规则的一个例外是已经限定到子项目的设置。
scalaVersion := "3.8.4"

lazy val core = (project in file("core"))

lazy val app = (project in file("app"))
  .dependsOn(core)

// This is applied only to app
app / name := "app1"
我们可以利用此例外,添加仅适用于默认根项目的设置,如下所示:
scalaVersion := "3.8.4"

lazy val core = (project in file("core"))

lazy val app = (project in file("app"))
  .dependsOn(core)

// These are applied only to root
LocalRootProject / name := "root"
LocalRootProject / publish / skip := true
插件基础
什么是插件?
插件扩展构建定义,最常见的方式是添加新的设置和任务。例如,插件可以添加 githubWorkflowGenerate 任务来生成 GitHub Actions YAML。
使用 Scaladex 查找插件版本
您可以使用 Scaladex 搜索插件,并查找插件的最新版本。
声明插件
如果您的项目在目录 hello 中,且您要向构建定义添加 sbt-github-actions,请创建 hello/project/plugins.sbt,并通过将插件的模块 ID 传递给 addSbtPlugin(...) 来声明插件依赖:
// In project/plugins.sbt

addSbtPlugin("com.github.sbt" % "sbt-github-actions" % "0.28.0")
如果您要添加 sbt-assembly,请添加以下内容:
// In project/plugins.sbt

addSbtPlugin("com.eed3si9n" % "sbt-assembly" % "2.3.1")
有关使用托管在 git 仓库中的插件的实验性技术,请参阅 Source dependency plugin 配方。
插件通常提供设置和任务,这些设置和任务会添加到子项目中以启用插件的功能。下一节将对此进行说明。
启用和禁用自动插件
插件可以声明其设置自动添加到构建定义中,在这种情况下您无需做任何操作即可添加它们。
自动插件功能使插件能够自动且安全地确保其设置和依赖位于项目上。许多自动插件应自动具有其默认设置。
如果您使用的自动插件需要显式启用,则必须在您的 build.sbt 中添加以下内容:
lazy val util = (project in file("util"))
  .enablePlugins(FooPlugin, BarPlugin)
  .settings(
    name := "hello-util"
  )
enablePlugins 方法允许项目显式定义它们希望使用的自动插件。
项目还可以使用 disablePlugins 方法排除插件。例如,如果我们希望从 util 中移除 IvyPlugin 设置,可以按如下方式修改 build.sbt:
lazy val util = (project in file("util"))
  .enablePlugins(FooPlugin, BarPlugin)
  .disablePlugins(plugins.IvyPlugin)
  .settings(
    name := "hello-util"
  )
自动插件应记录它们是否需要显式启用。如果您想了解给定项目启用了哪些自动插件,只需在 sbt 控制台中运行 plugins 命令。
sbt:hello> plugins
In build /tmp/hello/:
  Enabled plugins in hello:
    sbt.plugins.CorePlugin
    sbt.plugins.DependencyTreePlugin
    sbt.plugins.Giter8TemplatePlugin
    sbt.plugins.IvyPlugin
    sbt.plugins.JUnitXmlReportPlugin
    sbt.plugins.JvmPlugin
    sbt.plugins.SemanticdbPlugin
Plugins that are loaded to the build but not enabled in any subprojects:
  sbt.ScriptedPlugin
  sbt.plugins.SbtPlugin
此处,plugins 输出显示 sbt 的默认插件均已启用。sbt 的默认设置由 7 个插件提供:
CorePlugin:提供任务的核心并行控制。DependencyTreePlugin:提供依赖树任务。Giter8TemplatePlugin:提供sbt new支持。IvyPlugin:提供发布/解析模块的机制。JUnitXmlReportPlugin:提供生成 junit-xml 的支持。JvmPlugin:提供编译/测试/运行/打包 Java/Scala 项目的机制。SemanticdbPlugin:提供生成 SemanticDB 的支持。
可用插件
构建布局
sbt 使用文件放置约定,便于快速上手新的 sbt 构建:
.
├── build.sbt
├── project/
│   ├── build.properties
│   ├── Dependencies.scala
│   └── plugins.sbt
├── src/
│   ├── main/
│   │   ├── java/
│   │   ├── resources/
│   │   ├── scala/
│   │   └── scala-2.13/
│   └── test/
│       ├── java/
│       ├── resources/
│       ├── scala/
│       └── scala-2.13/
├── subproject-core/
│   └── src/
│       ├── main/
│       └── test/
├─── subproject-util/
│   └── src/
│       ├── main/
│       └── test/
└── target/
- 本地根目录
.是您构建的起点。 - 在 sbt 的术语中,base directory(基目录)是包含子项目的目录。在上面的示例中,
.、subproject-core和subproject-util都是基目录。 - 构建定义在本地根目录的
build.sbt(实际上是任何名为*.sbt的文件)中描述。 - sbt 版本在
project/build.properties中跟踪。 - 生成的文件(编译后的类、打包的 jar、托管文件、缓存和文档)默认会写入
target目录。
构建支持文件
除了 build.sbt 之外,project 目录还可以包含定义辅助对象和一次性插件的 .scala 文件。
.
├── build.sbt
├── project/
│   ├── build.properties
│   ├── Dependencies.scala
│   └── plugins.sbt
....
您可能会在 project/ 内看到 .sbt 文件,通常用于声明插件。请参阅 插件基础。
源代码
sbt 默认使用与 Maven 相同的目录结构存放源文件(所有路径均相对于基目录):
....
├── src/
│   ├── main/
│   │   ├── java/        <main Java sources>
│   │   ├── resources/   <files to include in main JAR>
│   │   ├── scala/       <main Scala sources>
│   │   └── scala-2.13/  <main Scala 2.13 specific sources>
│   └── test/
│       ├── java/        <test Java sources>
│       ├── resources/   <files to include in test JAR>
│       ├── scala/       <test Scala sources>
│       └── scala-2.13/  <test Scala 2.13 specific sources>
....
src/ 中的其他目录将被忽略。此外,所有隐藏目录也将被忽略。
源代码可以放在项目的基目录中,如 hello/app.scala,这对于小项目可能可以接受,但对于常规项目,人们倾向于将项目放在 src/main/ 目录中以保持整洁。
配置版本控制
您的 .gitignore(或其他版本控制系统的等效文件)应包含:
target/
Note that this deliberately has a trailing / (to match only directories)
and it deliberately has no leading / (to match project/target/ in
addition to plain target/).
sbt 与 IDE
虽然仅用编辑器和 sbt 也可以编写 Scala 代码,但如今大多数程序员使用集成开发环境(简称 IDE)。Scala 中流行的 IDE 包括 Metals 和 IntelliJ IDEA,两者都能与 sbt 构建集成。
使用 IDE 的一些优势包括:
- 跳转到定义
- 基于静态类型的代码补全
- 列出编译错误并跳转到错误位置
- 交互式调试
以下是配置 IDE 以与 sbt 集成的几个配方:
变更记录
sbt 2.0 变更
涉及兼容性的变更
另请参阅 从 sbt 1.x 迁移。
- 元构建中的 Scala 3。sbt 2.x 的 build.sbt DSL 用于构建定义和插件,基于 Scala 3.x(当前为 3.8.4)。(sbt 1.x 和 2.x 均能构建 Scala 2.x 和 3.x)由 @eed3si9n、@adpi2 等贡献。
- 通用设置。裸设置会添加到所有子项目,而不仅仅是根子项目,从而取代
ThisBuild所扮演的角色。 - 增量测试。
test任务已改为可缓存测试结果的增量测试。使用testFull进行完整测试,由 @eed3si9n 在 #7686 中贡献 - 缓存任务。默认情况下所有任务都会被缓存。详见 Caching。
- 依赖树。
dependencyTree任务已统一为一个输入任务,由 @eed3si9n 在 #8199 中贡献 test任务类型已从Unit改为TestResult,由 @eed3si9n 在 #8181 中贡献- 类型为
URL的默认设置和任务键(即apiMappings、apiURL、homepage、organizationHomepage、releaseNotesURL)已改为URI,见 #7927。 licenses键已从Seq[(String, URL)]改为Seq[License],见 #7927。- sbt 2.x 插件以
_sbt2_3后缀发布,由 @eed3si9n 在 #7671 中贡献 - sbt 2.x 添加了
platform设置,使ModuleID的%%运算符可以在 JVM、JS 和 Native 上进行交叉构建,而无需使用插件中为规避此问题而创建的%%%运算符,由 @eed3si9n 在 #6746 中贡献 - 移除了
useCoursier设置,因此无法选择不使用 Coursier,由 @eed3si9n 在 #7712 中贡献 Key.Classpath已改为Seq[Attributed[xsbti.HashedVirtualFileRef]]类型的别名,而非Seq[Attributed[File]]。同样,一些曾返回File的任务键已改为返回HashedVirtualFileRef。详见 Caching Files。- In sbt 2.x
targetdefaults totarget/out/jvm/scala-3.8.4/<subproject>/, as opposed to<subproject>/target/. - sbt 2.x 在
build.sbt变更时默认自动重新加载,由 @eed3si9n 在 #8211 中贡献 - sbt 2.x disables the delegation of scoped tasks in the sbt shell by @eed3si9n in #8539
- sbt 2.x enforces eviction error in
Testconfiguration by @calm329 and @zainab-ali in #8451 + #9102
已移除的弃用项
功能
- 项目矩阵。项目矩阵在 sbt 1.x 中通过插件提供,现已内置以支持并行交叉构建。
- sbt query。sbt 2.x 扩展了统一斜杠语法以支持子项目查询。详见下文。
- 本地/远程缓存系统。详见下文
- 客户端运行。详见下文。
- Client-side console. Details below.
- rootProject and autoAggregate. Details below
- Maven BOM (Bill of Materials) usage. Details below
通用设置
在 sbt 2.x 中,build.sbt 中的裸设置被解释为通用设置,并注入到所有子项目中。这意味着我们现在可以在不使用 ThisBuild 作用域的情况下设置 scalaVersion:
scalaVersion := "3.8.4"
这也修复了所谓的动态分派问题:
lazy val hi = taskKey[String]("")
hi := name.value + "!"
在 sbt 1.x 中,hi 任务会捕获根项目的名称,而在 sbt 2.x 中,它会返回每个子项目的 name 并加上 !:
$ sbt show hi
[info] entering *experimental* thin client - BEEP WHIRR
[info] terminate the server with `shutdown`
> show hi
[info] foo / hi
[info]  foo!
[info] hi
[info]  root!
sbt query
为筛选子项目,sbt 2.x 引入了 sbt query。
$ sbt foo.../test
以上命令运行所有以 foo 开头的子项目。
$ sbt ...@scalaBinaryVersion=3/test
以上命令运行所有 scalaBinaryVersion 为 3 的子项目。由 @eed3si9n 在 #7699 中贡献
增量测试
在 sbt 2.x 中,test 任务已成为接受可筛选要运行的测试套件的参数的输入任务:
> test ...ExampleTest
此外,test 是增量且缓存的。这意味着,除非之前失败或自上次运行以来有所变更,否则测试不会运行。
详见 test。
本地/远程缓存系统
sbt 2.x 默认实现缓存任务,可自动将任务结果缓存到本地磁盘和与 Bazel 兼容的远程缓存。
lazy val task1 = taskKey[String]("doc for task1")

task1 := name.value + version.value + "!"
这会跟踪 task1 的输入并创建机器范围内的磁盘缓存,也可配置为使用远程缓存。由于 sbt 任务通常还会产生文件,我们还提供了缓存文件内容的机制:
lazy val task1 = taskKey[String]("doc for task1")

task1 := {
  val converter = fileConverter.value
  ....
  val output = converter.toVirtualFile(somefile)
  Def.declareOutput(output)
  name.value + version.value + "!"
}
详见 Caching。由 @eed3si9n 在 #7464 / #7525 中贡献
客户端运行
In sbt 2.0, sbt server sends the run task back to sbtn, which will fork a fresh JVM. All you have to do is:
sbt run
这避免了阻塞 sbt server,您可以同时运行多个任务。由 @eed3si9n 在 #8060 中贡献。另请参阅 run 文档。
Client-side console
Similar to the client-side run, sbt server sends console (Scala REPL) back to the sbtn, which forks a fresh JVM to run the REPL. All you have to do is:
sbt console
This avoids blocking the sbt server. This was contributed by @eed3si9n and @calm329 in #8018, #8604, #8677, #8705, #8722.
rootProject and autoAggregate
sbt 2.0 adds rootProject macro:
lazy val root = rootProject
This is a shortcut for (project in file(".")), which tends to be a boilerplate in build.sbt.
lazy val root = rootProject
  .autoAggregate
sbt 2.0 also adds autoAggregate method, which at the loading time expands to local subprojects.
Maven BOM (Bill of Materials) usage
sbt 2.0 adds Maven BOM (Bill of Materials) usage support. Subprojects can depend on published BOM artifacts using .pomOnly():
libraryDependencies += ("com.fasterxml.jackson" % "jackson-bom" % "2.21.0").pomOnly()
These bill of materials are forwarded to Coursier via via Resolve.addBom(), which should introduce version constraints for specific libraries (such as Jackson). You can use "*" to declare versionless dependency:
libraryDependencies += "com.fasterxml.jackson.core" % "jackson-core" % "*"
This will let Coursier automatically fill in the version based on the bill of material constraints (in this case "2.21.0"). Contributed by @bitloi in #8675.
性能改进
Adrien Piquerez 在 Scala Center 期间贡献了一系列性能改进。
- perf:减少长生命周期实例数量,相对于 2.0.0-M2 启动速度提升 20%,由 @adpi2 在 #7866 中贡献
- perf:减少
Setting和Initialize的创建,由 @adpi2 在 #7880 中贡献 - perf:重构
Settings并优化聚合键的索引,由 @adpi2 在 #7879 中贡献 - perf:移除
Info和BasicAttributeMap的实例,由 @adpi2 在 #7882 中贡献
sbt 以往版本
另请参阅:
从 sbt 1.x 迁移
将 build.sbt DSL 改为 Scala 3.x
提醒一下,用户可以使用 sbt 1.x 或 sbt 2.x 构建 Scala 2.x 或 Scala 3.x 程序。但 build.sbt DSL 所基于的 Scala 版本由 sbt 版本决定。在 sbt 2.0 中,我们正在迁移到 Scala 3.8.x。
这意味着如果您为 sbt 2.x 实现自定义任务或 sbt 插件,必须使用 Scala 3.x。有关 Scala 3.x 的详细信息,请参阅 Scala 3.x 不兼容性表 和 Scala 2 with -Xsource:3。
// 此代码在 -Xsource:3 下适用于 Scala 2.12.20
import sbt.{ given, * }
导入 given
Scala 2.x 与 3.x 的区别之一是将类型类实例导入作用域的方式。Scala 2.x 使用 import FooCodec._,而 Scala 3 使用 import FooCodec.given。编写:
// 以下代码在 sbt 1.x 和 2.x 中均适用
import sbt.librarymanagement.LibraryManagementCodec.{ given, * }
避免后缀
sbt 0.13 和 1.x 的示例中常见使用后缀表示法,尤其是 ModuleID:
// BAD
libraryDependencies +=
  "com.github.sbt" % "junit-interface" % "0.13.2" withSources() withJavadoc()
以上代码在 sbt 2.x 中加载失败:
-- Error: /private/tmp/foo/build.sbt:9:61 --------------------------------------
9 |  "com.github.sbt" % "junit-interface" % "0.13.2" withSources() withJavadoc()
  |                                                             ^^
  |can't supply unit value with infix notation because nullary method withSources
   in class ModuleIDExtra: (): sbt.librarymanagement.ModuleID takes no arguments;
   use dotted invocation instead: (...).withSources()
要修复此问题,请使用正常的(点号)函数调用表示法:
// GOOD
libraryDependencies +=
  ("com.github.sbt" % "junit-interface" % "0.13.2").withSources().withJavadoc()
裸设置变更
version := "0.1.0"
scalaVersion := "3.8.4"
如上例所示,Bare settings(裸设置)是直接在 build.sbt 中编写且不带 settings(...) 的设置。
name := "root"         // 所有子项目将命名为 root!
publish / skip := true // 所有子项目将被跳过!
若要将某些设置仅应用于根子项目,可以使用多项目构建定义,或将设置限定在 LocalRootProject 下:
LocalRootProject / name := "root"
LocalRootProject / publish / skip := true
迁移 ThisBuild
在 sbt 2.x 中,裸设置不应再限定到 ThisBuild。新的 common settings(通用设置)相比 ThisBuild 的一个优势是它采用更可预测的委托行为。这些设置插入在插件设置与 settings(...) 中定义的设置之间,这意味着可以用于定义诸如 Compile / scalacOptions 之类的设置,而 ThisBuild 无法做到这一点。
exportJars 的变更
exportJars 默认为 true,之前为 false。这可能会破坏 getResource("/") 和 resource.toURI。如果您的构建中此逻辑被破坏并产生 NullPointerException 和 FileSystemNotFoundException,请设置 exportJars := false。如需保留旧行为,请在构建中设置 exportJars := false。此变更由 sbt/sbt#7464 引入,另请参阅 blog。
迁移到缓存任务
在 sbt 2.x 中,所有任务默认都会被缓存。为参与缓存,任务的结果类型必须提供 sjsonnew.JsonFormat 的 given。任何结果类型缺少 JsonFormat(例如 ParadoxProcessor、ClassLoader、Seq[PathMapping] 等复杂对象或函数类型)的任务将在 sbt 2 的构建加载时失败。
如果不想定义 given,最简单的迁移方式是用 Def.uncached(...) 包装任务,使 sbt 2 跳过缓存并始终重新执行它们:
myTask := Def.uncached {
  // 返回不可序列化类型的任务体
}
在考虑任务缓存时,需注意有副作用的任务。当 sbt 2 从磁盘缓存恢复任务结果时,它会返回缓存值而不重新执行任务体。任何副作用(例如写文件、同步映射)都会被静默跳过。如果任务每次运行都应产生副作用,请用 Def.uncached(...) 包装,使 sbt 2 始终重新执行它。
sbt2-compat 插件在 sbt 1.x 上提供 Def.uncached 作为兼容性 shim(其中它是无操作)。有关详情,包括构建范围和每任务退出选项,请参阅缓存任务参考文档。
从 IntegrationTest 迁移
要从 IntegrationTest 配置迁移,请创建单独的子项目并作为普通测试实现。
迁移到斜杠语法
sbt 1.x 同时支持 sbt 0.13 风格语法和斜杠语法。sbt 2.x 移除了对 sbt 0.13 语法的支持,请在 sbt shell 和 build.sbt 中均使用斜杠语法:
<project-id> / Config / intask / key
例如,test:compile 在 shell 中不再有效。请改用 Test/compile。有关 build.sbt 文件的半自动迁移,请参阅 syntactic Scalafix rule for unified slash syntax。
scalafix --rules=https://gist.githubusercontent.com/eed3si9n/57e83f5330592d968ce49f0d5030d4d5/raw/7f576f16a90e432baa49911c9a66204c354947bb/Sbt0_13BuildSyntax.scala *.sbt project/*.scala
交叉构建 sbt 插件
在 sbt 2.x 中,如果您使用 Scala 3.x 和 2.12.x 交叉构建 sbt 插件,它将自动针对 sbt 1.x 和 sbt 2.x 进行交叉构建:
// 使用 sbt 2.x
lazy val plugin = (projectMatrix in file("plugin"))
  .enablePlugins(SbtPlugin)
  .settings(
    name := "sbt-vimquit",
  )
  .jvmPlatform(scalaVersions = Seq("3.8.4", "2.12.20"))
如果使用 projectMatrix,请确保将插件移至 plugin/ 等子目录。否则,合成根项目也会包含 src/。
使用 sbt 1.x 交叉构建 sbt 插件
如需使用 sbt 1.x 进行交叉构建,请使用 sbt 1.10.2 或更高版本。
// 使用 sbt 1.x
lazy val scala212 = "2.12.20"
lazy val scala3 = "3.8.4"
ThisBuild / crossScalaVersions := Seq(scala212, scala3)

lazy val plugin = (project in file("plugin"))
  .enablePlugins(SbtPlugin)
  .settings(
    name := "sbt-vimquit",
    (pluginCrossBuild / sbtVersion) := {
      scalaBinaryVersion.value match {
        case "2.12" => "1.5.8"
        case _      => "2.0.1"
      }
    },
  )
%% 的变更
在 sbt 2.x 中,ModuleID 的 %% 运算符已具有平台感知能力。对于 JVM 子项目,%% 与之前一样工作,在 Maven 仓库中编码 Scala 后缀(例如 _3)。
迁移 %%% 运算符
当 Scala.JS 或 Scala Native 在 sbt 2.x 中可用时,%% 将同时编码 Scala 版本(如 _3)和平台后缀(如 _sjs1)。因此,%%% 可替换为 %%:
libraryDependencies += "org.scala-js" %% "scalajs-dom" % "2.8.0"
需要 JVM 库时请使用 .platform(Platform.jvm)。
target 的变更
在 sbt 2.x 中,target 目录统一为工作目录中的单个 target/ 目录,每个子项目创建编码平台、Scala 版本和子项目 ID 的子目录。为在脚本化测试中适应此变更,exists、absent 和 delete 现已支持 glob 表达式 ** 以及 ||。
# 之前
$ absent target/out/jvm/scala-3.3.1/clean-managed/src_managed/foo.txt
$ exists target/out/jvm/scala-3.3.1/clean-managed/src_managed/bar.txt

# 之后
$ absent target/**/src_managed/foo.txt
$ exists target/**/src_managed/bar.txt

# 均可
$ exists target/**/proj/src_managed/bar.txt || proj/target/**/src_managed/bar.txt
在 sbt 1.x 中,target.value 解析为项目根 target/ 目录。在 sbt 2.x 中,它改为解析为 target/out/jvm/scala-<ver>/<project-name>。插件在迁移过程中应注意此变更。
迁移 CI 流水线
有一些行为变更可能影响 CI 流水线。
运行一系列命令
现在必须将命令序列作为以分号分隔的带引号字符串提供:
sbt "clean ; compile ; test"
以前,您可以写 sbt clean compile test。现在这会产生错误 "Expected whitespace character"。
具有多个步骤的 sbt server
如果 CI 流水线包含多个运行 sbt 的步骤,后续步骤将复用第一次调用启动的 sbt server,而不是每次启动新的 sbt 进程。因此,这些后续步骤将继续使用传递给第一次会话的环境变量。
如果您的流水线依赖于向每个会话传递不同的环境变量(如 JAVA_OPTS),则必须在作业级别提供所有变量使其对所有 sbt 调用相同,或在每个步骤之后或步骤之间关闭 sbt。
sbt "clean ; compile ; test ; shutdown"
请注意,无论您是直接运行 sbt 还是通过在内部调用 sbt 的第三方操作(如 sbt-dependency-submission),此情况均适用。
测试产物
测试结果等输出产物现在存储在 target/out 下的子目录中,因此您可能需要更新用于测试发布和产物归档的路径:
path: target/out/**/test-reports/*.xml
全局基础目录的变更
在 sbt 2.x 中,全局基础目录遵循目录标准。Windows 上的默认值为 %LOCALAPPDATA%/sbt/2,否则为 $XDG_CONFIG_HOME/sbt/2 或 $HOME/.config/sbt/2。详情请参阅 sbt 参考。
PluginCompat 技术
为使用相同的 *.scala 源但同时面向 sbt 1.x 和 2.x,我们可以创建一个 shim,例如在 src/main/scala-2.12/ 和 src/main/scala-3/ 中创建名为 PluginCompat 的对象。迁移过程中常遇到的 API 已被抽象到 sbt2-compat 插件中,可用于避免手动创建 shim。要在 sbt 插件中使用它,可将其添加到 sbt 插件的 build.sbt:
addSbtPlugin("com.github.sbt" % "sbt2-compat" % "<version>")
然后在共享源中导入并使用转换方法:
import sbtcompat.PluginCompat._

// 在此处使用转换方法
您可以在以下博客文章中了解更多关于 sbt2-compat、PluginCompat 模式及其使用方法:Migrating sbt plugins to sbt 2 with sbt2-compat plugin。
迁移 Classpath 类型
sbt 2.x 将 Classpath 类型更改为 Seq[Attributed[xsbti.HashedVirtualFileRef]] 的别名,而不再是 Seq[Attributed[File]]。任何需要 File 或 Path 进行 I/O(类路径 URL、映射、同步、验证)的插件必须转换这些引用。如上所示添加并导入 sbt2-compat 后,请使用 toNioPaths 和 toFiles,例如:
import sbtcompat.PluginCompat._

myTask := {
  implicit val conv: FileConverter = fileConverter.value
  val paths = toNioPaths((Compile / dependencyClasspath).value)
  val files = toFiles((Compile / dependencyClasspath).value)
  // ...
}
sbt2-compat 还提供 toNioPath、toFile、toFileRefsMapping、Def.uncached 和其他便捷方法,可在共享源中使用。有关插件提供的 API 的最新文档,请参阅 sbt2-compat README。
定义您自己的 PluginCompat shim
对于 sbt2-compat 未覆盖的 sbt 1.x 和 2.x 之间损坏的 API,您可以通过在 src/main/scala-2.12/PluginCompat.scala 和 src/main/scala-3/PluginCompat.scala 下创建单独的源文件来定义自己的 PluginCompat shim。例如:
// src/main/scala-2.12/PluginCompat.scala

package sbtfoo

import sbt._
import Keys._

object PluginCompat {
  def someSharedMethod(): Unit = ...
}
// src/main/scala-3/PluginCompat.scala

package sbtfoo

import sbt._
import Keys._

object PluginCompat {
  def someSharedMethod(): Unit = ...
}
然后在 sbt 插件中使用您自己的 PluginCompat shim:
import sbtfoo.PluginCompat._

myTask := {
  someSharedMethod()
}
此模式与 sbt2-compat 兼容,可与其一起使用以吸收 sbt 1.x 和 2.x 之间的差异。
概念
命令基础
命令(command)是 sbt 的系统级构建块,常用于捕获用户交互或 IDE 交互。

我们可以将每个命令视为 State => State 函数。在 sbt 中,状态表示以下内容:
- 构建结构(
build.sbt等) - 您的磁盘(源代码、JAR 输出等)
因此,命令通常会修改构建结构或磁盘。例如,set 命令可以应用设置来修改构建结构:
> set name := "foo"
act 命令可以将 compile 等任务提升为命令:
> compile
编译会从磁盘读取并写入输出,或在屏幕上显示错误信息。
命令按顺序处理
由于只有一个状态,命令的特点是它们一次执行一个。

此规则有一些例外,但通常命令按顺序运行。一个有用的比喻是,命令类似于咖啡馆收银员接单,会按接收顺序处理。
任务并行运行
如上所述,act 命令将任务转换为命令级别。在此过程中,act 命令会将任务广播到聚合的子项目,并并行运行独立任务。
同样,在会话启动期间运行的 reload 命令将并行初始化设置。

sbt server 的角色
sbt server 是一项服务,可接受来自命令行或名为 Build Server Protocol 的网络 API 的命令。此机制使构建用户和 IDE 能够共享同一 sbt 会话。
交叉构建
交叉构建(cross building)指从同一组源文件构建多个目标。这包括 Scala 交叉构建(针对多个 Scala 发布版本)、平台交叉构建(针对 JVM、Scala.JS 和 Scala Native)以及 Spark 版本等自定义虚拟轴。
使用交叉构建的库
要使用针对多个 Scala 版本构建的库,请将 ModuleID 中的第一个 % 改为 %%。这会告诉 sbt 将 Scala ABI(应用程序二进制接口)后缀附加到依赖名称。例如:
libraryDependencies += "org.typelevel" %% "cats-effect" % "3.5.4"
当当前 Scala 版本为 Scala 3.x 时,以上写法等价于以下:
libraryDependencies += "org.typelevel" % "cats-effect_3" % "3.5.4"
有关设置的更多详情,请参阅 cross building setup。
历史背景
在 Scala 早期(Scala 2.9 之前),Scala 库即使在补丁级别也不保持二进制兼容性,因此每次发布新 Scala 版本时,库都必须针对新版本重新发布。这意味着库用户需要选择与其使用的 Scala 版本兼容的特定版本。
即使在 Scala 2.9.x 之后,Scala 库在次版本级别也不保持二进制兼容性,因此针对 Scala 2.10.x 编译的库与 2.11.x 不兼容。
为解决此问题,sbt 开发了交叉构建机制,使得:
- 同一组源文件可以针对多个 Scala 版本编译
- 定义将 ABI 版本(如
_2.12)附加到 Maven 构件的约定 - 后来此机制扩展以支持 Scala.JS 和其他平台
项目矩阵
sbt 2.x 引入了项目矩阵,使交叉构建可以并行进行。
organization := "com.example"
scalaVersion := "3.8.4"
version      := "0.1.0-SNAPSHOT"

lazy val core = (projectMatrix in file("core"))
  .settings(
    name := "core"
  )
  .jvmPlatform(scalaVersions = Seq("3.8.4", "2.13.18"))
有关设置的更多详情,请参阅 cross building setup。
sbt query
sbt 2.x 扩展了斜杠语法以支持子项目聚合:
act ::= [ query / ] [ config / ] [ in-task / ] ( taskKey | settingKey )
换言之,sbt query 是编写子项目轴的新方式。
子项目引用
子项目引用作为查询来选择子项目:
对于上述构建,我们可以按以下方式在 foo 子项目上运行测试,语法与 sbt 1.x 相同:
foo/test
... 通配符
... 通配符可匹配任意字符,并可与其他字母和数字组合以筛选根聚合列表。例如,我们可以按以下方式在所有以 foo 开头的子项目上运行测试:
foo.../test
sbt query 有意使用 ...(省略号)而非更直观的 *(星号),因为 * 在 shell 中常被用作通配符来匹配现有文件或目录。这需要加引号,而忘记给 */test 加引号会匹配到类似 src/test 的内容。
@scalaBinaryVersion 参数
@scalaBinaryVersion 参数与子项目的 scalaBinaryVersion 设置匹配。
val toolkitV = "0.5.0"
val toolkit = "org.scala-lang" %% "toolkit" % toolkitV

lazy val foo = projectMatrix
  .settings(
    libraryDependencies += toolkit,
  )
  .jvmPlatform(scalaVersions = Seq("3.8.4", "2.13.18"))

lazy val bar = projectMatrix
  .settings(
    libraryDependencies += toolkit,
  )
  .jvmPlatform(scalaVersions = Seq("3.8.4", "2.13.18"))
例如,我们可以按以下方式在所有 3.x 子项目上运行测试:
...@scalaBinaryVersion=3/test
可以从终端按以下方式使用:
$ sbt ...@scalaBinaryVersion=3/test
[info] entering *experimental* thin client - BEEP WHIRR
[info] terminate the server with `shutdown`
> ...@scalaBinaryVersion=3/test
[info] Passed: Total 0, Failed 0, Errors 0, Passed 0
[info] No tests to run for Test / testQuick
[info] compiling 1 Scala source to /tmp/foo/target/out/jvm/scala-3.6.4/foo/test-backend ...
[info] Passed: Total 0, Failed 0, Errors 0, Passed 0
[info] No tests to run for bar / Test / testQuick
example.ExampleSuite:
  + Scala version 0.003s
[info] Passed: Total 1, Failed 0, Errors 0, Passed 1
这使我们能够筛选聚合的子项目,使用 projectMatrix 时子项目可能很多。
缓存
sbt 2.0 引入了混合本地/远程缓存系统,可将任务结果缓存到本地磁盘和与 Bazel 兼容的远程缓存。sbt 历史上已实现多种缓存,如 update 缓存、增量编译等,但 sbt 2.x 的缓存在以下方面具有显著变革:
- 自动。sbt 2.x 缓存通过将自身嵌入任务宏实现自动化,而 sbt 1.x 中插件作者需在任务实现中手动调用缓存函数。
- 机器级。sbt 2.x 的磁盘缓存在机器上的所有构建之间共享。
- 支持远程。在 sbt 2.x 中,缓存存储单独配置,使所有可缓存任务自动支持远程缓存。
缓存的总体目标是随着代码规模的增长,使构建和测试时间的增长趋于平缓,而非像现状那样线性增长。因此,加速比取决于代码规模等因素,但对于当前测试需要 10 分钟以上的构建,实现 5 倍到 20 倍加速是可达到的。
缓存基础
基本思路是将构建过程视为纯函数,接受输入 (A1, A2, A3, ...) 并返回输出 (R1, List(O1, O2, O3, ...))。例如,我们可以接受源文件列表、Scala 版本,最终产生 *.jar 文件。若此假设成立,则对于相同输入,我们可以为所有人记忆输出 JAR。我们关注此技术,是因为使用记忆的输出 JAR 比执行 Scala 编译等实际任务更快。
密闭构建
作为构建即纯函数的心智模型,构建工程师有时使用密闭构建(hermetic build)一词,指在沙漠中、于货运集装箱内进行、无钟表、无网络的构建。若能从该状态产生 JAR 文件,则该 JAR 应可安全地在任意机器间共享。为何提到钟表?因为 JAR 可能包含时间戳,因此每次产生略有不同的 JAR。为避免此问题,密闭构建工具会将时间戳覆盖为固定日期 2010-01-01,无论构建何时进行。
最终捕获临时输入的构建被称为破坏密闭性或非密闭。另一种常见的破坏密闭性的方式是将绝对路径作为输入或输出捕获。有时路径通过宏嵌入 JAR,您可能直到检查字节码才知道。
自动缓存
以下是自动缓存的演示:
val someKey = taskKey[String]("something")

someKey := name.value + version.value + "!"
在 sbt 2.x 中,任务结果将根据 name 和 version 两个设置的值进行缓存。首次运行任务时将在现场执行,但自第二次起将使用磁盘缓存:
sbt:demo> show someKey
[info] demo0.1.0-SNAPSHOT!
[success] elapsed time: 0 s, cache 0%, 1 onsite task
sbt:demo> show someKey
[info] demo0.1.0-SNAPSHOT!
[success] elapsed time: 0 s, cache 100%, 1 disk cache hit
缓存与序列化同样困难
要参与自动缓存,输入键(如 name 和 version)必须为 sjsonnew.HashWriter typeclass 提供 given,返回类型必须为 sjsonnew.JsonFormat 提供 given。Contraband 可用于生成 sjson-new 编解码器。
欠烤与过烤
为描述缓存任务的失败状态,事先约定一些用语会很有帮助。
- 过烤(Overbaking):当缓存任务因输入
(A1, A2, A3, ...)过多而不必要地失效,产生多余工作时,称该任务过烤。 - 欠烤(Underbaking):当缓存任务因输入不足而未能失效,导致结果无效时,称该任务欠烤。在增量编译语境下,称之为 under-compilation(欠编译)。
例如,在缓存任务中混入 @transient 键可能导致欠烤。
缓存文件
缓存文件(如 java.io.File)需要单独考虑,不是因为技术难度,而主要是因为涉及文件时的歧义和假设。当我们说「文件」时,它可能实际指:
- 从已知位置的相对路径
- 物化的实际文件
- 文件的唯一证明或内容哈希
从技术上讲,File 仅表示文件路径,因此我们只能反序列化文件名如 target/a/b.jar。若下游任务假设 target/a/b.jar 存在于文件系统中,这将失败。为清晰起见,也为避免捕获绝对路径,sbt 2.x 为这三种情况提供了三种独立的类型。
xsbti.VirtualFileRef用于表示仅相对路径,相当于传递字符串xsbti.VirtualFile表示带内容的物化文件,可以是虚拟文件或您磁盘上的文件
然而,对于密闭构建而言,两者都不适合表示文件列表。仅文件名无法保证文件相同,而在 JSON 等中携带完整文件内容效率太低。
神秘的第三个选项——文件的唯一证明——在此发挥作用。除相对路径外,HashedVirtualFileRef 还跟踪 SHA-256 内容哈希和文件大小。这可轻松序列化为 JSON,同时我们仍能引用确切文件。
文件的效果
有许多生成文件的任务不以 VirtualFile 为返回类型。例如,compile 返回 Analysis,而 *.class 文件的生成在 sbt 1.x 中作为 side effect(副作用)发生。
要参与缓存,我们需要将这些效果声明为我们关心的事物。
someKey := {
  val conv = fileConverter.value
  val out: java.nio.file.Path = createFile(...)
  val vf: xsbti.VirtualFile = conv.toVirtualFile(out)
  Def.declareOutput(vf)
  vf: xsbti.HashedVirtualFileRef
}
远程缓存
您可以选择性地扩展构建,除本地磁盘缓存外还使用远程缓存。远程缓存允许多台机器共享构建构件和输出,从而提升构建性能。
假设您的项目或公司有十几个人。每天早晨,您会 git pull 这些人所做的更改,并需要构建他们的代码。若项目成功,代码规模会随时间增长,您花在构建他人代码上的时间占比会增加。这成为团队规模和代码规模的限制因素。远程缓存通过 CI 系统填充缓存、您可下载构件和任务输出来扭转这一趋势。
sbt 2.x 实现了与 Bazel 兼容的 gRPC 接口,可与多种开源和商业后端配合使用。详见 Remote cache setup。
参考
另请参阅 Cached task 参考指南。
参考
sbt
有关基础介绍,请参阅入门指南中的基本任务。
概要
sbt
sbt command args
sbt --server
sbt --script-version
描述
sbt 是最初为 Scala 和 Java 创建的简单构建工具。它让我们声明子项目及其各种依赖和自定义任务,以确保始终获得快速、可重复的构建。
sbt runner 和 sbt server
- sbt runner 是名为
sbt的系统 shell 脚本,Windows 上为sbt.bat。它能够运行_任意版本的 sbt_。有时也称为 "sbt-the-shell-script"。- 当检测到 sbt 2.x 时,sbt runner 以客户端模式执行,通常使用 sbtn(瘦客户端程序的 GraalVM 原生实现)。
- sbt runner 还执行 sbt launcher,该启动器能够运行 任意版本的 sbt。
- 当您从安装程序安装 sbt 时,您安装的是 sbt runner。
- sbt server 是 sbt 的主要构件,也是实际的构建工具。
- sbt 版本由每个工作目录中的
project/build.properties确定。 - sbt server 接受来自 sbtn、网络 API 或通过其自身 sbt shell 的命令。
- sbt 版本由每个工作目录中的
sbt.version=2.0.1
此机制允许将构建配置为特定版本的 sbt,项目中的每个人都会使用相同的构建语义,无论其机器上安装的 sbt runner 是什么。
这也意味着某些功能在 sbt runner 或 sbtn 级别实现,而其他功能在 sbt server 级别实现。
sbt 命令
在 sbt 中,有在子项目级别操作的任务(如 compile),以及狭义上的命令(如 set),后者能够操作构建定义本身。
鉴于设置和任务被提升到 act 命令中,我们可以将 所有可输入 sbt shell 的内容 视为广义上的命令。
详见命令 概念页。
子项目级任务
clean删除所有生成的文件(target目录)。publish将构件(如 JAR)发布到由publishTo设置定义的仓库。publishLocal将构件(如 JAR)发布到本地 Ivy 仓库,如发布章节所述。update解析并获取外部依赖。
配置级任务
配置级任务是与配置关联的任务。例如,compile(等价于 Compile/compile)编译主源代码(Compile 配置)。Test/compile 编译测试源代码(Test 配置)。Compile 配置的大多数任务在 Test 配置中都有等效项,可使用 Test/ 前缀运行。
-
compile编译主源代码(在src/main/scala目录中)。Test/compile编译测试源代码(在 src/test/scala/ 目录中)。 -
console使用包含编译源、lib 目录中所有 JAR 和托管库的 classpath 启动 Scala 解释器。返回 sbt 请输入 :quit、Ctrl+D(Unix)或 Ctrl+Z(Windows)。同样,Test/console 使用测试类和 classpath 启动解释器。 -
doc使用 scaladoc 为src/main/scala中的 Scala 源文件生成 API 文档。Test/doc为src/test/scala中的源文件生成 API 文档。 -
package创建包含src/main/resources中文件和从src/main/scala编译的类的 JAR 文件。Test/package创建包含src/test/resources中文件和从src/test/scala编译的类的 JAR。 -
packageDoc创建包含从 src/main/scala 中 Scala 源文件生成的 API 文档的 JAR 文件。Test/packageDoc 创建包含 src/test/scala 中测试源文件 API 文档的 JAR。 -
packageSrc:创建包含所有主源文件和资源的 JAR 文件。打包路径相对于 src/main/scala 和 src/main/resources。同样,Test/packageSrc 对测试源文件和资源进行操作。 -
run <argument>*在与 sbt 相同的虚拟机中运行项目的主类。主类接收提供的参数。 -
runMain <main-class> <argument>*在与 sbt 相同的虚拟机中运行项目指定的主类。主类接收提供的参数。 -
test <test>*运行指定的测试(或未提供参数时运行所有测试),包括:- 尚未运行,或
- 上次运行失败,或
- 自上次成功运行以来有任何传递依赖被重新编译
*在测试名称中解释为通配符。
-
testFull运行测试编译期间检测到的所有测试。
通用命令
shutdown关闭 sbt server 以结束当前 sbt 会话。exit或quit结束当前交互式会话或构建。此外,Ctrl+D(Unix)或 Ctrl+Z(Windows)将退出交互式提示符。help <command>显示指定命令的详细帮助。若命令不存在,help 会列出名称或描述与参数(解释为正则表达式)匹配的命令的详细帮助。若未提供命令,则显示主要命令的简要描述。相关命令包括任务和设置。projects [add|remove <URI>]若无参数则列出所有可用项目,或添加/移除指定 URI 的构建。
-
Watch 命令
~ <command>在源文件变更时执行项目指定的操作或方法。 -
< filename执行给定文件中的命令。每个命令应单独一行。空行和以 '#' 开头的行将被忽略 -
A ; B执行 A,若成功则运行 B。注意前导分号是必需的。 -
eval <Scala-expression>计算给定的 Scala 表达式并返回结果和推断类型。可用于设置系统属性、作为计算器、fork 进程等。例如:> eval System.setProperty("demo", "true") > eval 1+1 > eval "ls -l" !
管理构建定义的命令
-
reload [plugins|return]若未指定参数,则重新加载构建,必要时重新编译任何构建或插件定义。reload plugins 将当前项目改为构建定义项目(在project/中)。这可用于直接操作构建定义。例如,在构建定义项目上运行 clean 将强制更新快照并重新编译构建定义。reload return 切换回主项目。 -
set <setting-expression>计算并应用给定的设置定义。该设置一直有效,直到 sbt 重启、构建重新加载,或被另一个 set 命令覆盖或被 session 命令移除。 -
session <command>管理由set命令定义的会话设置。可持久化在提示符处配置的设置。 -
inspect <setting-key>显示有关设置的信息,如值、描述、定义作用域、依赖、委托链和关联设置。
sbt runner 和 launcher
从系统 shell 启动 sbt runner 时,可指定各种系统属性或 JVM 额外选项以影响其行为。
sbt JVM 选项和系统属性
若在 sbt 启动时定义了 JAVA_OPTS 和/或 SBT_OPTS 环境变量,其内容将作为命令行参数传递给运行 sbt server 的 JVM。
若当前目录存在名为 .jvmopts 的文件,其内容在 sbt 启动时追加到 JAVA_OPTS。同样,若存在 .sbtopts 和/或 /etc/sbt/sbtopts,其内容追加到 SBT_OPTS。JAVA_OPTS 的默认值为 -Dfile.encoding=UTF8。
您也可以直接以 sbt 参数形式指定 JVM 系统属性和命令行选项:任何 -Dkey=val 参数将原样传递给 JVM,任何 -J-Xfoo 将作为 -Xfoo 传递。
另请参阅 sbt --help 获取更多详情。
sbt JVM 堆、permgen 和栈大小
若您发现 permgen 空间不足或工作站内存不足,请像对待任何 Java 应用一样调整 JVM 配置。
例如,常见的内存相关选项集为:
export SBT_OPTS="-Xmx2048M -Xss2M"
sbt
或若您希望仅为此会话指定:
sbt -J-Xmx2048M -J-Xss2M
启动目录
sbt runner 仅是引导程序,实际的 sbt server、Scala 编译器和标准库默认下载到共享目录 $HOME/.sbt/boot/。
要更改此目录位置,请设置 sbt.boot.directory 系统属性。相对路径将相对于当前工作目录解析,若您希望避免在项目间共享启动目录,这会很有用。例如,以下使用将启动目录放在 project/boot/ 的 0.11 之前风格:
sbt -Dsbt.boot.directory=project/boot/
全局基础目录
全局基础目录包含机器范围的设置和插件。它由以下决定:
-Dsbt.boot.directory系统属性$SBT_CONFIG_HOME环境变量。- Windows 上的
%LOCALAPPDATA%/sbt - 非 Windows 上的
$XDG_CONFIG_HOME/sbt $HOME/.config/sbt
然后是名为 2 的子目录,例如 $HOME/.config/sbt/2。
终端编码
您终端使用的字符编码可能与您平台上 Java 的默认编码不同。在这种情况下,您需要指定file.encoding=<encoding> 系统属性,可能类似:
export JAVA_OPTS="-Dfile.encoding=Cp1252"
sbt
HTTP/HTTPS/FTP 代理
在 Unix 上,sbt 会从标准环境变量 http_proxy、https_proxy 和 ftp_proxy 获取 HTTP、HTTPS 或 FTP 代理设置。若您在使用需要认证的代理后面,需在 sbt 启动时传递一些补充标志。详见 JVM networking system properties。
例如:
sbt -Dhttp.proxyUser=username -Dhttp.proxyPassword=mypassword
在 Windows 上,您的脚本应设置代理主机、端口的属性,如适用还包括用户名和密码。例如,对于 HTTP:
sbt -Dhttp.proxyHost=myproxy -Dhttp.proxyPort=8080 -Dhttp.proxyUser=username -Dhttp.proxyPassword=mypassword
将上述命令行中的 http 替换为 https 或 ftp 以配置 HTTPS 或 FTP。
其他系统属性
以下系统属性也可传递给 sbt runner:
-Dsbt.banner=true
显示宣传新功能的欢迎横幅。
-Dsbt.ci=true
默认为 false(除非设置了环境变量 BUILD_NUMBER)。用于持续集成环境。抑制 supershell 和颜色。
-Dsbt.client=true
运行 sbt 客户端。
-Dsbt.color=auto
- 要开启颜色,使用
always或true。 - 要关闭颜色,使用
never或false。 - 若输出是支持颜色的终端(非管道)则使用颜色,使用
auto。
-Dsbt.coursier.home=$HOME/.cache/coursier/v1
Coursier 构件缓存的位置,默认由 Coursier cache resolution logic 定义。您可使用 csrCacheDirectory 命令验证该值。
-Dsbt.genbuildprops=true
若缺失则生成 build.properties。若未设置,则遵从 sbt.skip.version.write。
-Dsbt.override.build.repos=true
若为 true,则忽略构建定义中配置的仓库,改用为 launcher 配置的仓库。
-Dsbt.repository.config=$HOME/.sbt/repositories
包含 launcher 使用的仓库的文件。格式与 sbt launcher 配置文件的 [repositories] 部分相同。此设置通常与将 sbt.override.build.repos 设为 true 配合使用。
sbt update
有关基础介绍,请参阅入门指南中的库依赖基础。
概要
sbt [query / ] update
描述
sbt 使用 Coursier 实现库管理,在其他生态系统中也称为包管理器。库管理的一般思路是,您可以在子项目中指定要使用的外部库,库管理系统将:
- 检查所列仓库中是否存在这些版本
- 查找传递依赖(即库所依赖的库)
- 尝试解决版本冲突(如有)
- 从仓库下载构件(如 JAR 文件)
依赖关系
声明依赖关系看起来像:
libraryDependencies += groupID %% artifactID % revision
或
libraryDependencies += groupID %% artifactID % revision % configuration
此外,可以一起声明多个依赖:
libraryDependencies ++= Seq(
  groupID %% artifactID % revision,
  groupID %% otherID % otherRevision
)
若您使用的依赖是用 sbt 构建的,请将第一个 % 改为 %%:
libraryDependencies += groupID %% artifactID % revision
这将使用与您当前 Scala 版本匹配的依赖 JAR。若解析此类依赖时出错,该依赖可能未为您使用的 Scala 版本发布。详见交叉构建。
versionScheme 与驱逐错误
sbt 允许库作者使用 versionScheme 设置声明版本语义:
// Semantic Versioning applied to 0.x, as well as 1.x, 2.x, etc
versionScheme := Some(VersionScheme.EarlySemVer)
当 Coursier 发现库的多个版本(例如 Cats Effect 2.x 和 Cats Effect 3.0.0-M4)时,通常通过从图中移除较旧版本来解决冲突。此过程俗称驱逐,如「Cats Effect 2.2.0 被驱逐」。
若新版本与 Cats Effect 2.2.0 二进制兼容,则可行。但本例中库作者已声明其 不 二进制兼容,因此该驱逐实际上不安全。不安全的驱逐会导致运行时问题,如 ClassNotFoundException。Coursier 本应解析失败。
lazy val use = project
  .settings(
    name := "use",
    libraryDependencies ++= Seq(
      "org.http4s" %% "http4s-blaze-server" % "0.21.11",
      "org.typelevel" %% "cats-effect" % "3.0.0-M4",
    ),
  )
sbt 在 Coursier 返回候选版本后执行此二次兼容性检查:
[error] stack trace is suppressed; run last use / update for the full output
[error] (use / update) found version conflict(s) in library dependencies; some are suspected to be binary incompatible:
[error]
[error]   * org.typelevel:cats-effect_2.12:3.0.0-M4 (early-semver) is selected over {2.2.0, 2.0.0, 2.0.0, 2.2.0}
[error]       +- use:use_2.12:0.1.0-SNAPSHOT                        (depends on 3.0.0-M4)
[error]       +- org.http4s:http4s-core_2.12:0.21.11                (depends on 2.2.0)
[error]       +- io.chrisdavenport:vault_2.12:2.0.0                 (depends on 2.0.0)
[error]       +- io.chrisdavenport:unique_2.12:2.0.0                (depends on 2.0.0)
[error]       +- co.fs2:fs2-core_2.12:2.4.5                         (depends on 2.2.0)
[error]
[error]
[error] this can be overridden using libraryDependencySchemes or evictionErrorLevel
此机制称为 驱逐错误。
选择退出驱逐错误检查
若库作者已声明兼容性破坏,但您希望忽略严格检查(常用于 scala-xml),可在 project/plugins.sbt 和 build.sbt 中编写:
libraryDependencySchemes += "org.scala-lang.modules" %% "scala-xml" % VersionScheme.Always
要忽略所有驱逐错误:
evictionErrorLevel := Level.Info
解析器
sbt 默认使用标准 Maven Central 仓库。使用以下形式声明额外仓库:
resolvers += name at location
例如:
libraryDependencies ++= Seq(
    "org.apache.derby" % "derby" % "10.4.1.3",
    "org.specs" % "specs" % "1.6.1"
)

resolvers += "Sonatype OSS Snapshots" at "https://oss.sonatype.org/content/repositories/snapshots"
若您将本地 Maven 仓库添加为仓库,sbt 可搜索该仓库:
resolvers += Resolver.mavenLocal
覆盖默认解析器
resolvers 配置额外的内联用户解析器。默认情况下,sbt 将这些解析器与默认仓库(Maven Central 和本地 Ivy 仓库)组合形成 externalResolvers。要更精细控制仓库,直接设置 externalResolvers。若仅需在常规默认之外指定仓库,则配置 resolvers。
例如,在默认仓库之外使用 Sonatype OSS Snapshots 仓库:
resolvers += "Sonatype OSS Snapshots" at "https://oss.sonatype.org/content/repositories/snapshots"
要使用本地仓库但不使用 Maven Central 仓库:
externalResolvers := Resolver.combineDefaultResolvers(resolvers.value.toVector, mavenCentral = false)
覆盖所有构建的解析器
用于获取 sbt、Scala、插件和应用依赖的仓库可全局配置,并声明为覆盖构建或插件定义中配置的解析器。分为两部分:
- 定义 launcher 使用的仓库。
- 指定这些仓库应覆盖构建定义中的仓库。
可通过定义 ~/.sbt/repositories 覆盖 launcher 使用的仓库,该文件必须包含与 Launcher 配置文件格式相同的 [repositories] 部分。例如:
[repositories]
local
my-maven-repo: https://example.org/repo
my-ivy-repo: https://example.org/ivy-repo/, [organization]/[module]/[revision]/[type]s/[artifact](-[classifier]).[ext]
可通过 sbt 启动脚本中的 sbt.repository.config 系统属性指定仓库文件的不同位置。最后一步是将 sbt.override.build.repos 设为 true,以使用这些仓库进行依赖解析和获取。
排除传递依赖
某些情况下需从所有依赖中排除传递依赖。可通过在 excludeDependencies 中设置 ExclusionRules 实现。
excludeDependencies ++= Seq(
  // commons-logging is replaced by jcl-over-slf4j
  ExclusionRule("commons-logging", "commons-logging")
)
要排除依赖的某些传递依赖,使用 excludeAll 或 exclude 方法。当项目将发布 pom 时应使用 exclude 方法。需提供要排除的组织和模块名。例如:
libraryDependencies +=
  ("log4j" % "log4j" % "1.2.15").exclude("javax.jms", "jms")
显式 URL
若您的项目需要仓库中不存在的依赖,可按以下方式指定其 jar 的直接 URL:
libraryDependencies += "slinky" % "slinky" % "2.1" from "https://slinky2.googlecode.com/svn/artifacts/2.1/slinky.jar"
仅当通过配置的仓库无法找到依赖时,才将 URL 用作后备。此外,显式 URL 不包含在发布的元数据(即 pom 或 ivy.xml)中。
禁用传递性
默认情况下,这些声明会传递式获取所有项目依赖。某些情况下,您可能发现项目列出的依赖对其构建并非必需。例如,使用 Felix OSGI 框架的项目仅显式需要其主 jar 来编译和运行。使用 intransitive() 或 notTransitive() 避免获取构件依赖,如下例:
libraryDependencies += ("org.apache.felix" % "org.apache.felix.framework" % "1.8.0").intransitive()
分类器
您可使用 classifier 方法为依赖指定分类器。例如,获取 TestNG 的 jdk15 版本:
libraryDependencies += ("org.testng" % "testng" % "5.7").classifier("jdk15")
对于多个分类器,使用多次 classifier 调用:
libraryDependencies +=
  "org.lwjgl.lwjgl" % "lwjgl-platform" % lwjglVersion classifier "natives-windows" classifier "natives-linux" classifier "natives-osx"
要传递式获取所有依赖的特定分类器,运行 updateClassifiers 任务。默认情况下,这会解析具有 sources 或 javadoc 分类器的所有构件。通过配置 transitiveClassifiers 设置选择要获取的分类器。例如,仅获取源码:
transitiveClassifiers := Seq("sources")
下载源码
下载源码和 API 文档 jar 通常由 IDE 插件处理。这些插件使用 updateClassifiers 和 updateSbtClassifiers 任务,生成引用这些 jar 的 Update-Report。
要让 sbt 在不使用 IDE 插件的情况下下载依赖的源码,在依赖定义中添加 withSources()。对于 API jar,添加 withJavadoc()。例如:
libraryDependencies +=
  ("org.apache.felix" % "org.apache.felix.framework" % "1.8.0").withSources().withJavadoc()
注意此操作不具传递性。为此请使用 update*Classifiers 任务。
sbt dependencyTree
概要
sbt dependencyTree [subcommand] [options]
sbt dependencyTree list [options]
sbt dependencyTree graph [options]
sbt dependencyTree html [options]
sbt dependencyTree html-graph [options]
sbt dependencyTree json [options]
sbt dependencyTree xml [options]
sbt dependencyTree stats [options]
描述
dependencyTree 任务以多种格式显示您项目的依赖图,帮助您可视化和分析传递依赖。由 DependencyTreePlugin 提供,该插件在 sbt 1.4.0 中从 Johannes Rudolph 的 sbt-dependency-graph 内源化而来。该任务在生成输出前会解析依赖,因此必要时可能触发下载。
用法
在 sbt shell 中运行。默认子命令为 tree,输出 ASCII 树形图。
子命令
tree(默认):输出依赖的 ASCII 树形图,显示层级关系。适用于快速概览。list:输出所有依赖的扁平列表,每行一个。适用于脚本或 grep。graph/dot:输出用于可视化的 GraphViz DOT 文件。提供dot别名以保持兼容。html:创建以文本形式渲染依赖图的独立 HTML 页面。html-graph:创建嵌入 GraphViz 图的 HTML 页面(系统需安装 GraphViz)。json:以 JSON 格式输出依赖,便于程序化使用。xml:以 GraphML 格式输出依赖,适用于图分析工具。stats:输出汇总统计,如依赖总数和版本数。help:显示用法帮助(与不带参数运行dependencyTree相同)。
选项
--quiet:抑制控制台输出,将结果作为任务值返回(例如供其他任务使用)。--out <file>:将输出写入指定文件而非 stdout。文件扩展名决定默认子命令:.txt:tree.dot:graph.html:html.json:json.xml:xml
--browse:在默认浏览器中自动打开输出文件(仅对graph或html子命令有效)。
示例
ASCII 树形图(默认)
显示依赖的层级视图,[S] 表示 Scala 库依赖。
> Compile/dependencyTree
[info] default:example_3:0.1.0-SNAPSHOT
[info]   +-org.scala-lang:scala3-library_3:3.3.1 [S]
[info]   +-com.example:library_3:1.0.0
[info]     +-org.typelevel:cats-core_3:2.9.0
[info]     | +-org.typelevel:cats-kernel_3:2.9.0
[info]     |   +-org.scala-lang:scala3-library_3:3.1.3 (evicted by: 3.3.1)
[info]     +-org.typelevel:cats-effect_3:3.4.0
被驱逐的依赖(被较新版本替换的旧版本)显示在括号中。
依赖列表
> Compile/dependencyTree list
org.scala-lang:scala3-library_3:3.3.1
com.example:library_3:1.0.0
org.typelevel:cats-core_3:2.9.0
org.typelevel:cats-kernel_3:2.9.0
org.typelevel:cats-effect_3:3.4.0
GraphViz DOT 文件
生成用于渲染图的 DOT 文件(例如使用 dot 命令)。
> Compile/dependencyTree graph --out dependencies.dot
dependencies.dot 内容:
digraph "dependency-graph" {
    graph[rankdir="LR"; splines=polyline]
    edge [arrowtail="none"]
    "default:example_3:0.1.0-SNAPSHOT" -> "org.scala-lang:scala3-library_3:3.3.1"
    "default:example_3:0.1.0-SNAPSHOT" -> "com.example:library_3:1.0.0"
    "com.example:library_3:1.0.0" -> "org.typelevel:cats-core_3:2.9.0"
    // ... more edges
}
渲染为 PNG:dot -Tpng dependencies.dot -o dependencies.png
HTML 输出
> Compile/dependencyTree html --out deps.html --browse
创建包含文本图的 deps.html 并在浏览器中打开。
嵌入图的 HTML
> Compile/dependencyTree html-graph --browse
需要安装 GraphViz。在 HTML 中嵌入可视化图。
JSON 输出
> Compile/dependencyTree json --out deps.json
示例输出:
{
  "organization": "default",
  "name": "example_3",
  "version": "0.1.0-SNAPSHOT",
  "dependencies": [
    {
      "organization": "org.scala-lang",
      "name": "scala3-library_3",
      "version": "3.3.1",
      "configurations": ["compile"],
      "evicted": false
    },
    // ... more
  ]
}
XML (GraphML) 输出
> Compile/dependencyTree xml --out deps.graphml
适用于导入 yEd 等图可视化工具。
统计
> Compile/dependencyTree stats
Total dependencies: 15
Unique organizations: 5
Versions: 10 distinct
Evictions: 2
配置键
在 build.sbt 中使用以下设置自定义行为:
dependencyTreeIncludeScalaLibrary := true:在输出中包含 Scala 库依赖(默认:false)。dependencyDotNodeColors := false:禁用 DOT 节点标签中的颜色(默认:true)。dependencyDotNodeLabel := (org: String, name: String, version: String) => s"$org:$name:$version":自定义 DOT 节点标签。dependencyDotHeader := """digraph "custom" { rankdir="TB"; }""":设置自定义 DOT 头部。
相关任务
whatDependsOn <module>:显示哪些模块依赖指定模块(例如whatDependsOn org.example:lib:1.0)。dependencyLicenseInfo:显示依赖的许可证信息。
Scopes
在 Compile 和 Test 配置中可用。如需跨配置视图,使用 Global/。
sbt compile
概要
sbt [query / ] compile
sbt [query / ] Test / compile
描述
compile 任务编译选定的子项目及其子项目依赖。自 sbt 2.x 起,编译后的构件会自动缓存。
使用原始 Scala 编译器编译 Scala 代码一直较慢,因此 sbt 的相当一部分开发工作致力于各种加速编译的策略。
降低重启编译器的开销
sbt server 在后台持续运行,使 Scala 编译可在同一 Java 虚拟机(JVM)中执行。保持 JVM 常驻可显著加快编译,因为加载编译器并让即时编译器优化需要较长时间。
增量编译
当源文件 A.scala 被修改时,sbt 会尽力减少因 A.scala 变更而需重新编译的其他源文件。这种跟踪语言结构间依赖并仅重新编译所需源文件的过程称为 增量编译。
(远程)缓存
在 sbt 2.x 中,编译后的构件可在会话和构建间缓存,还可选择使用 Bazel 兼容的远程缓存在不同机器间缓存。详见缓存。
Test / compile
使用配置限定 compile 任务,如 Test / compile 将编译测试源及其源依赖。
编译设置
scalaVersion
用于编译的 Scala 版本。
scalaVersion := "3.8.4"
scalacOptions
Scala 编译器选项。
Compile / scalacOptions += "-Werror"
javacOptions
Java 编译器选项。
Compile / javacOptions ++= List("-Xlint", "-Xlint:-serial")
sbt run
概要
sbt [query / ] run [args]
描述
run 任务提供运行用户程序的方式。
在 sbt 1.x 及更早版本中,run 任务在与 sbt server 相同的 Java 虚拟机(JVM)中运行用户程序。sbt 2.x 实现了 客户端 run:run 任务创建包含程序的沙箱环境,将信息发回 sbtn,由 sbtn 在新的 JVM 中启动用户程序。
动机
客户端 run 有若干动机。
- sys.exit 支持。用户代码可调用
sys.exit,通常会关闭 JVM。在 sbt 1.x 中,我们需使用 JDK SecurityManager 拦截这些sys.exit调用,以防run关闭 sbt 会话;但 JDK 17 弃用 SecurityManager 后,TrapExit 在 sbt 1.6.0(2021)中被移除。由于客户端 run 在独立 JVM 中运行用户程序,因此可调用sys.exit。 - 隔离。用户代码也可启动线程或分配其他资源,这些可能在 main 方法返回后继续运行。在独立 JVM 中运行用户代码可在 sbt server 与用户代码之间提供隔离。
- sbt server 可用性。由于程序在 sbt server 外运行,sbt server 可更及时响应其他客户端的请求,例如测试或 IDE 集成。
sbt test
概要
sbt [query / ] test [testname1 testname2] [ -- options ]
描述
test 任务提供编译和运行测试的方式。
默认情况下,sbt 2.x 中的 test 任务:
- 子项目并行。并行编译由 query 指定的相关子项目。
- 测试套件并行。将发现的测试套件映射为任务并并行执行。
- 增量测试。仅运行上次失败、从未运行,或 sbt 检测到测试或其依赖有变更的测试。
- 缓存。测试结果在机器范围内缓存,并可选择远程缓存。
测试的标准源位置为:
src/test/scala/中的 Scala 源src/test/java/中的 Java 源src/test/resources/中用于测试 classpath 的资源
测试中可通过 java.lang.Class 或 java.lang.ClassLoader 的 getResource 方法访问资源。
测试接口
sbt 为基于 JVM 的测试框架定义了通用接口,支持自动发现测试套件和并行执行。默认情况下 sbt 与 MUnit、ScalaTest、Hedgehog、ScalaCheck、Specs2、Weaver、ZIO Test 和 JUnit 4 集成;这意味着您只需将测试框架添加到 classpath 即可与 sbt 配合使用。例如,可通过将其声明为 libraryDependency 使用 MUnit:
lazy val munit = "org.scalameta" %% "munit" % "1.2.0"

libraryDependencies += munit % Test
上述中,Test 表示 Test 配置,意味着 MUnit 仅出现在测试 classpath 中,主源不需要它。
JUnit
JUnit 5 支持由 sbt-jupiter-interface 提供。要为项目添加 JUnit Jupiter 支持,请在项目主 build.sbt 文件中添加 jupiter-interface 依赖。
libraryDependencies += "com.github.sbt.junit" % "jupiter-interface" % "0.15.1" % Test
并将 sbt-jupiter-interface 插件添加到 project/plugins.sbt:
addSbtPlugin("com.github.sbt.junit" % "sbt-jupiter-interface" % "0.15.1")
JUnit 4 支持由 junit-interface 提供。请在项目主 build.sbt 文件中添加 junit-interface 依赖。
libraryDependencies += "com.github.sbt" % "junit-interface" % "0.13.3" % Test
测试过滤
在 sbt 2.x 中,test 任务接受以空格分隔的测试名称列表。例如:
> test example.ExampleSuite example.ExampleSuite2
示例输出:
> test example.ExampleSuite example.ExampleSuite2
[info] compiling 1 Scala source to /tmp/foo/target/out/jvm/scala-3.7.2/foo/backend ...
[info] compiling 2 Scala sources to /tmp/foo/target/out/jvm/scala-3.7.2/foo/test-backend ...
example.ExampleSuite:
  + addition 0.003s
example.ExampleSuite2:
  + subtraction 0.003s
[info] Passed: Total 2, Failed 0, Errors 0, Passed 2
[success] elapsed time: 3 s, cache 49%, 25 disk cache hits, 26 onsite tasks
也支持通配符:
> test *Example*
增量测试
除显式过滤外,test 任务仅运行满足以下条件之一的测试:
- 上次运行失败的测试
- 之前未运行过的测试
- 有一个或多个传递依赖(可能在不同项目中)被重新编译的测试。
完整测试
要运行未缓存的完整测试(如 sbt 1.x),请使用 testFull 任务。
其他任务
主源可用的任务通常也可用于测试源,但在命令行中需加 Test / 前缀,在 Scala 代码中也以 Test / 引用。这些任务包括:
Test / compileTest / consoleTest / consoleQuickTest / runTest / runMain
详见 sbt run 了解这些任务。
输出
默认情况下,每个测试源文件的日志会缓冲到该文件所有测试完成。可通过设置 logBuffered 禁用:
Test / logBuffered := false
测试报告
默认情况下,sbt 会为构建中所有测试生成 JUnit XML 测试报告,位于项目的 target/test-reports 目录。可通过禁用 JUnitXmlReportPlugin 来禁用此功能。
val myProject = (project in file(".")).disablePlugins(plugins.JUnitXmlReportPlugin)
选项
测试框架参数
测试框架参数可在命令行中通过 -- 分隔符传递给 test 任务。例如:
> test org.example.MyTest -- -verbosity 1
要在构建中指定测试框架参数,添加由 Tests.Argument 构造的选项:
Test / testOptions += Tests.Argument("-verbosity", "1")
要仅为特定测试框架指定:
Test / testOptions += Tests.Argument(TestFrameworks.ScalaCheck, "-verbosity", "1")
设置与清理
使用 Tests.Setup 和 Tests.Cleanup 指定设置和清理操作。它们接受 () => Unit 类型或 ClassLoader => Unit 类型的函数。接受 ClassLoader 的变体会接收用于运行测试的(或曾用于运行测试的)类加载器,可访问测试类和测试框架类。
示例:
Test / testOptions += Tests.Setup( () => println("Setup") )
Test / testOptions += Tests.Cleanup( () => println("Cleanup") )
Test / testOptions += Tests.Setup( loader => ... )
Test / testOptions += Tests.Cleanup( loader => ... )
禁用测试套件并行执行
默认情况下,sbt 在与自身相同的 JVM 中并行运行所有任务。由于每个测试套件映射为一个任务,测试默认也并行运行。要使给定项目内的测试串行执行:
Test / parallelExecution := false
注意,不同项目的测试仍可能并发执行。
过滤类
若您只想运行名称以 "Test" 结尾的测试类,使用 Tests.Filter:
Test / testOptions := Seq(Tests.Filter(s => s.endsWith("Test")))
Fork 测试
该设置:
Test / fork := true
指定所有测试将在单个外部 JVM 中执行。
可通过 testGrouping 键更精细控制测试如何分配到 JVM 以及传递哪些选项。
通过设置 Tags.ForkedTestGroup 标签的限制可控制同时运行的 fork JVM 数量,默认为 1。当组被 fork 时,无法为 Setup 和 Cleanup 操作提供实际测试类加载器。
sbt inspect
概要
sbt inspect [subproject / ] [ config / ] task
sbt inspect actual [subproject / ] [ config / ] task
sbt inspect tree [subproject / ] [ config / ] task
描述
inspect 命令提供检查任务和设置图的方式。例如,可用于确定应修改哪个设置以影响其他任务。
值、描述和提供来源
inspect 提供的第一条信息是任务的类型或设置的值和类型。
例如:
$ sbt inspect libraryDependencies
[info] Setting: interface scala.collection.immutable.Seq =
  List(org.scala-lang:scala3-library:3.7.2,
       org.typelevel:toolkit:0.1.29,
       org.typelevel:toolkit-test:0.1.29:test)
[info] Description:
[info]  Declares managed dependencies.
[info] Provided by:
[info]  ProjectRef(uri("file:/tmp/aaa/"), "aaa") / libraryDependencies
....
输出的下一部分标为 "Provided by"。显示定义该设置的实际作用域。
这表明 libraryDependencies 已在当前项目(ProjectRef(uri("file:/tmp/aaa/"), "aaa"))上定义。
相关设置
inspect 输出的 Related 部分列出键的所有定义。例如:
> inspect compile
...
[info] Related:
[info]  Test / compile
这表明除请求的 Compile / compile 任务外,还有 Test / compile 任务。
设置依赖关系
正向依赖显示用于定义设置(或任务)的其他设置(或任务)。反向依赖则相反,显示哪些使用了给定设置。inspect 根据指定依赖或有效依赖提供此信息。指定依赖是设置直接指定的;有效设置是这些依赖解析后的结果。以下各节将更详细地说明这一区别。
指定设置依赖
例如,我们来看 console:
$ sbt inspect console
...
[info] Dependencies:
[info]  Compile / console / initialCommands
[info]  Compile / console / compilers
[info]  Compile / state
[info]  Compile / console / cleanupCommands
[info]  Compile / console / taskTemporaryDirectory
[info]  Compile / console / scalaInstance
[info]  Compile / console / scalacOptions
[info]  Compile / console / fullClasspath
[info]  Compile / fileConverter
[info]  Compile / console / streams

...
这显示 console 任务的输入。可见其 classpath 和选项来自 Compile / console / fullClasspath 和 Compile / console / scalacOptions。inspect 命令提供的信息有助于找到要修改的正确设置。键的约定(如 console 和 fullClasspath)是:Scala 标识符为驼峰式,字符串表示为小写并用连字符分隔。配置的 Scala 标识符为大写,以区别于 compile 和 test 等任务。例如,从前例可推断如何在 Scala 解释器启动时添加要运行的代码:
> set Compile / console / initialCommands := "import mypackage._"
> console
...
import mypackage._
...
inspect 显示 console 使用设置 Compile / console / initialCommands。将 initialCommands 字符串转换为 Scala 标识符即得 initialCommands。compile 表示用于主源。console / 表示该设置专用于 console。因此,我们可在 console 任务上设置初始命令而不影响 consoleQuick 任务。
有效设置依赖
inspect actual <scoped-key> 显示实际使用的依赖。这很有用,因为委托意味着依赖可能来自请求作用域之外。使用 inspect actual 可准确看到哪个作用域为设置提供值。将 inspect actual 与普通 inspect 结合,可看到影响设置的作用域范围。回到「指定设置依赖」中的示例:
$ sbt inspect actual console
...
[info] Dependencies:
[info]  Compile / console / streams
[info]  Global / taskTemporaryDirectory
[info]  scalaInstance
[info]  Compile / scalacOptions
[info]  Global / initialCommands
[info]  Global / cleanupCommands
[info]  Compile / fullClasspath
[info]  console / compilers
...
对于 initialCommands,可见其来自全局作用域(Global)。结合 inspect console 的相关输出:
Compile / console / initialCommands
可知可将 initialCommands 设置为与全局作用域一样通用、与当前项目的 console 任务作用域一样具体,或介于两者之间。这意味着例如可为整个项目设置 initialCommands,将影响 console:
> set initialCommands := "import mypackage._"
...
在此设置的原因可能是其他 console 任务现在会使用该值。通过查看 inspect actual 的反向依赖输出,可看到哪些使用了我们的新设置:
$ sbt inspect actual Global/initialCommands
...
[info] Reverse dependencies:
[info]  Compile / console
[info]  consoleProject
[info]  Test / console
[info]  Test / consoleQuick
[info]  Compile / consoleQuick
...
现在可知,通过在整个项目上设置 initialCommands,会影响该项目所有配置中的全部 console 任务。若不想让初始命令应用于 consoleProject(其无法使用我们项目的 classpath),可使用更具体的任务轴:
> set console / initialCommands := "import mypackage._"
> set consoleQuick / initialCommands := "import mypackage._"`
或配置轴:
> set Compile/ initialCommands := "import mypackage._"
> set Test / initialCommands := "import mypackage._"
下一部分描述 Delegates 部分,显示作用域的委托链。
委托
设置有键和作用域。若作用域 A 未定义键的值,对该键的请求可能委托给另一作用域。委托链是明确定义的,在 inspect 命令的 Delegates 部分显示。Delegates 部分显示当请求的键未定义值时搜索作用域的顺序。
例如,再次考虑 console 的初始命令:
$ sbt inspect console/initialCommands
...
[info] Delegates:
[info]  console / initialCommands
[info]  initialCommands
[info]  ThisBuild / console / initialCommands
[info]  ThisBuild / initialCommands
[info]  Zero / console / initialCommands
[info]  Global / initialCommands
...
这意味着若没有专门针对 console/initialCommands 的值,将按顺序搜索 Delegates 下列出的作用域,直到找到已定义的值。
Inspect tree
除显示上一节所述的直接正向和反向依赖外,inspect tree 命令还可显示任务或设置的完整依赖树。例如:
$ sbt inspect tree console
[info] Compile / console = Task[void]
[info]   +-Global / cleanupCommands =
[info]   +-console / compilers = Task[class xsbti.compile.Compilers]
[info]   +-Compile / fullClasspath = Task[Seq[class sbt.internal.util.Attributed]]
[info]   +-Global / initialCommands =
[info]   +-scalaInstance = Task[class sbt.internal.inc.ScalaInstance]
[info]   +-Compile / scalacOptions = Task[Seq[class java.lang.String]]
[info]   +-Compile / console / streams = Task[interface sbt.std.TaskStreams]
[info]   | +-Global / streamsManager = Task[interface sbt.std.Streams]
[info]   |
[info]   +-Global / taskTemporaryDirectory = target/....
[info]   +-Global / fileConverter = sbt.internal.inc.MappedFileConverter@10095d95
[info]   +-Global / state = Task[class sbt.State]
[info]
[success] elapsed: 0 s
对于每个任务,inspect tree 显示该任务生成值的类型。对于设置,显示其 toString。
sbt publish
概要
sbt [query / ] publish
sbt [query / ] publishSigned
sbt [query / ] publishLocal
sbt [query / ] publishM2
描述
publish 系列任务提供编译和发布您项目的方式。此处的 发布 包括将描述符(如 Maven POM 或 ivy.xml)和构件(如 JAR 或 war 文件)上传到仓库,以便其他项目可将您的项目指定为依赖。
publish任务将您的项目发布到远程仓库,如 JFrog Artifactory 或 Sonatype Nexus 实例。publishSigned任务通过 sbt-pgp 插件 启用,用于发布 GPG 签名的构件。publishLocal任务将您的项目发布到 Ivy 本地文件仓库,通常位于$HOME/.ivy2/local/。然后您可在同一机器上的其他项目中使用此项目。publishM2任务将您的项目发布到本地 Maven 仓库。
有专门的配方说明如何发布到 Central 仓库。
跳过发布
要避免发布项目,在要跳过的子项目中添加以下设置:
publish / skip := true
常见用途是阻止根项目的发布。
定义仓库
要指定仓库,将仓库赋给 publishTo,并可选择设置发布风格。例如,上传到 Nexus:
publishTo := Some("Sonatype Snapshots Nexus" at "https://oss.sonatype.org/content/repositories/snapshots")
要发布到本地 Maven 仓库:
publishTo := Some(MavenCache("local-maven", file("path/to/maven-repo/releases")))
要发布到本地 Ivy 仓库:
publishTo := Some(Resolver.file("local-ivy", file("path/to/ivy-repo/releases")))
若您要发布到 Central 仓库,还需根据构件选择正确的仓库:SNAPSHOT 版本发布到 central-snapshots 仓库,其他版本发布到本地 staging 仓库。可使用 version 设置的值进行此选择:
publishTo := {
  val centralSnapshots = "https://central.sonatype.com/repository/maven-snapshots/"
  if version.value.endsWith("-SNAPSHOT") then Some("central-snapshots" at centralSnapshots)
  else localStaging.value
}
本地发布
publishLocal 任务将发布到 "local" Ivy 仓库。默认位于 $HOME/.ivy2/local/。同一机器上的其他构建可将该项目列为依赖。例如,若您发布的项目具有如下配置参数:
organization := "com.example"
version := "0.1-SNAPSHOT"
name := "hello"
则同一机器上的另一构建可依赖它:
libraryDependencies += "com.example" %% "hello" % "0.1-SNAPSHOT"
您选择的版本号必须以 SNAPSHOT 结尾,或每次发布时更改版本号以表明其为可变构件。
与 publishLocal 类似,publishM2 任务将发布到用户的 Maven 本地仓库。默认位于 $HOME/.m2/settings.xml 指定的位置或 $HOME/.m2/repository/。另一构建需使用 Resolver.mavenLocal 从中解析:
resolvers += Resolver.mavenLocal
凭据
有两种方式可为此类仓库指定凭据。
第一种且更好的方式是从文件加载,例如:
credentials += Credentials(Path.userHome / ".sbt" / ".credentials")
凭据文件是包含 realm、host、user 和 password 键的属性文件。例如:
realm=Sonatype Nexus Repository Manager
host=my.artifact.repo.net
user=admin
password=admin123
第二种方式是内联指定:
credentials += Credentials("Sonatype Nexus Repository Manager", "my.artifact.repo.net", "admin", "admin123")
凭据匹配使用 realm 和 host 两个键。
realm 键是 HTTP WWW-Authenticate 头的 realm 指令,
是 HTTP 服务器对 HTTP Basic Authentication 响应的一部分。
对于给定仓库,可通过读取收到的所有头来找到。
例如:
curl -D - my.artifact.repo.net
交叉发布
要支持多个不兼容的 Scala 版本,请使用 projectMatrix 和 publish(参见 Cross building setup)。
覆盖发布约定
默认情况下,sbt 会使用您正在使用的 Scala 二进制版本发布构件。例如,若项目使用 Scala 2.13.x,示例构件将发布为 example_2.13。这通常是您想要的,但若发布纯 Java 构件或编译器插件,您需要更改 CrossVersion。详见 Cross building setup 页面的 Publishing convention 部分。
已发布构件
默认发布主二进制 JAR、源码 JAR 和 API 文档 JAR。您可声明要发布的其他类型构件,并禁用或修改默认构件。详见 Artifact 页面。
版本方案
versionScheme 设置跟踪构建的版本方案:
versionScheme := Some("early-semver")
支持的值有 "early-semver"、"pvp"、"semver-spec" 和 "strict"。sbt 会将此信息作为属性包含到 pom.xml 和 ivy.xml 中。
Some("early-semver"):早期语义化版本,在 0.Y.z 内保持补丁更新间的二进制兼容(如 0.13.0 与 0.13.2)。达到 1.0.0 后遵循常规语义化版本,1.1.0 与 1.0.0 二进制兼容。Some("semver-spec"):语义化版本,所有 0.y.z 视为初始开发(无二进制兼容保证)。Some("pvp"):Haskell 包版本策略,X.Y 视为主版本。Some("strict"):要求版本完全匹配。
此信息将标注到 pom.xml 文件中,便于下游项目判断版本冲突是否可安全解析。参见 Preventing version conflicts with versionScheme (2021)。
修改生成的 POM
当 publishMavenStyle 为 true 时,POM 由 makePom 操作生成并发布到仓库而非 Ivy 文件。可通过修改若干设置来更改此 POM 文件。设置 pomExtra 提供 XML(scala.xml.NodeSeq)以直接插入生成的 pom。例如:
pomExtra := <something></something>
还有 pomPostProcess 设置可用于在写入前操作最终 XML。其类型为 Node => Node。
pomPostProcess := { (node: Node) =>
  ....
}
makePom 将您声明的所有 Maven 风格仓库添加到 POM。可通过修改 pomRepositoryFilter 过滤这些仓库,默认排除本地仓库。若要仅包含本地仓库:
pomIncludeRepository := { (repo: MavenRepository) =>
  repo.root.startsWith("file:")
}
Watch 命令
概要
sbt ~ command1
sbt ~ command1 [ ; command2 ; ... ]
描述
Watch 命令以 ~(波浪号)表示,可监控特定任务的输入文件,并在这些文件发生变更时重复执行任务。
以下描述了一些示例用法:
编译
常见用途是持续编译。以下命令将分别让 sbt 监控 Test 和 Compile(默认)配置中的源变更,并重新运行 compile 命令。
> ~ Test / compile

> ~ compile
注意,由于 Test / compile 依赖 Compile / compile,主源目录中的源变更将触发测试源的重新编译。
测试
触发式执行常用于测试驱动开发(TDD)风格。以下命令将监控构建的主源和测试源变更,并仅重新运行引用自上次测试运行以来已重新编译的类的测试。
> ~ test
若某测试的依赖已变更,也可仅重新运行该测试。
> ~ test foo.BarTest
可配置为在检测到源变更时始终重新运行某测试,无论该测试是否依赖任何已更新的源文件。
> ~ testOnly foo.BarTest
要在任何源变更时运行项目中所有测试,请使用
> ~ testFull
运行多个命令
Watch 命令支持监控多个以分号分隔的任务。例如,以下命令将监控源文件变更并运行 clean 和 test:
> ~ clean; test
构建源
若通过设置 Global / onChangedBuildSource := ReloadOnSourceChanges 将构建配置为在构建源变更时自动重新加载,则 sbt 将监控构建源(即 project 目录中的 *.sbt 和 *.{java,scala} 文件)。检测到构建源变更时,构建将重新加载,重新加载完成后 sbt 将重新进入触发式执行模式。
清屏
sbt 可在评估任务前或触发事件后清空控制台屏幕。要配置 sbt 在事件触发后清屏,请添加
ThisBuild / watchTriggeredMessage := Watch.clearScreenOnTrigger
到构建设置中。要在运行任务前清屏,请添加
ThisBuild / watchBeforeCommand := Watch.clearScreen
到构建设置中。
配置
触发式执行的行为可通过若干设置进行配置。
-
watchTriggers: Seq[Glob]为应触发任务评估但任务不直接依赖的文件添加搜索查询。例如,若项目 build.sbt 包含foo / watchTriggers += baseDirectory.value.toGlob / "*.txt",则对以txt扩展名结尾的文件的任何修改都会在触发式执行模式下触发foo命令。 -
watchTriggeredMessage: (Int, Path, Seq[String]) => Option[String]设置文件修改触发新构建时显示的消息。其输入参数为当前 watch 迭代次数、触发构建的文件以及将要运行的命令。默认打印指示哪个文件触发构建以及将运行哪些命令的消息。函数返回None时不打印消息。要在打印消息前清屏,在任务定义中添加Watch.clearScreen()即可。这将确保先清屏,再打印(若有定义的)消息。 -
watchInputOptions: Seq[Watch.InputOption]允许构建覆盖默认 watch 选项。例如,要添加通过按 'l' 键重新加载构建的能力,在build.sbt中添加ThisBuild / watchInputOptions += Watch.InputOption('l', "reload", Watch.Reload)。使用默认watchStartMessage时,这也会将该选项添加到 '?' 选项显示的列表中。 -
watchBeforeCommand: () => Unit提供在评估任务前运行的回调。可通过在项目 build.sbt 中添加ThisBuild / watchBeforeCommand := Watch.clearScreen来清空控制台屏幕。默认为空操作。 -
watchLogLevel设置文件监控系统的日志级别。当源文件被修改时触发式执行未评估,或因对不应监控的文件的修改而意外触发时,此设置很有用。 -
watchInputParser: Parser[Watch.Action]更改监控器处理输入事件的方式。例如,设置watchInputParser := 'l' ^^^ Watch.Reload | '\r' ^^^ new Watch.Run("")将使按 'l' 键重新加载构建,按换行键返回 shell。默认从watchInputOptions自动派生。 -
watchStartMessage: (Int, ProjectRef, Seq[String]) => Option[String]设置 watch 进程等待文件或输入事件时打印的横幅。输入为迭代次数、当前项目和要运行的命令。默认消息包含终止 watch 或显示所有可用选项的说明。仅当watchOnIteration记录watchStartMessage结果时才显示此横幅。 -
watchOnIteration: (Int, ProjectRef, Seq[String]) => Watch.Action在等待源或输入事件前评估的函数。例如,若达到一定迭代次数,可用于提前终止 watch。默认仅记录watchStartMessage的结果。 -
watchForceTriggerOnAnyChange: Boolean配置源文件内容是否必须变更才能触发构建。默认值为 false。 -
watchPersistFileStamps: Boolean切换 sbt 是否在多次任务评估运行间持久化为源文件计算的文件哈希。这可提高具有大量源文件的项目的性能。由于文件哈希被缓存,若多个源文件被并发修改,评估的任务可能读取到无效哈希。默认值为 false。 -
watchAntiEntropy: FiniteDuration控制同一文件在先前触发构建后,必须经过多长时间才能再次触发构建。用于防止文件在短时间内多次修改时产生虚假构建。默认值为 500ms。
缓存任务
本页介绍缓存任务的细节。有关一般说明,请参阅缓存。
自动缓存
val someKey = taskKey[String]("something")

someKey := name.value + version.value + "!"
在 sbt 2.x 中,任务结果将根据 name 和 version 两个设置自动缓存。首次运行任务时将在现场执行,第二次起将使用磁盘缓存:
sbt:demo> show someKey
[info] demo0.1.0-SNAPSHOT!
[success] elapsed time: 0 s, cache 0%, 1 onsite task
sbt:demo> show someKey
[info] demo0.1.0-SNAPSHOT!
[success] elapsed time: 0 s, cache 100%, 1 disk cache hit
缓存与序列化同样困难
要参与自动缓存,输入键(如 name 和 version)必须为 sjsonnew.HashWriter typeclass 提供 given 实例,返回类型必须为 sjsonnew.JsonFormat 提供 given 实例。
[error] -- Error: /Users/xxx/caching/project/FooPlugin.scala:17:4 -
[error]  17 |    foo := {
[error]     |    ^
[error]     |given evidence sjsonnew.JsonFormat[sbt.HashedVirtualFileRef] is not found; opt out of caching by annotating the key with @transient, or as foo := Def.uncached(...), or provide a given value
[error]     |
[error]  18 |      val b = baseDirectory.value
部分内置类型(如 HashedVirtualFileRef)的编解码器可通过 CacheImplicits.given 提供:
import CacheImplicits.given

....

  override lazy val projectSettings: Seq[Setting[?]] = Seq(
    foo := {
      val b = baseDirectory.value
      val conv = fileConverter.value
      conv.toVirtualFile((b / "build.sbt").toPath)
    },
    bar := foo.value,
  )
Contraband 可用于生成 sjson-new 编解码器。
效果跟踪
文件创建的效果
要缓存文件创建的效果(而不仅是返回文件名),需使用 Def.declareOutput(vf) 跟踪文件创建的效果。
someKey := {
  val conv = fileConverter.value
  val out: java.nio.file.Path = createFile(...)
  val vf: xsbti.VirtualFile = conv.toVirtualFile(out)
  Def.declareOutput(vf)
  vf: xsbti.HashedVirtualFileRef
}
系统属性的影响
在缓存任务中捕获系统属性或环境变量会破坏缓存稳定性。考虑以下缓存任务:
lazy val someInt = taskKey[Int]("")

// BAD
someInt := {
  sys.props("release").toInt + 1
}
首先假设我们使用 -Drelease=0 运行:
$ sbt --server -Drelease=0
....
sbt:caching> show someInt
[info] 1
[success] elapsed time: 0 s, cache 0%, 1 onsite task
然而,即使我们使用 -Drelease=1 运行,数值也不会改变:
$ sbt --server -Drelease=1
....
sbt:caching> show someInt
[info] 1
[success] elapsed time: 0 s, cache 100%, 1 disk cache hit
这是因为在使用缓存键时,someInt 只考察任务定义的形态以及输入设置与任务。要正确缓存 someInt,请将系统属性包装为设置,如下所示:
lazy val someInt = taskKey[Int]("")
lazy val releaseVer = settingKey[Int]("")

releaseVer := sys.props("release").toInt
someInt := releaseVer.value + 1
这将在每次加载构建时重新求值系统属性:
$ sbt --server -Drelease=1
sbt:caching> show someInt
[info] 2
[success] elapsed time: 0 s, cache 0%, 1 onsite tas
选择退出缓存
按任务键退出
若您希望某些任务键退出缓存,可按以下方式设置缓存级别:
@transient
val someKey = taskKey[String]("something")
或
@cacheLevel(include = Array.empty)
val someKey = taskKey[String]("something")
按任务退出
要单独退出缓存,请按以下方式使用 Def.uncached(...):
val someKey = taskKey[String]("something")

someKey := Def.uncached {
  name.value + somethingUncachable.value + "!"
}
构建级退出
要选择退出默认的自定义任务缓存,请在 project/plugins.sbt 中添加以下内容:
Compile / scalacOptions += "-Xmacro-settings:sbt:no-default-task-cache"
执行日志
要调试缓存相关问题,sbt 内置了执行日志功能。可将 sbt.experimental_execution_log 系统属性设为 true 或文件路径以启用执行日志:
$ sbt --server -Dsbt.experimental_execution_log=true compile
设为 true 时,将在 target/global-logging 下生成执行日志:
{
  "input": {
    "digest": "sha256-a50da1cd086987bc273861a815da4e90ba4735d4a21b965e861e583382a985d6/48",
    "codeContentHash": "murmur3-0000000000000000ffffffffce70de5a/0",
    "extraHash": "murmur3-00000000000000000000000000000000/0",
    "str": "(CompileInputs2(Vector(
${CSR_CACHE}/https/repo1.maven.org/maven2/org/scala-lang/scala3-library_3/3.7.4/scala3-library_3-3.7.4.jar, ...))))"
  },
  "cacheHit": true,
  "exitCode": 0,
  "outputs": [
    "${OUT}/value/sha256-a50da1cd086987bc273861a815da4e90ba4735d4a21b965e861e583382a985d6/48.json>
    sha256-f222bfd59f319bb6a2d4d58003b2131c0c42a10cdb4da9df971480ca8d044f7b/179",
  ]
}
由于 JSON 格式可能变更,此功能仍处于实验性标志之下。
远程缓存
sbt 2.x 实现了与 Bazel 兼容的 gRPC 接口,可与多种开源和商业后端配合使用。详见 远程缓存设置。
交叉构建设置
本页介绍交叉构建设置。有关一般说明,请参阅 交叉构建。
使用交叉构建的库
要使用针对多个 Scala 版本构建的库,请将 ModuleID 中的第一个 % 改为 %%。这告诉 sbt 应将用于构建库的当前 Scala 版本追加到依赖名称。例如:
libraryDependencies += "org.typelevel" %% "cats-effect" % "3.5.4"
对于固定 Scala 版本,几乎等效的手动替代方式为:
libraryDependencies += "org.typelevel" % "cats-effect_3" % "3.5.4"
Scala 3 专用交叉版本
若您在 Scala 3 中开发应用,可使用 Scala 2.13 库:
("a" % "b" % "1.0").cross(CrossVersion.for3Use2_13)
这与使用 %% 等效,但当 scalaVersion 为 3.x.y 时解析库的 _2.13 变体。
反之,当 scalaVersion 为 2.13.x 时,可使用 CrossVersion.for2_13Use3 使用库的 _3 变体:
("a" % "b" % "1.0").cross(CrossVersion.for2_13Use3)
库作者注意: 发布依赖 Scala 2.13 库的 Scala 3 库(或反之)通常不安全。
这可能使最终用户的 classpath 上出现同一库的两个版本,如 scala-xml_2.13 和 scala-xml_3。
关于使用交叉构建库的更多说明
您可通过在 ModuleID 上使用 cross 方法,对不同 Scala 版本的行为进行细粒度控制。以下等价:
"a" % "b" % "1.0"
("a" % "b" % "1.0").cross(CrossVersion.disabled)
以下等价:
"a" %% "b" % "1.0"
("a" % "b" % "1.0").cross(CrossVersion.binary)
这会覆盖默认设置,始终使用完整 Scala 版本而非二进制 Scala 版本:
("a" % "b" % "1.0").cross(CrossVersion.full)
CrossVersion.patch 介于 CrossVersion.binary 和 CrossVersion.full 之间,会移除用于区分变体但二进制兼容的 Scala 工具链构建的任何尾随 -bin-... 后缀。
("a" % "b" % "1.0").cross(CrossVersion.patch)
CrossVersion.constant 固定常量值:
("a" % "b" % "1.0").cross(CrossVersion.constant("2.9.1"))
等价于:
"a" % "b_2.9.1" % "1.0"
项目矩阵
sbt 2.x 引入了项目矩阵,通过以子项目表示交叉构建,使交叉构建可以并行进行。
lazy val scala3 = "3.8.4"
lazy val scala2_13 = "2.13.18"

organization := "com.example"
scalaVersion := scala3
version      := "0.1.0-SNAPSHOT"

lazy val core = (projectMatrix in file("core"))
  .settings(
    name := "core",
  )
  .jvmPlatform(scalaVersions = Seq(scala3, scala2_13))
  .nativePlatform(scalaVersions = Seq(scala3, scala2_13))
  // .jsPlatform(scalaVersions = Seq(scala3))

// optional
lazy val core3 = core.jvm(scala3)
lazy val coreNative3 = core.native(scala3)
生成的子项目
在加载时,项目矩阵会通过组合平台与 Scala 版本展开为子项目:
sbt:cross-root> projects
[info]     core
[info]     core2_13
[info]     coreNative
[info]     coreNative2_13
[info]   * cross-root
按惯例,矩阵的 JVM Scala 3 变体将使用不带任何后缀的名称,例如 core。
sbt:cross-root> core/run
[info] running (fork) example.main
Hello
[success] ok
要在 build.sbt 内引用子项目,可调用 jvm(...)、js(...) 或 native(...):
// For Scala
lazy val core3 = core.jvm(scalaVersion = scala3)

// For Java
lazy val intf0 = intf.jvm(autoScalaLibrary = false)
虚拟轴
矩阵中的每个组合称为 ProjectRow;ProjectRow 表示为 VirtualAxis 的序列。
final class ProjectRow(
    val autoScalaLibrary: Boolean,
    val axisValues: Seq[VirtualAxis],
    val process: Project => Project
)

object VirtualAxis:

  /**
   * WeakAxis allows a row to depend on another row with Zero value.
   * For example, Scala version can be Zero for Java project, and it's ok.
   */
  abstract class WeakAxis extends VirtualAxis

  /** StrongAxis requires a row to depend on another row with the same selected value. */
  abstract class StrongAxis extends VirtualAxis
end VirtualAxis
VirtualAxis 分为 WeakAxis 和 StrongAxis。Scala 版本是弱轴的一例:带 Scala 版本的行可依赖不带 Scala 版本的 Java 行。同时,平台是强轴:一行只能依赖平台完全匹配的另一行。
例如,可按以下方式定义 SparkAxis:
import sbt.*

case class SparkAxis(idSuffix: String, directorySuffix: String)
  extends VirtualAxis.WeakAxis
有关如何使用 SparkAxis 的详情,请参阅 在虚拟轴上交叉构建 食谱。
发布约定
我们使用 Scala ABI(应用二进制接口)版本作为后缀,表示用于编译库的 Scala 版本。例如,构件名 cats-effect_2.13 表示使用了 Scala 2.13.x,cats-effect_3 表示使用了 Scala 3.x。这种简单方式可与 Maven、Ant 及其他构建工具的用户互操作。对于 Scala 的预发布版本(如 2.13.0-RC1),完整版本将视为 ABI 版本。
crossVersion 设置可用于覆盖发布约定:
CrossVersion.disabled(无后缀)CrossVersion.binary(_<scala-abi-version>)CrossVersion.full(_<scala-version>)
默认根据 crossPaths 的值为 CrossVersion.binary 或 CrossVersion.disabled。由于(与 Scala 库不同)Scala 编译器在补丁版本间不向前兼容,编译器插件应使用 CrossVersion.full。
远程缓存设置
本页介绍远程缓存设置。有关缓存系统的一般说明,请参阅缓存。
gRPC 远程缓存
虽然未来可能有多种远程缓存存储实现,sbt 2.0 已内置与 Bazel 远程缓存后端兼容的 gRPC 客户端。要配置 sbt 2.x,请将以下内容添加到 project/plugins.sbt:
addRemoteCachePlugin
Bazel 远程缓存后端众多,既有开源也有商业方案。虽然本页并非所有 Bazel 远程缓存实现的完整列表,但希望能展示如何为多种后端配置 sbt 2.x。
认证
gRPC 认证有多种方式,Bazel 远程缓存后端使用其中不同种类:
- 无认证。适用于测试。
- 默认 TLS/SSL。
- 使用自定义服务器证书的 TLS/SSL。
- 使用自定义服务器和客户端证书的 TLS/SSL,即 mTLS。
- 带 API 令牌头的默认 TLS/SSL。
无认证的 bazel-remote
您可从 buchgr/bazel-remote 获取代码,并使用 Bazel 在笔记本上运行:
bazel run :bazel-remote  -- --max_size 5 --dir $HOME/work/bazel-remote/temp \
  --http_address localhost:8000 \
  --grpc_address localhost:2024
要配置 sbt 2.x,请将以下内容添加到 project/plugins.sbt:
addRemoteCachePlugin
并将以下内容追加到 build.sbt:
Global / remoteCache := Some(uri("grpc://localhost:2024"))
使用 mTLS 的 bazel-remote
在实际环境中,mTLS 可确保传输加密且双向认证。bazel-remote 可按如下方式启动:
bazel run :bazel-remote  -- --max_size 5 --dir $HOME/work/bazel-remote/temp \
  --http_address localhost:8000 \
  --grpc_address localhost:2024 \
  --tls_ca_file /tmp/sslcert/ca.crt \
  --tls_cert_file /tmp/sslcert/server.crt \
  --tls_key_file /tmp/sslcert/server.pem
在此场景下,sbt 2.x 设置如下:
Global / remoteCache := Some(uri("grpcs://localhost:2024"))
Global / remoteCacheTlsCertificate := Some(file("/tmp/sslcert/ca.crt"))
Global / remoteCacheTlsClientCertificate := Some(file("/tmp/sslcert/client.crt"))
Global / remoteCacheTlsClientKey := Some(file("/tmp/sslcert/client.pem"))
注意使用 grpcs://,而非 grpc://。
EngFlow
EngFlow GmbH 是由 Bazel 团队核心成员于 2020 年创立的构建解决方案公司,为 Bazel 提供构建分析和远程执行后端,包括远程缓存。
在 https://my.engflow.com/ 注册试用后,页面会指导您使用 docker 启动试用集群。若按说明操作,将在端口 8080 启动远程缓存服务。试用集群的 sbt 2.x 配置如下:
Global / remoteCache := Some(uri("grpc://localhost:8080"))
BuildBuddy
BuildBuddy 由前 Google 工程师创立的构建解决方案公司,为 Bazel 提供构建分析和远程执行后端。也以 buildbuddy-io/buildbuddy 开源提供。
注册后,BuildBuddy Personal 计划允许您通过互联网使用 BuildBuddy。
- 在 https://app.buildbuddy.io/ 中,进入 Settings,将 Organization URL 改为
<something>.buildbuddy.io。 - 接下来,进入 Quickstart 并记录 URL 和
--remote_headers。 - 创建名为
$HOME/.sbt/buildbuddy_credential.txt的文件并填入 API 密钥:
x-buildbuddy-api-key=*******
sbt 2.x 配置如下:
Global / remoteCache := Some(uri("grpcs://something.buildbuddy.io"))
Global / remoteCacheHeaders += IO.read(BuildPaths.defaultGlobalBase / "buildbuddy_credential.txt").trim
NativeLink
NativeLink 是用 Rust 实现的开源 Bazel 远程执行后端,注重性能。截至 2024 年 6 月,NativeLink Cloud 处于测试阶段。
- 在 https://app.nativelink.com/ 中,进入 Quickstart 并记录 URL 和
--remote_header。 - 创建名为
$HOME/.sbt/nativelink_credential.txt的文件并填入 API 密钥:
x-nativelink-api-key=*******
sbt 2.x 配置如下:
Global / remoteCache := Some(uri("grpcs://something.build-faster.nativelink.net"))
Global / remoteCacheHeaders += IO.read(BuildPaths.defaultGlobalBase / "nativelink_credential.txt").trim
工件
描述
工件是用于发布子项目特定版本的单个文件。该概念源自 Apache Maven 和 Ivy。
在 JVM 生态中,常见工件为 Java 归档(JAR 文件)。压缩包格式通常更受青睐,因其更易管理、下载和存储。
举例来说,以下是库的工件列表,在 ivy.xml 文件中枚举:
  <publications>
    <artifact name="core_3" type="jar" ext="jar" conf="compile"/>
    <artifact e:classifier="sources" name="core_3" type="src" ext="jar" conf="sources"/>
    <artifact e:classifier="javadoc" name="core_3" type="doc" ext="jar" conf="docs"/>
    <artifact name="core_3" type="pom" ext="pom" conf="pom"/>
  </publications>
这表明工件具有名称、类型和扩展名,以及可选的 classifier。
- name。与子项目的模块名相同。
- type。工件的功能类别,如
jar、src和doc。 - extension。文件扩展名,如
jar、war、zip、xml等。 - classifier。在 Maven 中,classifier 是可为替代或次要工件追加的任意字符串。
选择默认工件
默认发布的工件为:
- 主二进制 JAR
- 包含主源码和资源的 JAR
- 包含 API 文档的 JAR
您可添加测试类、源码或 API 的工件,也可禁用部分主工件。
要添加所有 Test 工件:
lazy val app = (project in file("app"))
  .settings(
    Test / publishArtifact := true,
  )
要单独添加:
lazy val app = (project in file("app"))
  .settings(
    // enable publishing the jar produced by `Test/package`
    Test / packageBin / publishArtifact := true,

    // enable publishing the test API jar
    Test / packageDoc / publishArtifact := true,

    // enable publishing the test sources jar
    Test / packageSrc / publishArtifact := true,
  )
要单独禁用主工件:
lazy val app = (project in file("app"))
  .settings(
    // disable publishing the main jar produced by `package`
    Compile / packageBin / publishArtifact := false,

    // disable publishing the main API jar
    Compile / packageDoc / publishArtifact := false,

    // disable publishing the main sources jar
    Compile / packageSrc / publishArtifact := false,
  )
修改默认工件
除 publishArtifact 外,每个内置工件还有若干可配置设置。基本包括 artifact(类型为 SettingKey[Artifact])、mappings(类型为 TaskKey[(File, String)])和 artifactPath(类型为 SettingKey[File])。它们按上一节所述以 (Config / <task>) 限定作用域。
例如,要修改主工件的类型:
Compile / packageBin / artifact := {
  val prev: Artifact = (Compile / packageBin / artifact).value
  prev.withType("bundle")
}
生成的工件名由 artifactName 设置决定。该设置类型为 (ScalaVersion, ModuleID, Artifact) => String。ScalaVersion 参数提供完整 Scala 版本字符串及版本字符串的二进制兼容部分。返回的 String 为要生成的文件名。默认实现为 Artifact.artifactName _。可修改该函数以生成不同的本地工件名,而不影响发布名(发布名由 artifact 定义与仓库模式共同决定)。
例如,要生成不含 classifier 或交叉路径的最小名称:
artifactName := { (sv: ScalaVersion, module: ModuleID, artifact: Artifact) =>
  artifact.name + "-" + module.revision + "." + artifact.extension
}
(注意:实践中很少会去掉 classifier。)
最后,您可通过映射 packagedArtifact 任务获取工件的 (Artifact, File) 对。若不需要 Artifact,可从打包任务(package、packageDoc 或 packageSrc)直接获取 File。两种情况下,映射任务以获取文件均可确保先生成工件,从而保证文件为最新。
例如:
val myTask = taskKey[Unit]("My task.")

myTask :=  {
  val (art, file) = (Compile / packageBin / packagedArtifact).value
  println("Artifact definition: " + art)
  println("Packaged file: " + file.getAbsolutePath)
}
定义自定义工件
除配置内置工件外,您还可声明要发布的其他工件。使用 Ivy 元数据时允许多个工件,但 Maven POM 文件仅支持基于 classifier 区分工件,且这些信息不会记录在 POM 中。
基本 Artifact 构造如下:
Artifact("name", "type", "extension")
Artifact("name", "classifier")
Artifact("name", url: URL)
Artifact("name", Map("extra1" -> "value1", "extra2" -> "value2"))
例如:
Artifact("myproject", "zip", "zip")
Artifact("myproject", "image", "jpg")
Artifact("myproject", "jdk15")
有关工件的更多详情,请参阅 Ivy 文档。有关组合上述参数并指定 [Configurations] 和额外属性,请参阅 Artifact API。
要将这些工件声明为发布,请将它们映射到生成工件的任务:
val myImageTask = taskKey[File](...)

myImageTask := {
  val artifact: File = makeArtifact(...)
  artifact
}

addArtifact(Artifact("myproject", "image", "jpg"), myImageTask)
addArtifact 返回一系列设置(包装在 SettingsDefinition 中)。在完整构建配置中的用法如下:
lazy val app = (project in file("app"))
  .settings(
    addArtifact(...)
  )
发布 .war 文件
Web 应用的常见做法是发布 .war 文件而非 .jar 文件。
lazy val app = (project in file("app"))
  .settings(
    // disable .jar publishing
    Compile / packageBin / publishArtifact := false,

    // create an Artifact for publishing the .war file
    Compile / packageWar / artifact := {
      val prev: Artifact = (Compile / packageWar / artifact).value
      prev.withType("war").withExtension("war")
    },

    // add the .war file to what gets published
    addArtifact(Compile / packageWar / artifact, packageWar),
  )
使用带工件的依赖
要从具有自定义或多个工件的依赖中指定要使用的工件,请在依赖上使用 artifacts 方法。例如:
libraryDependencies += ("org" % "name" % "rev").artifacts(Artifact("name", "type", "ext"))
from 和 classifer 方法(在 sbt update 页中描述)实际上是转换为 artifacts 的便捷方法:
def from(url: String) = artifacts(Artifact(name, new URL(url)))
def classifier(c: String) = artifacts(Artifact(name, c))
即,以下两种依赖声明等价:
libraryDependencies += ("org.testng" % "testng" % "5.7").classifier("jdk15")

libraryDependencies += ("org.testng" % "testng" % "5.7").artifacts(Artifact("testng", "jdk15"))
输入任务
sbt 支持定义可解析用户输入并提供 Tab 补全的自定义任务。解析器详情将在后续的 Tab 补全解析器中介绍。
本页介绍如何将这些解析器组合子接入输入任务系统。
输入键
输入任务的键类型为 InputKey,表示输入任务,如同 SettingKey 表示设置、TaskKey 表示任务。使用 inputKey.apply 工厂方法定义新的输入任务键:
// goes in project/Build.scala or in build.sbt
val demo = inputKey[Unit]("A demo input task.")
输入任务的定义与普通任务类似,但还可使用应用于用户输入的 Parser 的结果。正如特殊的 value 方法获取设置或任务的值,特殊的 parsed 方法获取 Parser 的结果。
基本输入任务定义
最简单的输入任务接受空格分隔的参数序列。它不提供有用的 Tab 补全,解析也较基础。空格分隔参数的内置解析器通过 spaceDelimited 方法构建,其唯一参数为 Tab 补全时向用户展示的标签。
例如,以下任务打印当前 Scala 版本,然后将传入的参数逐行回显。
import complete.DefaultParsers.{ *, given }

demo := {
  // get the result of parsing
  val args: Seq[String] = spaceDelimited("<arg>").parsed
  // Here, we also use the value of the `scalaVersion` setting
  println("The current Scala version is " + scalaVersion.value)
  println("The arguments to demo were:")
  args.foreach(println(_))
}
使用解析器的输入任务
spaceDelimited 方法提供的 Parser 在定义输入语法时缺乏灵活性。使用自定义解析器只需按 Parsing Input 页所述定义您自己的 Parser。
构建解析器
第一步是通过定义以下类型之一的值来构建实际的 Parser:
Parser[I]:不使用任何设置的基本解析器Initialize[Parser[I]]:定义依赖一个或多个设置的解析器Initialize[State => Parser[I]]:使用设置和当前 state 定义的解析器
我们已在 spaceDelimited 中见过第一种情况的示例,其定义不使用任何设置。作为第三种情况的示例,以下定义了一个使用项目 Scala 和 sbt 版本设置以及 state 的示例 Parser。要使用这些设置,需将 Parser 构建包装在 Def.setting 中,并用特殊的 value 方法获取设置值:
import sbt.complete.DefaultParsers.{ *, given }
import sbt.complete.Parser

val parser: Def.Initialize[State => Parser[(String,String)]] =
Def.setting {
  (state: State) =>
    ( token("scala" <~ Space) ~ token(scalaVersion.value) ) |
    ( token("sbt" <~ Space) ~ token(sbtVersion.value) ) |
    ( token("commands" <~ Space) ~
        token(state.remainingCommands.size.toString) )
}
This Parser definition will produce a value of type (String,String). The input syntax defined isn't very flexible; it is just a demonstration. It will produce one of the following values for a successful parse (assuming the current Scala version is 3.8.4, the current sbt version is 2.0.1, and there are 3 commands left to run):
- (scala,3.8.4)
- (sbt,2.0.1)
- (commands,3)
同样,我们能访问项目当前 Scala 和 sbt 版本是因为它们是设置。任务不能用于定义解析器。
构建任务
接下来,我们根据 Parser 的结果构建要执行的实际任务。为此,我们按常规定义任务,但可通过 Parser 上的特殊 parsed 方法访问解析结果。
以下示例使用前一示例的输出(类型为 (String,String))和 package 任务的结果,在屏幕上打印一些信息。
demo := {
    val (tpe, value) = parser.parsed
    println("Type: " + tpe)
    println("Value: " + value)
    println("Packaged: " + packageBin.value.getAbsolutePath)
}
InputTask 类型
查看 InputTask 类型有助于理解输入任务的更高级用法。核心输入任务类型为:
class InputTask[A1](val parser: State => Parser[Task[A1]])
通常,输入任务会赋给设置,您会使用 Initialize[InputTask[A1]]。
分解如下:
- 您可使用其他设置(通过 Initialize)构建输入任务。
- 您可使用当前 State 构建解析器。
- 解析器接受用户输入并提供 Tab 补全。
- 解析器产生要运行的任务。
因此,您可使用设置或 State 构建定义输入任务命令行语法的解析器。上一节已说明。然后可使用设置、State 或用户输入构建要运行的任务。这在输入任务语法中是隐式的。
使用其他输入任务
输入任务涉及的类型可组合,因此可复用输入任务。InputTasks 上定义了 .parsed 和 .evaluated 方法,便于常见场景:
- 在
InputTask[A1]或Initialize[InputTask[A1]]上调用.parsed,获取解析命令行后创建的Task[A1] - 在
InputTask[A1]或Initialize[InputTask[A1]]上调用.evaluated,从执行该任务获取类型为A1的值
两种情况下,底层 Parser 都会与输入任务定义中的其他解析器按序组合。对于 .evaluated,会执行生成的任务。
以下示例依次应用 run 输入任务、字面分隔符解析器 -- 和再次的 run。解析器按语法出现顺序组合,因此 -- 前的参数传给第一个 run,之后的传给第二个。
val run2 = inputKey[Unit](
    "Runs the main class twice with different argument lists separated by --")

val separator: Parser[String] = "--"

run2 := {
   val one = (Compile / run).evaluated
   val sep = separator.parsed
   val two = (Compile / run).evaluated
}
对于回显其参数的主类 Demo,输出如下:
$ sbt
> run2 a b -- c d
[info] Running Demo c d
[info] Running Demo a b
c
d
a
b
预应用输入
由于 InputTasks 由 Parsers 构建,可通过编程方式应用输入来生成新的 InputTask。(也可生成 Task,下一节将介绍。)InputTask[T] 和 Initialize[InputTask[T]] 上提供了两个接受要应用的 String 的便捷方法。
partialInput应用输入并允许进一步输入,如来自命令行fullInput应用输入并终止解析,不再接受进一步输入
每种情况下,输入都会应用于输入任务的解析器。由于输入任务处理任务名后的所有输入,通常需要在输入中提供起始空白。
考虑上一节的示例。我们可以修改为:
- 显式指定第一个
run的全部参数。我们使用name和version展示设置可用于定义和修改解析器。 - 定义传给第二个
run的初始参数,但允许命令行上的进一步输入。
lazy val run2 = inputKey[Unit]("Runs the main class twice: " +
   "once with the project name and version as arguments"
   "and once with command line arguments preceded by hard coded values.")

// The argument string for the first run task is ' <name> <version>'
lazy val firstInput: Initialize[String] =
   Def.setting(s" ${name.value} ${version.value}")

// Make the first arguments to the second run task ' red blue'
lazy val secondInput: String = " red blue"

run2 := {
   val one = (Compile / run).fullInput(firstInput.value).evaluated
   val two = (Compile / run).partialInput(secondInput).evaluated
}
对于回显其参数的主类 Demo,输出如下:
$ sbt
> run2 green
[info] Running Demo demo 1.0
[info] Running Demo red blue green
demo
1.0
red
blue
green
从 InputTask 获取 Task
上一节展示了如何通过应用输入派生新的 InputTask。本节中,应用输入会产生 Task。Initialize[InputTask[A1]] 上的 toTask 方法接受要应用的 String 输入,并产生可正常使用的任务。例如,以下定义了一个普通任务 runFixed,可被其他任务使用或直接运行而无需提供任何输入:
lazy val runFixed = taskKey[Unit]("A task that hard codes the values to `run`")

runFixed := {
   val _ = (Compile / run).toTask(" blue green").value
   println("Done!")
}
For a main class Demo that echoes its arguments, running runFixed looks like:
$ sbt
> runFixed
[info] Running Demo blue green
blue
green
Done!
每次调用 toTask 都会生成新任务,但每个任务的配置与原始 InputTask(本例为 run)相同,只是应用的输入不同。例如:
lazy val runFixed2 = taskKey[Unit]("A task that hard codes the values to `run`")

run / fork := true

runFixed2 := {
   val x = (Compile / run).toTask(" blue green").value
   val y = (Compile / run).toTask(" red orange").value
   println("Done!")
}
不同的 toTask 调用定义不同的任务,每个任务都在新的 jvm 中运行项目主类。即,fork 设置同时配置两者,每个都有相同的 classpath,都运行相同的主类。但每个任务向主类传递不同的参数。对于回显其参数的主类 Demo,运行 runFixed2 的输出可能如下:
$ sbt
> runFixed2
[info] Running Demo blue green
[info] Running Demo red orange
blue
green
red
orange
Done!
Tab 补全解析器
本页介绍 sbt 中的解析器组合子。这些解析器用于解析用户输入,并为输入任务和命令提供 Tab 补全。
解析器组合子由较小的解析器构建解析器。Parser[A] 最基本用法是函数 String => Option[A]。它接受要解析的 String,解析成功时产生包装在 Some 中的值,失败时产生 None。错误处理和 Tab 补全使情况更复杂,但本文仅讨论 Option。
基本解析器
最简单的解析器组合子匹配精确输入:
import sbt.{ *, given }
import sbt.complete.DefaultParsers.{ *, given }

// A parser that succeeds if the input is 'x', returning the Char 'x'
//  and failing otherwise
val singleChar: Parser[Char] = 'x'

// A parser that succeeds if the input is "blue", returning the String "blue"
//   and failing otherwise
val litString: Parser[String] = "blue"
在这些示例中,隐式转换从 Char 或 String 产生字面 Parser。其他基本解析器构造器为 charClass、success 和 failure 方法:
import sbt.{ *, given }
import sbt.complete.DefaultParsers.{ *, given }

// A parser that succeeds if the character is a digit, returning the matched Char
//   The second argument, "digit", describes the parser and is used in error messages
val digit: Parser[Char] = charClass((c: Char) => c.isDigit, "digit")

// A parser that produces the value 3 for an empty input string, fails otherwise
val alwaysSucceed: Parser[Int] = success(3)

// Represents failure (always returns None for an input String).
//  The argument is the error message.
val alwaysFail: Parser[Nothing] = failure("Invalid input.")
内置解析器
sbt 在 sbt.complete.DefaultParsers 中定义了若干内置解析器。
常用内置解析器包括:
Space、NotSpace、OptSpace和OptNotSpace用于解析空格或非空格,必需或可选。StringBasic用于解析可能带引号的文本。IntBasic用于解析有符号 Int 值。Digit和HexDigit用于解析单个十进制或十六进制数字。Bool用于解析Boolean值
详情请参阅 DefaultParsers API。
组合解析器
我们在这些基本解析器基础上构建更有用的解析器。可将解析器按序组合、在解析器间选择或重复解析器。
// A parser that succeeds if the input is "blue" or "green",
//  returning the matched input
val color: Parser[String] = "blue" | "green"

// A parser that matches either "fg" or "bg"
val select: Parser[String] = "fg" | "bg"

// A parser that matches "fg" or "bg", a space, and then the color, returning the matched values.
val setColor: Parser[(String, Char, String)] =
  select ~ ' ' ~ color

// Often, we don't care about the value matched by a parser, such as the space above
//  For this, we can use ~> or <~, which keep the result of
//  the parser on the right or left, respectively
val setColor2: Parser[(String, String)]  =  select ~ (' ' ~> color)

// Match one or more digits, returning a list of the matched characters
val digits: Parser[Seq[Char]] = charClass(_.isDigit, "digit").+

// Match zero or more digits, returning a list of the matched characters
val digits0: Parser[Seq[Char]] = charClass(_.isDigit, "digit").*

// Optionally match a digit
val optDigit: Parser[Option[Char]] = charClass(_.isDigit, "digit").?
转换结果
解析器组合子的关键是在解析过程中将结果转换为更有用的数据结构。基本方法为 map 和 flatMap。以下是 map 及基于 map 实现的便捷方法示例。
// Apply the `digits` parser and apply the provided function to the matched
//   character sequence
val num: Parser[Int] = digits.map: (chars: Seq[Char]) =>
  chars.mkString.toInt }

// Match a digit character, returning the matched character or return '0' if the input is not a digit
val digitWithDefault: Parser[Char] = charClass(_.isDigit, "digit") ?? '0'

// The previous example is equivalent to:
val digitDefault: Parser[Char] =
  charClass(_.isDigit, "digit").?.map: (d: Option[Char]) =>
    d.getOrElse('0')

// Succeed if the input is "blue" and return the value 4
val blue = "blue" ^^^ 4

// The above is equivalent to:
val blueM = "blue".map((s: String) => 4)
控制 Tab 补全
大多数解析器有合理的默认 Tab 补全行为。例如,字符串和字符字面解析器会在空输入时建议底层字面。但 charClass 接受任意谓词,难以确定有效补全。examples 方法为此类解析器定义显式补全:
val digit = charClass(_.isDigit, "digit").examples("0", "1", "2")
Tab 补全将使用 examples 作为建议。另一种控制 Tab 补全的方法是 token。token 的主要用途是确定建议边界。例如,若您的解析器为:
("fg" | "bg") ~ ' ' ~ ("green" | "blue")
则空输入时的潜在补全为:console fg green fg blue bg green bg blue
通常您希望建议更小的片段,否则建议数量会难以管理。更好的解析器为:
token( ("fg" | "bg") ~ ' ') ~ token("green" | "blue")
此时,初始建议为(_ 表示空格):console fg_ bg_
注意不要重叠或嵌套 token,如 token("green" ~ token("blue"))。行为未指定(未来应会报错),但通常使用最外层的 token 定义。
依赖解析器
有时解析器需先分析部分数据,再解析更多依赖前者的数据。实现此行为的关键是使用 flatMap 函数。
例如,将展示如何从有效列表中带补全地选择多项,且不允许重复。使用空格分隔不同项。
def select1(items: Iterable[String]) =
token(Space ~> StringBasic.examples(FixedSetExamples(items)))
def selectSome(items: Seq[String]): Parser[Seq[String]] = {
select1(items).flatMap: v =>
val remaining = items.filter(_ != v)
if remaining.size == 0 then success(v :: Nil)
else selectSome(remaining).?.map(v +: _.getOrElse(Seq()))
}
如您所见,flatMap 函数提供前一个值。据此可为剩余项构建新解析器。map 组合子也用于转换解析器输出。
解析器递归调用,直至找到无可选选择的平凡情况。
命令
本页详细介绍命令。一般说明请参阅命令基础。
描述
命令是 sbt 的系统级构建块,常用于捕获用户交互。在命令层面,对子项目和并行处理的支持很少,因为这些由 act 命令实现。
插件作者应优先尝试用设置、任务和输入任务解决问题。若干值得注意的例外包括:
- 扩展 sbt 自身的用户体验
- 提供顺序处理,例如
release命令
简介
命令主要有三个方面:
- 用户调用命令时使用的语法,包括:
- 语法的 Tab 补全
- 将输入转换为适当数据结构的解析器
- 使用解析后的数据结构执行的操作。该操作会转换构建
State - 向用户提供的帮助
在 sbt 中,语法部分(包括 Tab 补全)由解析器组合子指定。若您熟悉 Scala 标准库中的解析器组合子,二者非常相似。解析器组合子的用法请参阅 Tab 补全解析器。
State 提供对构建状态的访问,例如所有已注册命令、待执行命令以及所有与项目相关的信息。
最后,可提供由 help 命令用于显示命令帮助的基本帮助信息。
定义命令
命令将函数 State => Parser[T] 与操作 (State, T) => State 组合。使用 State => Parser[T] 而非单纯的 Parser[T],是因为通常需要用当前 State 构建解析器。例如,当前已加载的项目(由 State 提供)决定 project 命令的有效补全。一般与具体情况的示例见以下各节。
构建命令的源码 API 详情请参阅 Command.scala。
通用命令
一般命令的构造如下:
val action: (State, A) => State = ...
val parser: State => Parser[A] = ...
val command: Command = Command("name")(parser)(action)
无参数命令
构造不接受任何参数的命令时有便捷方法。
val action: State => State = ...
val command: Command = Command.command("name")(action)
单参数命令
构造接受单个任意内容参数的命令时有便捷方法。
// accepts the state and the single argument
val action: (State, String) => State = ...
val command: Command = Command.single("name")(action)
多参数命令
构造接受空格分隔的多个参数的命令时有便捷方法。
val action: (State, Seq[String]) => State = ...
// <arg> is the suggestion printed for tab completion on an argument
val command: Command = Command.args("name", "<arg>")(action)
完整示例
以下示例是在项目中添加命令的示例构建。可按下列步骤试用:
- 创建
build.sbt和project/CommandExample.scala。 - 在该项目上运行 sbt。
- 试用
hello、helloAll、failIfTrue、color和printState命令。 - 可结合 Tab 补全与下方代码进行尝试。
以下为 build.sbt:
import CommandExample.*
scalaVersion := "3.8.4"
LocalRootProject / commands ++= Seq(hello, helloAll, failIfTrue, changeColor, printState)
以下为 project/CommandExample.scala:
import sbt.*
import Keys.*
import scala.Console
// imports standard command parsing functionality
import complete.DefaultParsers.*
object CommandExample:
// A simple, no-argument command that prints "Hi",
// leaving the current state unchanged.
def hello = Command.command("hello"): s0 =>
Console.out.println("Hi!")
s0
// A simple, multiple-argument command that prints "Hi" followed by the arguments.
// Again, it leaves the current state unchanged.
def helloAll = Command.args("helloAll", "<name>"): (s0, args) =>
println("Hi " + args.mkString(" "))
s0
// A command that demonstrates failing or succeeding based on the input
def failIfTrue = Command.single("failIfTrue"):
case (s0, "true") => s0.fail
case (s0, _) => s0
// Demonstration of a custom parser.
// The command changes the foreground or background terminal color
// according to the input.
lazy val change = Space ~> (reset | setColor)
lazy val reset = token("reset" ^^^ Console.RESET)
lazy val color = token( Space ~> ("blue" ^^^ "4" | "green" ^^^ "2") )
lazy val select = token( "fg" ^^^ "3" | "bg" ^^^ "4" )
lazy val setColor = (select ~ color).map: (g, c) =>
s"\u001B[${g}${c}m"
def changeColor = Command("color")(_ => change): (s0, ansicode) =>
Console.out.print(ansicode)
Console.out.println("Hi")
s0
// A command that demonstrates getting information out of State.
def printState = Command.command("printState"): s0 =>
import s0.*
println(s"definedCommands.size registered commands")
println(s"commands to run: ${show(remainingCommands)}")
println()
println(s"original arguments: ${show(configuration.arguments.toSeq)}")
println(s"base directory: ${configuration.baseDirectory}")
println()
println(s"sbt version: ${configuration.provider.id.version}")
println(s"Scala version (for sbt): ${configuration.provider.scalaProvider.version}")
println()
val extracted = Project.extract(s0)
import extracted.*
println(s"Current build: ${currentRef.build}")
println(s"Current project: ${currentRef.project}")
println(s"Original setting count: ${session.original.size}")
println(s"Session setting count: ${session.append.size}")
s0
def show[A1](s: Seq[A1]) =
s.map("'" + _ + "'").mkString("[", ", ", "]")
end CommandExample
插件
本页面向中级用户介绍插件细节。 插件系统的一般介绍请参阅插件基础。
描述
插件用于扩展构建定义,常用来增加内置设置和任务之外的能力。示例用途包括构建 Docker 容器、支持 Scala.JS、生成 GitHub Actions YAML 等。
插件定义一系列 sbt 设置,可自动加入所有项目,或为选定项目显式声明。插件也可定义新命令。sbt 1.x 与 2.x 中的插件扩展 sbt.AutoPlugin trait,可自动处理依赖插件之间的设置顺序。
创建插件
Conceptually we can think of the sbt plugins to be any other libraries on the metabuild, which is currently on Scala 3.8.4. However, in practice modern sbt plugins are built around auto plugin (sbt.AutoPlugin), which provides tasks and settings in the correct order. See the Plugin dependencies section for more details.
build.sbt 设置
要创建 auto plugin,请创建项目并启用 SbtPlugin。
version := "0.1.0-SNAPSHOT"
organization := "com.example"
homepage := Some(url("https://github.com/sbt/sbt-hello"))
lazy val root = rootProject
.enablePlugins(SbtPlugin)
.settings(
name := "sbt-hello",
pluginCrossBuild / sbtVersion := {
scalaBinaryVersion.value match
case "3" => "2.0.0-RC10" // set minimum sbt version
}
)
- sbt 2.x 插件须使用 Scala 3.x 编译。不指定
scalaVersion时,sbt 会默认使用适合插件的 Scala 版本。 pluginCrossBuild / sbtVersion用于针对较旧的 sbt 版本编译插件,使插件用户可在一定范围内选择 sbt 版本。
projectSettings
在合适的命名空间中,通过扩展 sbt.AutoPlugin 定义 auto plugin 对象。使用 auto plugin 时,设置由插件通过 projectSettings 方法直接提供。以下示例插件向子项目添加名为 hello 的任务:
package sbthello
import sbt.*
import Keys.*
object HelloPlugin extends AutoPlugin:
override def trigger = allRequirements
object autoImport:
val helloGreeting = settingKey[String]("greeting")
val hello = taskKey[Unit]("say hello")
end autoImport
import autoImport.*
override lazy val globalSettings: Seq[Setting[?]] = Seq(
helloGreeting := "hi",
)
override lazy val projectSettings: Seq[Setting[?]] = Seq(
hello := {
val s = streams.value
val g = helloGreeting.value
s.log.info(g)
}
)
end HelloPlugin
在 Scala 中,可用 lazy val 重写 def 方法,这称为统一访问原则。
建议对 projectSettings 使用 lazy val,因为设置定义通常是不可变的。
globalSettings
globalSettings 会一次性追加到全局设置(例如 Global / helloGreeting)。这使插件可提供新功能或新默认值。常见用途之一是在全局添加命令,例如 IDE 插件。
override lazy val globalSettings: Seq[Setting[?]] = Nil
在可能的情况下,插件应使用 globalSettings 定义默认值。在最宽作用域提供值、在最窄作用域使用值,可让用户最大程度灵活地修改设置。
实现插件依赖
下一步是定义插件依赖。
package sbtless
import sbt.*
import Keys.*
object SbtLessPlugin extends AutoPlugin:
override def requires = SbtJsTaskPlugin
override lazy val projectSettings = ...
end SbtLessPlugin
requires 方法返回类型为 Plugins 的值,用于构造依赖列表的 DSL。requires 方法通常包含以下值之一:
empty(无插件)- 其他 auto plugin
&&运算符(用于定义多个依赖)
根插件与触发式插件
有些插件应始终在子项目上显式启用。我们称之为根插件,即插件依赖图中的 根 节点。
Auto plugin 还提供一种方式:在依赖满足时自动挂接到项目。我们称之为触发式插件,通过重写 trigger 方法创建。
例如,若要创建能自动向构建追加命令的触发式插件,可将 requires 设为返回 empty,并将 trigger 重写为 allRequirements。
package sbthello
import sbt.*
import Keys.*
object HelloPlugin2 extends AutoPlugin:
override def trigger = allRequirements
....
end HelloPlugin2
构建用户仍须在 project/plugins.sbt 中包含该插件,但不再需要在 build.sbt 中包含。当您指定带依赖要求的插件时,情况会更有趣。下面将 SbtLessPlugin 修改为依赖另一插件:
package sbtless
import sbt.*
import Keys.*
object SbtLessPlugin extends AutoPlugin:
override def trigger = allRequirements
override def requires = SbtJsTaskPlugin
override lazy val projectSettings = ...
end SbtLessPlugin
事实上,PlayScala 插件(若您尚不了解,Play 框架是一个 sbt 插件)将 SbtJsTaskPlugin 列为其必需插件之一。因此,若定义如下 build.sbt:
lazy val root = rootProject
.enablePlugins(PlayScala)
则 SbtLessPlugin 的设置序列会自动追加在 PlayScala 的设置之后某处。
这使插件可在不打扰用户的前提下正确扩展现有插件。也有助于减轻用户的排序负担,让插件作者在向用户提供功能时有更大自由度。
使用 autoImport 控制导入
当 auto plugin 提供名为 autoImport 的 val、lazy val 或 object 时,该字段的内容会在 set、eval 和 *.sbt 文件中被通配导入。
package sbthello
import sbt.*
import Keys.*
object HelloPlugin3 extends AutoPlugin:
object autoImport:
val greeting = settingKey[String]("greeting")
val hello = taskKey[Unit]("say hello")
end autoImport
import autoImport.*
override def trigger = allRequirements
....
end HelloPlugin3
通常,autoImport 用于提供新的键——SettingKey、TaskKey 或 InputKey——或核心方法,而无需显式 import 或限定名。
示例插件
典型插件示例:
version := "0.1.0-SNAPSHOT"
organization := "com.example"
homepage := Some(url("https://github.com/sbt/sbt-obfuscate"))
lazy val root = rootProject
.enablePlugins(SbtPlugin)
.settings(
name := "sbt-obfuscate",
pluginCrossBuild / sbtVersion := {
scalaBinaryVersion.value match
case "3" => "2.0.1" // set minimum sbt version
}
)
package sbtobfuscate
import sbt.*
import sbt.Keys.*
import sbt.CacheImplicits.given
import xsbti.HashedVirtualFileRef
object ObfuscatePlugin extends AutoPlugin:
// by defining autoImport, the settings are automatically
// imported into user's `*.sbt`
object autoImport:
val obfuscate = taskKey[Seq[HashedVirtualFileRef]]("Obfuscates files.")
// configuration points, like built-in `version` and `libraryDependencies`
val obfuscateLiterals = settingKey[Boolean]("Obfuscate literals.")
end autoImport
import autoImport.*
// This plugin is automatically enabled for projects which are JvmPlugin.
override def trigger = allRequirements
// default values for the settings
override lazy val globalSettings: Seq[Def.Setting[?]] = Seq(
obfuscateLiterals := false,
)
// default implementations for the tasks
val baseObfuscateSettings: Seq[Def.Setting[?]] = Seq(
obfuscate := {
Obfuscate(sourcesVF.value, (obfuscate / obfuscateLiterals).value)
},
)
// a group of settings that are automatically added to projects.
override lazy val projectSettings: Seq[Def.Setting[?]] =
inConfig(Compile)(baseObfuscateSettings) ++
inConfig(Test)(baseObfuscateSettings)
end ObfuscatePlugin
object Obfuscate:
def apply(
sources: Seq[HashedVirtualFileRef],
obfuscateLiterals: Boolean
): Seq[HashedVirtualFileRef] =
// TODO obfuscate stuff!
sources
end Obfuscate
使用示例
使用该插件的构建定义可能类似 build.sbt:
obfuscateLiterals := true
使用 auto plugin
常见情况是使用发布到仓库的二进制插件。您可创建 project/plugins.sbt,在其中声明所需的 sbt 插件、一般依赖及必要的仓库:
addSbtPlugin("org.example" % "plugin" % "1.0")
addSbtPlugin("org.example" % "another-plugin" % "2.0")
// plain library (not an sbt plugin) for use in the build definition
libraryDependencies += "org.example" % "utilities" % "1.3"
resolvers += "Example Plugin Repository" at "https://example.org/repo/"
许多 auto plugin 会自动向项目添加设置,但有些也可能需要显式启用。示例如下:
lazy val util = (project in file("util"))
.enablePlugins(FooPlugin, BarPlugin)
.disablePlugins(plugins.IvyPlugin)
.settings(
name := "hello-util"
)
Metabuild
metabuild 是 project/ 目录下的项目。该项目的 classpath 用作 project/ 中构建定义以及项目根目录下任意 .sbt 文件的 classpath,也用于 eval 和 set 命令。
具体而言:
- metabuild 声明的托管依赖会被解析并出现在构建定义 classpath 上,与普通项目相同。
project/lib/中的非托管依赖可用于构建定义,与普通项目相同。project/项目中的源码即构建定义文件,使用由托管与非托管依赖构成的 classpath 编译。- 可在
project/plugins.sbt中声明项目依赖(方式类似普通项目中的build.sbt),这些依赖将对构建定义可用。
会在构建定义 classpath 上查找 sbt/sbt.autoplugins 描述文件,其中包含 sbt.AutoPlugin 实现类名。
reload plugins 命令将当前构建切换为(根)项目的 metabuild 定义,从而像普通子项目一样操作 metabuild。reload return 切换回原始构建。未保存的 metabuild 会话设置会被丢弃。
auto plugin 是定义可自动注入子项目的设置的模块。此外,auto plugin 还提供以下能力:
- 将选定名称自动导入
.sbt文件以及eval和set命令。 - 指定对其他 auto plugin 的依赖。
- 在全部依赖满足时自动激活自身。
- 按需指定
projectSettings、buildSettings和globalSettings。
插件依赖
在 sbt 0.13.5 引入 AutoPlugin 系统之前,若插件依赖另一插件的设置和任务,构建用户必须按正确顺序包含插件。随着应用中插件增多,这变得复杂且易错。
auto plugin 可依赖其他 auto plugin,并确保这些依赖的设置先被加载。
假设有 SbtLessPlugin 和 SbtCoffeeScriptPlugin,后者又依赖 SbtJsTaskPlugin、SbtWebPlugin 和 JvmPlugin。无需手动激活所有这些插件,项目只需启用 SbtLessPlugin 和 SbtCoffeeScriptPlugin:
lazy val root = (project in file("."))
.enablePlugins(SbtLessPlugin, SbtCoffeeScriptPlugin)
这将按正确顺序从各插件拉入正确的设置序列。
Maven 发布约定
sbt 2.x 插件发布到 Maven 布局仓库时,工件名带有 _sbt2_3 后缀。例如 sbt-ci-release 1.11.2 发布至中央仓库 https://repo1.maven.org/maven2/com/github/sbt/sbt-ci-release_sbt2_3/1.11.2/。该后缀由 sbt 自动追加,因此在 build.sbt 中 name 只需写 sbt-ci-release 等即可。
Community Plugins
The GitHub sbt Organization
The sbt organization is available for use by any sbt plugin. Developers who contribute their plugins into the community organization will still retain control over their repository and its access. The goal of the sbt organization is to organize sbt software into one central location.
A side benefit to using the sbt organization for projects is that you can use gh-pages to host websites under the https://www.scala-sbt.org domain.
The sbt autoplugin giter8 template is a good place to start. This sets up a new sbt plugin project appropriately. The generated README includes a summary of the steps for publishing a new community plugin.
[Edit] this page to submit a pull request that adds your plugin to the list.
Code formatter plugins
- sbt-scalafmt: code formatting using Scalafmt.
- sbt-java-formatter: code formatting for Java sources.
One jar plugins
- sbt-assembly: create über JARs.
Release plugins
- sbt-native-packager (docs): build native packages (RPM, .deb etc) for your projects.
- sbt-release: create a customizable release process.
- sbt-ci-release: automate Central Repo releases from GitHub Actions.
- sbt-native-image: generate GraalVM native-image binaries.
- sbt-pgp: sign artifacts using PGP/GPG and manage signing keys.
IDE integration plugins
- sbt-structure: extract project structure in XML for IntelliJ Scala plugin.
- Metals: Scala language server.
Test plugins
- sbt-jmh: run Java Microbenchmark Harness (JMH) benchmarks from sbt.
- sbt-stryker4s: Test your tests with mutation testing.
- junit-interface: test interface for JUnit 4.
- sbt-doctest: generate and run tests from Scaladoc comments.
- snapshot4s: snapshot testing
- sbt-jupiter-interface: test interface for JUnit 5.
- test-times-reporter: report slow tests.
Library dependency plugins
- sbt-license-report: generate reports of licenses used by dependencies.
- sbt-dependency-submission: Dependency Submission API integration.
- sbt-conflict-classes: show conflict classes in the classpath.
- sbt-akka-version-check: detect Akka module mismatches and fail build.
- sbt-license-check: check and report on licenses used, fail build for disallowed licenses.
- sbt-pekko-version-check: check if the Apache Pekko modules match.
- sbt-jackson-version-check: check if the Jackson modules match.
- sbt-dependency-rules: enforce user-defined rules on project dependencies.
Code generator plugins
-
sbt-buildinfo: generate Scala code from sbt setting keys.
-
smithy4s: Smithy for Scala
-
sbt-scalaxb: generate model classes from XML schemas and WSDL.
-
avrohugger: generate case classes from Avro schemas.
-
sbt-github-actions: generate GitHub Actions YAML
-
sbt-header: auto-generate source code file headers (such as copyright notices).
-
sbt-protobuf: protobuf code generator.
-
sbt-boilerplate: TupleX and FunctionX boilerplate code generator.
-
sbt-contraband (docs): generate pseudo-case classes from GraphQL schemas.
-
sbt-openapi-generator: OpenAPI generator.
-
sbt-teavm: generate JavaScript and WebAssembly from Java bytecode
Language support plugins
- sbt-redacted: redacted compiler plugin.
Web and frontend development plugins
-
sbt-war: package and run WAR files
-
sbt-web: library for building sbt plugins for the web.
-
sbt-js-engine: support for sbt plugins that use JavaScript.
-
sbt-less: Less CSS compilation support.
-
sbt-coffeescript: CoffeeScript support.
Database plugins
- flyway-sbt Flyway database migration.
- sbt-dao-generator generate code for O/R Mapper Free
- sbt-sliquibase: generate code for Slick API types from a Liquibase changelog.
Static code analysis plugins
- wartremover: flexible Scala linting tool.
- sbt-scalafix: refactoring and linting tool for Scala using Scalafix.
- sbt-warning-diff: show added/removed warnings.
Utility and system plugins
-
MiMa: binary compatibility management for Scala libraries.
-
sbt-git: run git commands from sbt.
-
sbt-dotenv: load environment variables from .env into the JVM System Environment for local development.
-
sbt-dynver: set project version dynamically from git metadata.
-
sbt-javaagent: add Java agents to projects.
-
sbt-nocomma: reduce commas.
-
sbt-jshell: Java REPL for sbt.
-
sbt-config: configures subproject via HOCON.
-
sbt-vimquit: adds
:qcommand.
Documentation plugins
- mdoc: typechecked markdown documentation for Scala
- sbt-unidoc: create unified API documentation across subprojects.
- sbt-class-diagram: generate class diagrams from Scala source code.
- sbt-plantuml: generate PlantUML diagram.
Code coverage plugins
- sbt-scoverage: Scala code coverage using Scoverage.
- sbt-jacoco: Scala and Java code coverage using JaCoCo.
食谱
文档中的食谱部分以最少说明聚焦于目标。
若您是 sbt 新手,请先阅读 sbt 示例教程和 sbt 入门一节。
如何编写 hello world
目标
我想用 Scala 编写 hello world 程序并运行它。
步骤
-
新建一个目录,例如
hello_scala/ -
在
hello_scala/下创建名为project/的目录,并创建project/build.properties,内容为sbt.version=2.0.1 -
在
hello_scala/下创建build.sbt:scalaVersion := "3.8.4" -
在
hello_scala/下创建Hello.scala:@main def main(args: String*): Unit = println(s"Hello ${args.mkString}") -
在终端中进入
hello_scala/并运行sbt:$ sbt -
出现提示符后,输入
run:sbt:hello_scala> run -
输入
exit退出 sbt shell:sbt:hello_scala> exit
其他方式
若您赶时间,可在空目录中运行 sbt init,并选择第一个模板。
发布到中央仓库
文档中的食谱部分以最少说明聚焦于目标。
向 Central Portal 发布的一般概念,另请参阅 Sonatype 的 Publish guides。
目标
我想将项目发布到中央仓库。
步骤
准备 1:Central Portal 注册
请按 Sonatype 的 Publish guides 创建 Central Portal 账户。
- 若您曾有 OSSRH 账户,请使用 Forgot password 流程将账户迁移到新的 Central Portal,以保留此前的命名空间关联。
- 若通过 GitHub 认证,
io.github.<user_name>会自动关联到该账户。
请按 register a namespace 指南中的步骤,将域名与您的账户关联。
准备 2:PGP 密钥对
请按 Sonatype 的 GPG guide 生成 PGP 密钥对。
安装 GnuPG,并确认版本:
$ gpg --version
gpg (GnuPG/MacGPG2) 2.2.8
libgcrypt 1.8.3
Copyright (C) 2018 Free Software Foundation, Inc.
License GPLv3+: GNU GPL version 3 or later <https://gnu.org/licenses/gpl.html>
接下来生成密钥:
$ gpg --gen-key
列出密钥:
$ gpg --list-keys
/home/foo/.gnupg/pubring.gpg
------------------------------
pub rsa4096 2018-08-22 [SC]
1234517530FB96F147C6A146A326F592D39AAAAA
uid [ultimate] your name <[email protected]>
sub rsa4096 2018-08-22 [E]
分发密钥:
$ gpg --keyserver keyserver.ubuntu.com --send-keys 1234517530FB96F147C6A146A326F592D39AAAAA
步骤 1:sbt-pgp
sbt-pgp 插件 可用 GPG/PGP 为发布的工件签名。(也可选用 sbt-ci-release 自动化发布流程。)
将以下一行加入 project/plugins.sbt,以便在构建中启用:
addSbtPlugin("com.github.sbt" % "sbt-pgp" % "2.3.1")
步骤 2:凭据
在门户中生成用于凭据的用户令牌。令牌须保存在安全位置(不要放在仓库中)。
sbt 2.x 还可读取环境变量 SONATYPE_USERNAME 和 SONATYPE_PASSWORD,并开箱即为 central.sonatype.com 追加凭据,便于在 CI 环境(如 GitHub Actions)中自动发布。
- run: sbt ci-release
env:
PGP_PASSPHRASE: ${{ secrets.PGP_PASSPHRASE }}
PGP_SECRET: ${{ secrets.PGP_SECRET }}
SONATYPE_PASSWORD: ${{ secrets.SONATYPE_PASSWORD }}
SONATYPE_USERNAME: ${{ secrets.SONATYPE_USERNAME }}
在本机上,常见做法是使用 $HOME/.sbt/2/credentials.sbt 文件,内容如下:
credentials += Credentials(Path.userHome / ".sbt" / "sonatype_central_credentials")
接下来创建文件 $HOME/.sbt/sonatype_central_credentials:
host=central.sonatype.com
user=<your username>
password=<your password>
步骤 3:配置 build.sbt
要发布到 Maven 仓库,需要配置若干设置以生成正确的元数据。
注意:向 Central Portal 发布时,必须将 publishTo 设为 localStaging 仓库:
// new setting for the Central Portal
publishTo := {
val centralSnapshots = "https://central.sonatype.com/repository/maven-snapshots/"
if version.value.endsWith("-SNAPSHOT") then Some("central-snapshots" at centralSnapshots)
else localStaging.value
}
将这些设置放在 build.sbt 末尾,或单独的 publish.sbt 中:
organization := "com.example.project2"
organizationName := "example"
organizationHomepage := Some(url("http://example.com/"))
scmInfo := Some(
ScmInfo(
url("https://github.com/your-account/your-project"),
"scm:[email protected]:your-account/your-project.git"
)
)
developers := List(
Developer(
id = "Your identifier",
name = "Your Name",
email = "your@email",
url = url("http://your.url")
)
)
description := "Some description about your project."
licenses := List(License.Apache2)
homepage := Some(url("https://github.com/example/project"))
// Remove all additional repository other than Maven Central from POM
pomIncludeRepository := { _ => false }
publishMavenStyle := true
// new setting for the Central Portal
publishTo := {
val centralSnapshots = "https://central.sonatype.com/repository/maven-snapshots/"
if version.value.endsWith("-SNAPSHOT") then Some("central-snapshots" at centralSnapshots)
else localStaging.value
}
pom.xml 的完整格式(Maven 所用项目配置的产物)见 POM Reference。您可在 build.sbt 中通过 pomExtra 选项添加更多内容。
步骤 4:暂存工件
在 sbt shell 中执行:
> publishSigned
步骤 5:上传或发布 bundle
在 sbt shell 中执行:
> sonaUpload
这会将 bundle 上传到 Central Portal。点击 "Publish" 按钮即可发布到中央仓库。
若要自动化发布,请执行:
> sonaRelease
发布后,工件在中央仓库 https://repo1.maven.org/maven2/ 上可见可能需要十分钟到数小时。
将 sbt 用作 Metals 构建服务器
目标
我想在 VS Code 上使用 Metals,并以 sbt 作为构建服务器。
步骤
要在 VS Code 上使用 Metals:
- 在扩展视图安装 Metals:
- 打开包含
build.sbt文件的目录。 - 在菜单栏选择 查看 > 命令面板…(在 macOS 上为
Cmd-Shift-P),执行 "Metals: Switch build server",并选择 "sbt"
- 导入完成后,打开 Scala 文件以确认代码补全可用:
使用以下设置可使部分子项目不参与 BSP。
bspEnabled := false
修改代码并保存(在 macOS 上为 Cmd-S)时,Metals 会调用 sbt 执行实际构建。
登录 sbt 会话
在 Metals 以 sbt 作为构建服务器时,您还可以通过瘦客户端登录同一 sbt 会话。
- 在终端面板中输入
sbt --client
这样可登录 Metals 已启动的 sbt 会话。在其中可调用 testOnly 等任务,且代码已编译。
导入到 IntelliJ IDEA
目标
我想将 sbt 构建导入 IntelliJ IDEA。
步骤
IntelliJ IDEA 是 JetBrains 开发的 IDE,Community Edition 在 Apache v2 许可证下开源。IntelliJ 可与多种构建工具(包括 sbt)集成以导入项目。
要将构建导入 IntelliJ IDEA:
- 在插件页安装 Scala 插件:
- 在「项目」中打开包含
build.sbt文件的目录。
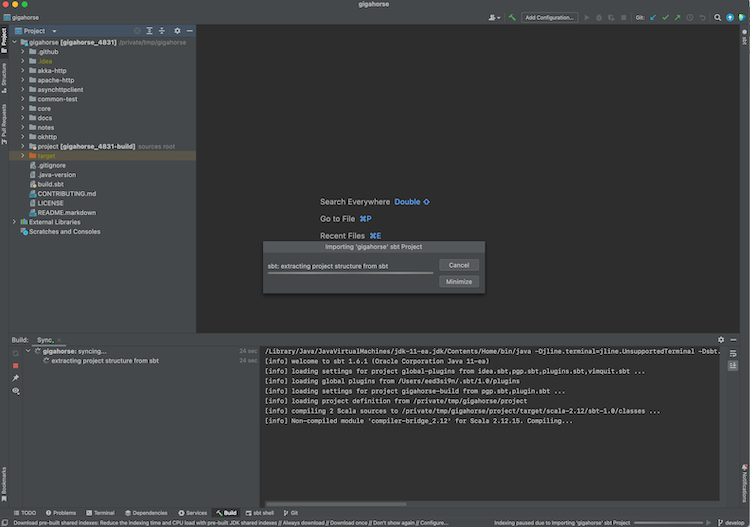
- 导入完成后,打开 Scala 文件以确认代码补全可用。
IntelliJ Scala 插件使用自带的轻量编译引擎检测错误,速度快但有时不准确。按 compiler-based highlighting 所述,可将 IntelliJ 配置为使用 Scala 编译器进行错误高亮。
使用 IntelliJ IDEA 交互式调试
- IntelliJ 支持在代码中设置断点进行交互式调试:

- 您可在单元测试上右键,选择 "Debug '<test name>'." 也可点击编辑器左侧单元测试旁的绿色 "run" 图标。测试命中断点时,可查看变量取值:
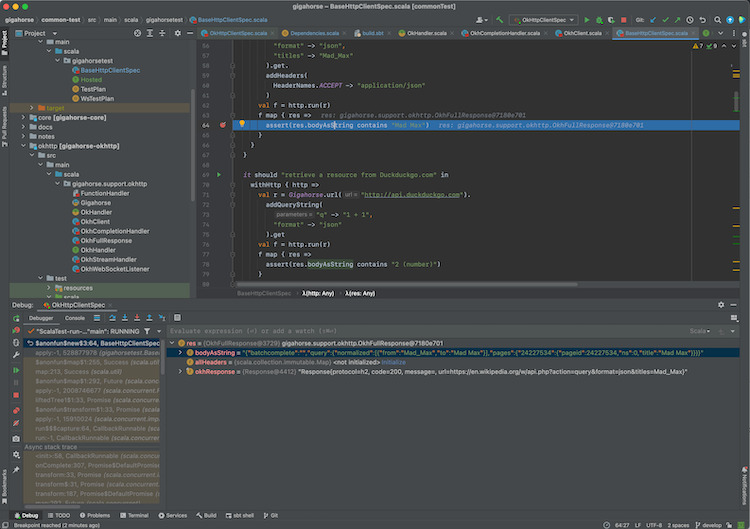
交互式调试会话中的操作方式,详见 IntelliJ 文档中的 Debug Code 页面。
其他方式
将 sbt 用作 IntelliJ IDEA 构建服务器(进阶)
将构建导入 IntelliJ 意味着编码时实际以 IntelliJ 作为构建工具与编译器(另见 compiler-based highlighting)。许多用户满意这种体验,但依代码库不同,部分编译错误可能为误报,与生成源码的插件配合也可能不佳,且您可能希望与 sbt 完全一致的构建语义。所幸现代 IntelliJ 通过 Build Server Protocol(BSP)支持包括 sbt 在内的其他 构建服务器。
在 IntelliJ 中使用 BSP 的好处是由 sbt 承担实际构建,因此若您习惯在旁边开着 sbt 会话,可避免重复编译。
| Import to IntelliJ | BSP with IntelliJ | |
|---|---|---|
| Reliability | ✅ Reliable behavior | ⚠️ Less mature. Might encounter UX issues. |
| Responsiveness | ✅ | ⚠️ |
| Correctness | ⚠️ Uses its own compiler for type checking, but can be configured to use scalac | ✅ Uses Zinc + Scala compiler for type checking |
| Generated source | ❌ Generated source requires resync | ✅ |
| Build reuse | ❌ Using sbt side-by-side requires double build | ✅ |
要在 IntelliJ 上将 sbt 用作构建服务器:
- 在插件页安装 Scala 插件。
- 若采用 BSP 方式,请关闭 IntelliJ,并删除已存在的
.idea目录(如有)。 - 在终端运行
sbt bspConfig以生成.bsp目录。 - 打开 IntelliJ,并打开
build.sbt文件。出现提示时选择 BSP project:
- 导入完成后,打开 Scala 文件以确认代码补全可用:
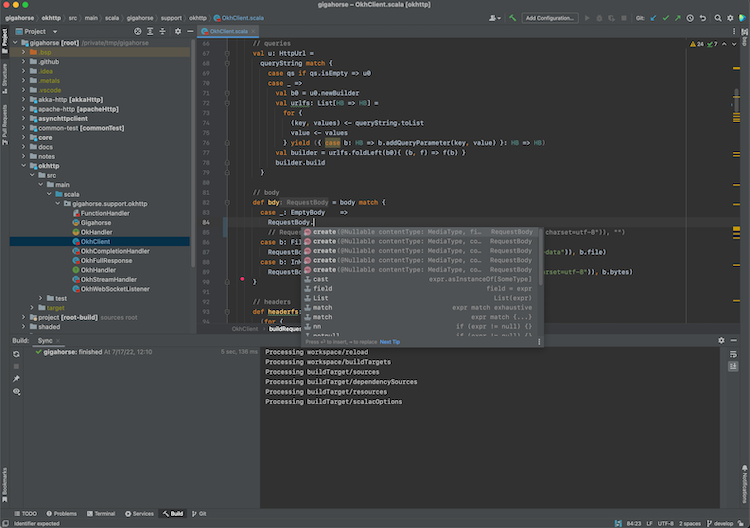
使用以下设置可使部分子项目不参与 BSP。
bspEnabled := false
- 打开 Preferences,搜索 BSP,勾选 "build automatically on file save",并取消勾选 "export sbt projects to Bloop before import":
修改代码并保存(在 macOS 上为 Cmd-S)时,IntelliJ 会调用 sbt 执行实际构建。
更多说明另见 Igal Tabachnik 的 Using BSP effectively in IntelliJ and Scala。
登录 sbt 会话
您也可通过瘦客户端登录已有的 sbt 会话。
- 在终端面板中输入
sbt --client
这样可登录 IntelliJ 已启动的 sbt 会话。在其中可调用 testOnly 等任务,且代码已编译。
GitHub Actions 设置
文档中的食谱部分以最少说明聚焦于目标。
有关 GitHub Actions 的一般概念,另请参阅 GitHub Actions documentation。
目标
我想在 GitHub Actions 上构建并测试我的项目。
基本设置
为 GitHub Actions 配置构建主要是设置 .github/workflows/ci.yml。以下是使用 setup-java 的最小 CI 工作流示例:
name: CI
on:
pull_request:
push:
jobs:
test:
runs-on: ubuntu-latest
steps:
- name: Checkout
uses: actions/checkout@v6
- name: Setup JDK
uses: actions/setup-java@v5
with:
distribution: temurin
java-version: 17
cache: sbt
- name: Setup sbt
uses: sbt/setup-sbt@v1
- name: Build and Test
run: sbt -v test
选择退出磁盘缓存
默认情况下,setup-sbt 会在 sbt 2.x 上启用磁盘缓存。可按以下方式选择退出:
- uses: sbt/setup-sbt@v1
with:
disk-cache: false
构建矩阵
以下是使用构建矩阵的示例:
name: CI
on:
pull_request:
push:
jobs:
test:
strategy:
fail-fast: false
matrix:
include:
- os: ubuntu-latest
java: 17
distribution: temurin
jobtype: 1
- os: ubuntu-latest
java: 17
distribution: temurin
jobtype: 2
- os: windows-latest
java: 17
distribution: temurin
jobtype: 2
- os: ubuntu-latest
java: 17
distribution: temurin
jobtype: 3
runs-on: ${{ matrix.os }}}
env:
JAVA_OPTS: -Xms2048M -Xmx2048M -Xss6M -Dfile.encoding=UTF-8
steps:
- name: Checkout
uses: actions/checkout@v6
- name: Setup JDK
uses: actions/setup-java@v5
with:
distribution: ${{ matrix.distribution }}}
java-version: ${{ matrix.java }}}
cache: sbt
- name: Setup sbt
uses: sbt/setup-sbt@v1
- name: Build and test (1)
if: ${{ matrix.jobtype == 1 }}}
shell: bash
run: |
sbt -v "mimaReportBinaryIssues; scalafmtCheckAll; test;"
- name: Build and test (2)
if: ${{ matrix.jobtype == 2 }}}
shell: bash
run: |
sbt -v "scripted actions/*"
- name: Build and test (3)
if: ${{ matrix.jobtype == 3 }}}
shell: bash
run: |
sbt -v "scripted dependency-management/*"
sbt-github-actions
此外还有 Daniel Spiewak 开发的 sbt-github-actions sbt 插件,可生成工作流文件并将设置保留在 build.sbt 文件中。
源码依赖插件
目标
我想使用托管在 git 仓库上的插件,而无需发布到中央仓库。
步骤
-
在 git 仓库中托管 sbt 2.x 插件,并使用 sbt 2.x 构建。
-
将以下内容添加到
project/plugins.sbt:// In project/plugins.sbt lazy val jmhRef = ProjectRef( uri("https://github.com/eed3si9n/sbt-jmh.git#303c3e98e1d1523e6a4f99abe09c900165028edb"), "plugin") BareBuildSyntax.dependsOn(jmhRef) -
当您启动 sbt 时,会在
$HOME/.sbt/2/staging/下自动克隆该仓库。
上例中,https://github.com/eed3si9n/sbt-jmh.git 是托管在 GitHub 上的插件的 HTTP 端点,303c3e98e1d1523e6a4f99abe09c900165028edb 是默认分支上的提交 id。
在虚拟轴上交叉构建
目标
我想在表示 Apache Spark 版本的虚拟轴上进行交叉构建。
步骤
- 在本地定义弱轴:
import sbt.*
case class SparkAxis(idSuffix: String, directorySuffix: String)
extends VirtualAxis.WeakAxis
- 定义带自定义行的项目矩阵。以下示例为 Spark 3 构建 Scala 2.12 和 2.13,为 Spark 4 构建 Scala 2.13 和 3:
lazy val scala212 = "2.12.21"
lazy val scala213 = "2.13.18"
lazy val scala3 = "3.8.4"
lazy val spark3 = SparkAxis(idSuffix = "Spark3", directorySuffix = "spark3")
lazy val spark4 = SparkAxis(idSuffix = "Spark4", directorySuffix = "spark4")
organization := "com.example"
version := "0.1.0-SNAPSHOT"
lazy val app = (projectMatrix in file("app"))
.settings(
name := "app"
)
.customRow(
scalaVersions = Seq(scala212, scala213),
axisValues = Seq(spark3, VirtualAxis.jvm),
settings = Seq(
moduleName := name.value + "_spark3",
libraryDependencies += "org.apache.spark" %% "spark-core" % "3.5.8",
)
)
.customRow(
scalaVersions = Seq(scala213, scala3),
axisValues = Seq(spark4, VirtualAxis.jvm),
settings = Seq(
moduleName := name.value + "_spark4",
libraryDependencies += ("org.apache.spark" %% "spark-core" % "4.1.0")
.cross(CrossVersion.for3Use2_13),
)
)
- 将源代码放在
app/src/main/scala下:
package example
import org.apache.spark.SparkContext
object A {
def main(args: Array[String]): Unit = {
val sc = new SparkContext("local", "test")
sc.stop()
}
}
确认可以运行:
sbt:virtual-axis-root> appSpark4/run
[info] running (fork) example.A
Using Spark's default log4j profile: org/apache/spark/log4j2-defaults.properties
26/05/05 00:00:00 INFO SparkContext: Running Spark version 4.1.0
Glossary
Symbols
:=, +=, ++=
These construct a Setting, which is the fundamental type in the settings system.
%
This is used to build up a ModuleID.
%%
This is similar to % except that it identifies a dependency that has been cross built.
%%%
This is defined in sbt-platform-deps in sbt 1.x.
C
命令
A system-level building block of sbt, often used to capture user interaction or IDE interaction. See Command basics.
交叉构建
The idea of building multiple targets from the same set of source file. This includes Scala cross building, targetting multiple versions of Scala releases; platform cross building, targetting JVM, Scala.JS, and Scala Native; and custom virtual axis like Spark versions.
D
Dependency resolution
During library management, when multiple version candidates (e.g. foo:2.2.0 and foo:3.0.0) are found for a library foo within a dependency graph, it is called a dependency conflict. The process of mediating the conflict into a single version is called dependency resolution. Often, this would result in the older version beging removed from the dependency graph, which is called an eviction of foo:2.2.0. In some cases, an eviction is considered unsafe because the candidates are not replacable. See sbt update.
E
Eviction
V
value
.value is used to denote a happens-before relationship from one task or setting to another. This method is special (it is a macro) and cannot be used except in := or in the standalone construction methods Def.setting and Def.task.
Setup notes
See Installing sbt runner for the instruction on general setup. Using Coursier or SDKMAN has two advantages.
- They will install the official packaging by Eclipse Adoptium etc, as opposed to the "mystery meat OpenJDK builds".
- They will install
tgzpackaging of sbt that contains all JAR files. (DEB and RPM packages do not to save bandwidth)
This page describes alternative ways of installing the sbt runner. Note that some of the third-party packages may not provide the latest version.
OS specific setup
macOS
Homebrew
$ brew install sbt
Homebrew maintainers have added a dependency to JDK 13 because they want to use more brew dependencies (brew#50649). This causes sbt to use JDK 13 even when java available on PATH is JDK 8 or 11. To prevent sbt from running on JDK 13, install jEnv or switch to using SDKMAN.
Windows
Chocolatey
> choco install sbt
Scoop
> scoop install sbt
Linux
Ubuntu and other Debian-based distributions
DEB package is officially supported by sbt, but it does not contain JAR files to save bandwidth.
Ubuntu and other Debian-based distributions use the DEB format, but usually you don't install your software from a local DEB file. Instead they come with package managers both for the command line (e.g. apt-get, aptitude) or with a graphical user interface (e.g. Synaptic). Run the following from the terminal to install sbt (You'll need superuser privileges to do so, hence the sudo).
sudo apt-get update
sudo apt-get install apt-transport-https curl gnupg -yqq
curl -sL "https://keyserver.ubuntu.com/pks/lookup?op=get&search=0x2EE0EA64E40A89B84B2DF73499E82A75642AC823" | sudo gpg --dearmor -o /etc/apt/keyrings/scalasbt.gpg
echo "deb [signed-by=/etc/apt/keyrings/scalasbt.gpg] https://repo.scala-sbt.org/scalasbt/debian all main" | sudo tee /etc/apt/sources.list.d/sbt.list
sudo apt-get update
sudo apt-get install sbt
Package managers will check a number of configured repositories for packages to offer for installation. You just have to add the repository to the places your package manager will check.
Once sbt is installed, you'll be able to manage the package in aptitude or Synaptic after you updated their package cache. You should also be able to see the added repository at the bottom of the list in System Settings -> Software & Updates -> Other Software:

sudo apt-key adv --keyserver hkps://keyserver.ubuntu.com:443 --recv 2EE0EA64E40A89B84B2DF73499E82A75642AC823 may not work on Ubuntu Bionic LTS (18.04) since it's using a buggy GnuPG, so we are advising to use web API to download the public key in the above.
Red Hat Enterprise Linux and other RPM-based distributions
RPM package is officially supported by sbt, but it does not contain JAR files to save bandwidth.
Red Hat Enterprise Linux and other RPM-based distributions use the RPM format. Run the following from the terminal to install sbt (You'll need superuser privileges to do so, hence the sudo).
# remove old Bintray repo file
sudo rm -f /etc/yum.repos.d/bintray-rpm.repo
curl -L https://www.scala-sbt.org/sbt-rpm.repo > sbt-rpm.repo
sudo mv sbt-rpm.repo /etc/yum.repos.d/
sudo yum install sbt
On Fedora (31 and above), use sbt-rpm.repo:
# remove old Bintray repo file
sudo rm -f /etc/yum.repos.d/bintray-rpm.repo
curl -L https://www.scala-sbt.org/sbt-rpm.repo > sbt-rpm.repo
sudo mv sbt-rpm.repo /etc/yum.repos.d/
sudo dnf install sbt