sbt ハンドブック (日本語版草稿)
言語:
![]()
sbt は主に Scala と Java のためのシンプルなビルド・ツールだ。sbt は、Coursier を用いたライブラリ依存性のダウンロード、プロジェクトの差分コンパイルや差分テスト、IntelliJ や VS Code などの IDE との統合、JAR パッケージの作成、および JVM コミュニティーがパッケージ管理に用いる Central Repo への公開などを行う。
scalaVersion := "3.8.4"
Scala を始めるには、一行の build.sbt を書くだけでいい。
リンク
- 本稿のソースは sbt/website にて管理されている
- sbt 1.x のドキュメンテーション
sbt runner のインストール
sbt プロジェクトをビルドするためには、以下の手順をたどる必要がある:
- JDK をインストールする (Eclipse Adoptium Temurin JDK 17 を推奨)
- sbt runner のインストール。
sbt runner は、宣言されたバージョンの sbt を必要に応じてダウンロードして、実行するスクリプトだ。この機構によってユーザのマシン環境に依存することなく、ビルド作者が sbt のバージョンを正確に管理することができる。
システム要件
sbt は主なオペレーティング・システムにおいて動作するが、事前に JDK 17 以上がインストールされていることを必要とする。
java --version
# openjdk 17.0.12 2024-07-16 LTS
SDKMAN からのインストール
JDK と sbt のインストールをするのに、SDKMAN を使うことができる。
sdk install java $(sdk list java | grep -o "\b17\.[0-9]*\.[0-9]*\-zulu" | head -1)
sdk install sbt
ユニバーサル・パッケージ
sbt runner の確認
sbt --script-version
# 2.0.1
例題でみる sbt
このページは、 sbt runner をインストールしたことを前提とする。
sbt の内部がどうなっているかや理由みたいなことを解説する代わりに、例題を次々と見ていこう。
最小 sbt ビルドを作る
mkdir foo-build
cd foo-build
touch build.sbt
mkdir project
echo "sbt.version=2.0.1" > project/build.properties
sbt シェルを起ち上げる
$ sbt
[info] welcome to sbt 2.0.1 (Azul Systems, Inc. Java)
....
[info] started sbt server
sbt:foo-build>
sbt シェルを終了させる
sbt シェルを終了させるには、exit と入力するか、Ctrl+D (Unix) か Ctrl+Z (Windows) を押す。
sbt:foo-build> exit
プロジェクトをコンパイルする
表記の慣例として sbt:...> や > というプロンプトは、sbt シェルに入っていることを意味することにする。
$ sbt
sbt:foo-build> compile
[success] elapsed time: 0 s, cache 0%, 1 onsite task
コード変更時に再コンパイルする
compile コマンド (やその他のコマンド) を ~ で始めると、プロジェクト内のソース・ファイルが変更されるたびにそのコマンドが自動的に再実行される。
sbt:foo-build> ~compile
[success] elapsed time: 0 s, cache 100%, 1 disk cache hit
[info] 1. Monitoring source files for foo-build/compile...
[info]    Press <enter> to interrupt or '?' for more options.
ソース・ファイルを書く
上記のコマンドは走らせたままにする。別のシェルかファイルマネージャーからプロジェクトのディレクトリへ行って、src/main/scala/example というディレクトリを作る。次に好きなエディタを使って example ディレクトリ内に以下のファイルを作成する:
package example

@main def main(args: String*): Unit =
  println(s"Hello ${args.mkString}")
この新しいファイルは実行中のコマンドが自動的に検知したはずだ:
[info] Build triggered by /tmp/foo-build/src/main/scala/example/Hello.scala. Running 'compile'.
[info] compiling 1 Scala source to /tmp/foo-build/target/out/jvm/scala-3.3.3/foo/backend ...
[success] elapsed time: 1 s, cache 0%, 1 onsite task
[info] 2. Monitoring source files for foo-build/compile...
[info]    Press <enter> to interrupt or '?' for more options.
~compile を抜けるには Enter を押す。
以前のコマンドを実行する
sbt シェル内で上矢印キーを 2回押して、上で実行した compile コマンドを探す。
sbt:foo-build> compile
ヘルプを読む
help コマンドを使って、基礎コマンドの一覧を表示する。
sbt:foo-build> help

  <command> (; <command>)*                       Runs the provided semicolon-separated commands.
  about                                          Displays basic information about sbt and the build.
  tasks                                          Lists the tasks defined for the current project.
  settings                                       Lists the settings defined for the current project.
  reload                                         (Re)loads the current project or changes to plugins project or returns from it.
  new                                            Creates a new sbt build.
  new                                            Creates a new sbt build.
  projects                                       Lists the names of available projects or temporarily adds/removes extra builds to the session.

....
特定のタスクの説明を表示させる:
sbt:foo-build> help run
Runs a main class, passing along arguments provided on the command line.
アプリを実行する
sbt:foo-build> run
[info] running example.main
Hello
[success] elapsed time: 0 s, cache 50%, 1 disk cache hit, 1 onsite task
sbt シェルから scalaVersion を設定する
sbt:foo-build> set scalaVersion := "3.8.4"
[info] Defining scalaVersion
[info] The new value will be used by Compile / bspBuildTarget, Compile / dependencyTreeCrossProjectId and 51 others.
[info]  Run `last` for details.
[info] Reapplying settings...
[info] set current project to foo (in build file:/tmp/foo-build/)
scalaVersion セッティングを確認する:
sbt:foo-build> scalaVersion
[info] 3.8.4
セッションを build.sbt へと保存する
アドホックに設定したセッティングは session save で保存できる。
sbt:foo-build> session save
[info] Reapplying settings...
[info] set current project to foo-build (in build file:/tmp/foo-build/)
[warn] build source files have changed
[warn] modified files:
[warn]   /tmp/foo-build/build.sbt
[warn] Apply these changes by running `reload`.
[warn] Automatically reload the build when source changes are detected by setting `Global / onChangedBuildSource := ReloadOnSourceChanges`.
[warn] Disable this warning by setting `Global / onChangedBuildSource := IgnoreSourceChanges`.
build.sbt ファイルは以下のようになったはずだ:
scalaVersion := "3.8.4"
プロジェクトに名前を付ける
エディタを使って、build.sbt を以下のように変更する:
scalaVersion := "3.3.3"
organization := "com.example"
name := "Hello"
ビルドの再読み込み
reload コマンドを使ってビルドを再読み込みする。このコマンドは build.sbt を読み直して、そこに書かれたセッティングを再適用する。
sbt:foo-build> reload
[info] welcome to sbt 2.x (Azul Systems, Inc. Java)
[info] loading project definition from /tmp/foo-build/project
[info] loading settings for project hello from build.sbt ...
[info] set current project to Hello (in build file:/tmp/foo-build/)
sbt:Hello>
プロンプトが sbt:Hello> に変わったことに注目してほしい。
libraryDependencies に toolkit-test を追加する
エディタを使って、build.sbt を以下のように変更する:
scalaVersion := "3.3.3"
organization := "com.example"
name := "Hello"
libraryDependencies += "org.scala-lang" %% "toolkit-test" % "0.1.7" % Test
reload コマンドを使って、build.sbt の変更を反映させる。
sbt:Hello> reload
差分テストを実行する
sbt:Hello> test
差分テストを継続的に実行する
sbt:Hello> ~test
テストを書く
上のコマンドを走らせたままで、エディタから src/test/scala/example/HelloSuite.scala という名前のファイルを作成する:
package example

class HelloSuite extends munit.FunSuite:
  test("Hello should start with H") {
    assert("hello".startsWith("H"))
  }
end HelloSuite
~test が検知したはずだ:
example.HelloSuite:
==> X example.HelloSuite.Hello should start with H  0.012s munit.FailException: /tmp/foo-build/src/test/scala/example/HelloSuite.scala:5 assertion failed
4:  test("Hello should start with H") {
5:    assert("hello".startsWith("H"))
6:  }
    at munit.FunSuite.assert(FunSuite.scala:11)
    at example.HelloSuite.$init$$$anonfun$1(HelloSuite.scala:5)
[error] Failed: Total 1, Failed 1, Errors 0, Passed 0
[error] Failed tests:
[error]   example.HelloSuite
[error] (Test / testQuick) sbt.TestsFailedException: Tests unsuccessful
[error] elapsed time: 1 s, cache 50%, 3 disk cache hits, 3 onsite tasks
テストが通るようにする
エディタを使って src/test/scala/example/HelloSuite.scala を以下のように変更する:
package example

class HelloSuite extends munit.FunSuite:
  test("Hello should start with H") {
    assert("Hello".startsWith("H"))
  }
end HelloSuite
テストが通過したことを確認して、Enter を押して継続的テストを抜ける。
ライブラリ依存性を追加する
エディタを使って、build.sbt を以下のように変更する:
scalaVersion := "3.3.3"
organization := "com.example"
name := "Hello"
libraryDependencies ++= Seq(
  "org.scala-lang" %% "toolkit" % "0.1.7",
  "org.scala-lang" %% "toolkit-test" % "0.1.7" % Test,
)
reload コマンドを使って、build.sbt の変更を反映させる。
Scala REPL を使う
New York の現在の天気を調べてみる。
sbt:Hello> console
Welcome to Scala 3.3.3 (1.8.0_402, Java OpenJDK 64-Bit Server VM).
Type in expressions for evaluation. Or try :help.
scala>
import sttp.client4.quick.*
import sttp.client4.Response
val newYorkLatitude: Double = 40.7143
val newYorkLongitude: Double = -74.006
val response: Response[String] = quickRequest
.get(
uri"https://api.open-meteo.com/v1/forecast?latitude=$newYorkLatitude&longitude=$newYorkLongitude¤t_weather=true"
)
.send()
println(ujson.read(response.body).render(indent = 2))
// press Ctrl+D
// Exiting paste mode, now interpreting.
{
"latitude": 40.710335,
"longitude": -73.99307,
"generationtime_ms": 0.36704540252685547,
"utc_offset_seconds": 0,
"timezone": "GMT",
"timezone_abbreviation": "GMT",
"elevation": 51,
"current_weather": {
"temperature": 21.3,
"windspeed": 16.7,
"winddirection": 205,
"weathercode": 3,
"is_day": 1,
"time": "2023-08-04T10:00"
}
}
import sttp.client4.quick._
import sttp.client4.Response
val newYorkLatitude: Double = 40.7143
val newYorkLongitude: Double = -74.006
val response: sttp.client4.Response[String] = Response({"latitude":40.710335,"longitude":-73.99307,"generationtime_ms":0.36704540252685547,"utc_offset_seconds":0,"timezone":"GMT","timezone_abbreviation":"GMT","elevation":51.0,"current_weather":{"temperature":21.3,"windspeed":16.7,"winddirection":205.0,"weathercode":3,"is_day":1,"time":"2023-08-04T10:00"}},200,,List(:status: 200, content-encoding: deflate, content-type: application/json; charset=utf-8, date: Fri, 04 Aug 2023 10:09:11 GMT),List(),RequestMetadata(GET,https://api.open-meteo.com/v1/forecast?latitude=40.7143&longitude...
scala> :q // to quit
サブプロジェクトを作成する
build.sbt を以下のように変更する:
scalaVersion := "3.3.3"
organization := "com.example"

lazy val hello = rootProject
  .settings(
    name := "Hello",
    libraryDependencies ++= Seq(
      "org.scala-lang" %% "toolkit" % "0.1.7",
      "org.scala-lang" %% "toolkit-test" % "0.1.7" % Test,
    ),
  )

lazy val helloCore = (project in file("core"))
  .settings(
    name := "Hello Core",
  )
reload コマンドを使って、build.sbt の変更を反映させる。
全てのサブプロジェクトを列挙する
sbt:Hello> projects
[info] In file:/tmp/foo-build/
[info]   * hello
[info]     helloCore
サブプロジェクトをコンパイルする
sbt:Hello> helloCore/compile
サブプロジェクトに toolkit-test を追加する
build.sbt を以下のように変更する:
scalaVersion := "3.3.3"
organization := "com.example"

val toolkitTest = "org.scala-lang" %% "toolkit-test" % "0.1.7"

lazy val hello = rootProject
  .settings(
    name := "Hello",
    libraryDependencies ++= Seq(
      "org.scala-lang" %% "toolkit" % "0.1.7",
      toolkitTest % Test,
    ),
  )

lazy val helloCore = (project in file("core"))
  .settings(
    name := "Hello Core",
    libraryDependencies += toolkitTest % Test,
  )
コマンドをブロードキャストする
hello に送ったコマンドを helloCore にもブロードキャストするために集約を設定する:
scalaVersion := "3.3.3"
organization := "com.example"

val toolkitTest = "org.scala-lang" %% "toolkit-test" % "0.1.7"

lazy val hello = rootProject
  .autoAggregate
  .settings(
    name := "Hello",
    libraryDependencies ++= Seq(
      "org.scala-lang" %% "toolkit" % "0.1.7",
      toolkitTest % Test,
    ),
  )

lazy val helloCore = (project in file("core"))
  .settings(
    name := "Hello Core",
    libraryDependencies += toolkitTest % Test,
  )
reload 後、~test は両方のサブプロジェクトに作用する:
sbt:Hello> ~test
Enter を押して継続的テストを抜ける。
hello が helloCore に依存するようにする
サブプロジェクト間の依存関係を定義するには .dependsOn(...) を使う。ついでに、toolkit への依存性も helloCore に移そう。
scalaVersion := "3.3.3"
organization := "com.example"

val toolkitTest = "org.scala-lang" %% "toolkit-test" % "0.1.7"

lazy val hello = rootProject
  .autoAggregate
  .dependsOn(helloCore)
  .settings(
    name := "Hello",
    libraryDependencies ++= Seq(
      "org.scala-lang" %% "toolkit" % "0.1.7",
      toolkitTest % Test,
    ),
  )

lazy val helloCore = (project in file("core"))
  .settings(
    name := "Hello Core",
    libraryDependencies += toolkitTest % Test,
  )
uJson を使って JSON をパースする
helloCore に uJson を追加しよう。
core/src/main/scala/example/core/Weather.scala を追加する:
package example.core
import sttp.client4.quick._
import sttp.client4.Response
object Weather:
def temp() =
val response: Response[String] = quickRequest
.get(
uri"https://api.open-meteo.com/v1/forecast?latitude=40.7143&longitude=-74.006¤t_weather=true"
)
.send()
val json = ujson.read(response.body)
json.obj("current_weather")("temperature").num
end Weather
次に src/main/scala/example/Hello.scala を以下のように変更する:
package example

import example.core.Weather

@main def main(args: String*): Unit =
  val temp = Weather.temp()
  println(s"Hello! The current temperature in New York is $temp C.")
アプリを走らせてみて、うまくいったか確認する:
sbt:Hello> run
[info] compiling 1 Scala source to /tmp/foo-build/core/target/scala-2.13/classes ...
[info] compiling 1 Scala source to /tmp/foo-build/target/scala-2.13/classes ...
[info] running example.Hello
Hello! The current temperature in New York is 22.7 C.
一時的に scalaVersion を変更する
sbt:Hello> ++3.3.3!
[info] Forcing Scala version to 3.3.3 on all projects.
[info] Reapplying settings...
[info] Set current project to Hello (in build file:/tmp/foo-build/)
scalaVersion セッティングを確認する:
sbt:Hello> scalaVersion
[info] helloCore / scalaVersion
[info]  3.3.3
[info] scalaVersion
[info]  3.3.3
このセッティングは reload 後には無効となる。
バッチ・モード
sbt のコマンドをターミナルから直接渡して sbt をバッチモードで実行することができる。
$ sbt clean "testOnly HelloSuite"
sbt new コマンド
sbt new コマンドを使って手早く簡単な Hello world ビルドをセットアップすることができる。
$ sbt new scala/scala-seed.g8
....
A minimal Scala project.

name [My Something Project]: hello

Template applied in ./hello
プロジェクト名を入力するプロンプトが出てきたら hello と入力する。
これで、hello ディレクトリ以下に新しいプロジェクトができた。
クレジット
本ページは William “Scala William” Narmontas さん作の Essential sbt というチュートリアルに基づいて書かれた。
sbt 入門
sbt は、柔軟かつ強力なビルド定義を持つが、それを裏付けるいくつかの概念がある。それらの概念は数こそ多くはないが、sbt は他のビルドシステムとは少し違うので、ドキュメントを読まずに使おうとすると、きっと細かい点でつまづいてしまうだろう。
この sbt 入門ガイドでは、sbt ビルド定義を作成してメンテナンスしていく上で知っておくべき概念を説明していく。
このガイドを一通り読んでおくことを強く推奨したい。
sbt の存在理由
背景
Scala 3 Book に書かれてある通り、Scala においてライブラリやプログラムは Scala コンパイラ scalac によってコンパイルされる:
@main def hello() = println("Hello, World!")
$ scalac hello.scala
$ scala hello
Hello, World!
いちいち毎回 scalac に全ての Scala ソースファイル名を直接渡すのは面倒だし遅い。
さらに、例題的なプログラム以外のものを書こうとすると普通はライブラリ依存性を持つことになり、つまり間接的なライブラリ依存を持つことにもなる。Scala エコシステムは、Scala 2.12系、2.13系、3.x系、JVMプラットフォーム、 JSプラットフォーム、 Native プラットフォームなどがあるため二重、三重に複雑な問題だ。
JAR ファイルや scalac を直接用いるという代わりに、サブプロジェクトという抽象概念とビルドツールを導入することで、無意味に非効率的な苦労を回避することができる。
sbt
sbt は主に Scala と Java のためのシンプルなビルド・ツールだ。sbt を使うことで、サブプロジェクトおよびそれらの依存性、カスタム・タスクを宣言することができ、高速かつ再現性のあるビルドを得ることができる。
この目標のため、sbt はいくつかのことを行う:
- sbt 自身のバージョンは
project/build.propertiesにて指定される。 - build.sbt DSL という DSL (ドメイン特定言語) を定義し、
build.sbtにて Scala バージョンその他のサブプロジェクトに関する情報を宣言できるようにする。 - Cousier を用いてサブプロジェクトのライブラリ依存性や間接的依存性を取得する。
- Zinc を呼び出して Scala や Java ソースの差分コンパイルを行う。
- 可能な限り、タスクを並列実行する。
- JVM エコシステム全般と相互乗り入れが可能なように、パッケージが Maven リポジトリにどのように公開されるべきかの慣習を定義する。
sbt は、プログラムやライブラリのビルドに必要なコマンド実装の大部分を標準化していると言っても過言ではない。
build.sbt DSL の必要性
sbt はサブプロジェクトとタスクグラフを宣言するのに Scala 言語をベースとする build.sbt DSL を採用する。昨今では、YAML や XML といった設定形式の代わりに DSL を使っていることは sbt に限らない。Gradle、Google 由来の Bazel 、Meta の Buck、Apple の SwiftPM など多くのビルドツールが DSL を用いてサブプロジェクトを定義する。
build.sbt は、scalaVersion と libraryDependencies のみを宣言すればあたかも YAML ファイルのように始めることができるが、ビルドシステムへの要求が高度になってもスケールすることができる。
- ライブラリのためのバージョン番号など同じ情報の繰り返しを回避するため、
build.sbtはvalを使って変数を宣言できる。 - セッティングやタスクの定義内で必要に応じて
ifのような Scala 言語の言語構文を使うことができる。 - セッティングやタスクが静的型付けされているため、ビルドが始まる前にタイポミスや型の間違いなどをキャッチできる。型は、タスク間でのデータの受け渡しにも役立つ。
Initialized[Task[A]]を用いた構造的並行性を提供する。この DSL はいわゆる「直接スタイル」な.value構文を用いて簡潔にタスクグラフを定義することができる。- プラグインを通して sbt の機能を拡張して、カスタム・タスクや Scala.JS といった言語拡張を行うという強力な権限をコミュニティーに与えている。
新しいビルドの作成
新しいビルドを作成するには、sbt new を使う。
$ mkdir /tmp/foo
$ cd /tmp/foo
$ sbt new

Welcome to sbt new!
Here are some templates to get started:
 a) scala/toolkit.local               - Scala Toolkit (beta) by Scala Center and VirtusLab
 b) typelevel/toolkit.local           - Toolkit to start building Typelevel apps
 c) sbt/cross-platform.local          - A cross-JVM/JS/Native project
 d) scala/scala3.g8                   - Scala 3 seed template
 e) scala/scala-seed.g8               - Scala 2 seed template
 f) playframework/play-scala-seed.g8  - A Play project in Scala
 g) playframework/play-java-seed.g8   - A Play project in Java
 i) softwaremill/tapir.g8             - A tapir project using Netty
 m) scala-js/vite.g8                  - A Scala.JS + Vite project
 n) holdenk/sparkProjectTemplate.g8   - A Scala Spark project
 o) spotify/scio.g8                   - A Scio project
 p) disneystreaming/smithy4s.g8       - A Smithy4s project
 q) quit
Select a template:
「a」を選択すると、いくつかの質問が追加で表示される:
Select a template: a
Scala version (default: 3.3.0):
Scala Toolkit version (default: 0.2.0):
リターンキーを押せば、デフォルト値が選択される。
[info] Updated file /private/tmp/bar/project/build.properties: set sbt.version to 1.9.8
[info] welcome to sbt 1.9.8 (Azul Systems, Inc. Java 1.8.0_352)
....
[info] set current project to bar (in build file:/private/tmp/foo/)
[info] sbt server started at local:///Users/eed3si9n/.sbt/1.0/server/d0ac1409c0117a949d47/sock
[info] started sbt server
sbt:bar> exit
[info] shutting down sbt server
以下はこのテンプレートによって作成されたファイルだ:
.
├── build.sbt
├── project
│   └── build.properties
├── src
│   ├── main
│   │   └── scala
│   │       └── example
│   │           └── Main.scala
│   └── test
│       └── scala
│           └── example
│               └── ExampleSuite.scala
└── target
build.sbt ファイルを見ていこう:
val toolkitV = "0.2.0"
val toolkit = "org.scala-lang" %% "toolkit" % toolkitV
val toolkitTest = "org.scala-lang" %% "toolkit-test" % toolkitV

scalaVersion := "3.3.0"
libraryDependencies += toolkit
libraryDependencies += (toolkitTest % Test)
これは、ビルド定義と呼ばれ、sbt がプロジェクトをコンパイルするのに必要な情報が記述されている。これは、.sbt 形式という Scala 言語のサブセットで書かれている。
以下は src/main/scala/example/Main.scala の内容だ:
package example

@main def main(args: String*): Unit =
  println(s"Hello ${args.mkString}")
これは、Hello world のテンプレートだ。これを実行するには、sbt --client と打ち込んで sbt シェルを起動して、シェル内から run <名前> と入力する:
$ sbt --client
[info] entering *experimental* thin client - BEEP WHIRR
[info] server was not detected. starting an instance
....
info] terminate the server with `shutdown`
[info] disconnect from the server with `exit`
sbt:bar> run Raj
[info] running example.main Raj
Hello Raj
[success] Total time: 0 s, completed Feb 18, 2024 2:38:10 PM
Giter8 テンプレート
.local テンプレートもいくつかあるが、基本的に sbt new は Giter8 と統合して GitHub 上でホスティングされるテンプレートを開く。例えば、scala/scala3.g8 は Scala チームによりメンテナンスされ、新しい Scala 3 のビルドを作成する:
$ /tmp
$ sbt new scala/scala3.g8
Giter8 wiki では 100 以上のテンプレートが列挙されていて、新しいビルドを手早く作ることができる。
sbt のコンポーネント
sbt runner
sbt のビルドは、「sbt という名前のシェルスクリプト」によって実行され、このスクリプトは sbt runner と呼ばれる。
project/build.properties による sbt バージョンの指定
sbt runner は、そのサブコンポーネントである sbt launcher を実行し、sbt launcher は project/build.properties を読み込んで、そのビルドに使われる sbt のバージョンを決定し、キャッシュに無ければ sbt 本体をダウンロードする:
sbt.version=2.0.1
これは、つまり
- ビルドをチェックアウトした人が、各々の sbt runner のバージョンに関わらわず、同一の sbt のバージョンを実行し
- sbt 本体のバージョンは git のようなバージョン管理システムによって管理されることを意味する
sbtn (sbt --client)
sbtn (native thin client) は sbt runner のサブコンポーネントの一つで、sbt runner に --client フラグを渡すと呼ばれ、sbt server にコマンドを送信するのに使われる。名前に n が付いているのは、それが GraalVM native-image によってネーティブ・コードにコンパイルされていることに由来する。sbtn と sbt server は安定しているため、最近の sbt のバージョンなら大体動作するようになっている。
sbt server (sbt --server)
sbt server は、ビルドツール本体で、そのバージョンは project/build.properties によって指定される。sbt server は、sbtn やエディタから注文を受け取るレジ係の役割を持つ。
Coursier
sbt server は、そのサブコンポーネントとして Couriser を実行して、Scala 標準ライブラリ、Scala コンパイラ、ビルドで使われるその他のライブラリ依存性の解決を行う。
Zinc
Zinc は、sbt プロジェクトにより開発、メンテされている、Scala の差分コンパイラだ。Zinc の側面として見落とされがちなのは、Zinc はここ数年に出た全てのバージョンの Scala コンパイラに対する安定した API を提供しているということがある。Coursier がどんな Scala バージョンでも解決できることと合わせると、sbt は build.sbt に一行書くだけで、ここ数年に出たどのバージョンの Scala でも走らせることができる:
scalaVersion := "3.8.4"
BSP server
sbt server は Build Server Protocol (BSP) をサポートして、ビルド対象の列挙、ビルドの実行、その他を行うことができる。これにより、IntelliJ や Metals といった IDE が既に実行中の sbt server とコードを用いて通信することが可能となる。
sbt server との接続
sbt server との接続方法を 3通りみていく。
sbtn を用いた sbt シェル
ビルドのワーキング・ディレクトリ内で sbt を実行する:
sbt
これは以下のように表示されるはずだ:
$ sbt
[info] server was not detected. starting an instance
[info] welcome to sbt 2.0.0-alpha7 (Azul Systems, Inc. Java 1.8.0_352)
[info] loading project definition from /private/tmp/bar/project
[info] loading settings for project bar from build.sbt ...
[info] set current project to bar (in build file:/private/tmp/bar/)
[info] sbt server started at local:///Users/eed3si9n/.sbt/2.0.0-alpha7/server/d0ac1409c0117a949d47/sock
[info] started sbt server
[info] terminate the server with `shutdown`
[info] disconnect from the server with `exit`
sbt:bar>
sbt をコマンドラインの引数無しで実行すると、sbt シェルが起動する。sbt シェルは、コマンド打ち込むためのプロンプトを持つが、タブ補完が効き、履歴も持っている。
例えば、sbt シェルに compile と打ち込むことができる:
sbt:bar> compile
compile を再実行するには、上矢印を押下して、リターンキーを押す。
sbt シェルを中止するには、exit と打ち込むか、 Ctrl-D (Unix) もしくは Ctrl-Z (Windows) を使う。
sbtn を用いたバッチ・モード
sbt をバッチ・モードで使うことも可能だ:
sbt compile
sbt testOnly TestA
$ sbt compile
> compile
sbt server のシャットダウン
マシン上の sbt server を全てシャットダウンするには以下を実行する:
sbt shutdownall
現行のものだけをシャットダウンするには以下を実行する:
sbt shutdown
基本タスク
このページは sbt をセットアップした後の、基本的な使い方を解説する。このページは、sbt のコンポーネントを既に読んだことを前提とする。
sbt を使っているリポジトリを pull してきたら、手軽に使ってみることができる。まずは、GitHub などから、リポジトリを選んでチェックアウトする。
$ git clone https://github.com/scalanlp/breeze.git
$ cd breeze
sbtn を用いた sbt シェル
sbt のコンポーネント でも言及されたように、sbt シェルを起動する:
$ sbt
これは以下のように表示されるはずだ:
$ sbt
[info] entering *experimental* thin client - BEEP WHIRR
[info] server was not detected. starting an instance
[info] welcome to sbt 1.5.5 (Azul Systems, Inc. Java 1.8.0_352)
[info] loading global plugins from /Users/eed3si9n/.sbt/1.0/plugins
[info] loading settings for project breeze-build from plugins.sbt ...
[info] loading project definition from /private/tmp/breeze/project
Downloading https://repo1.maven.org/maven2/org/scalanlp/sbt-breeze-expand-codegen_2.12_1.0/0.2.1/sbt-breeze-expand-codegen-0.2.1.pom
....
[info] sbt server started at local:///Users/eed3si9n/.sbt/1.0/server/dd982e07e85c7de1b618/sock
[info] terminate the server with `shutdown`
[info] disconnect from the server with `exit`
sbt:breeze-parent>
projects コマンド
まずは手始めに、projects コマンドを使ってサブプロジェクトを列挙してみる:
sbt:breeze-parent> projects
[info] In file:/private/tmp/breeze/
[info]     benchmark
[info]     macros
[info]     math
[info]     natives
[info]   * root
[info]     viz
現行のサプブロジェクト root を含み、合計 6つのをサブプロジェクトを持つビルドであることが分かる。
tasks コマンド
同様に、tasks コマンドを用いて、このビルドが持つ全タスクを列挙することができる:
sbt:breeze-parent> tasks

This is a list of tasks defined for the current project.
It does not list the scopes the tasks are defined in; use the 'inspect' command for that.
Tasks produce values.  Use the 'show' command to run the task and print the resulting value.

  bgRun            Start an application's default main class as a background job
  bgRunMain        Start a provided main class as a background job
  clean            Deletes files produced by the build, such as generated sources, compiled classes, and task caches.
  compile          Compiles sources.
  console          Starts the Scala interpreter with the project classes on the classpath.
  consoleProject   Starts the Scala interpreter with the sbt and the build definition on the classpath and useful imports.
  consoleQuick     Starts the Scala interpreter with the project dependencies on the classpath.
  copyResources    Copies resources to the output directory.
  doc              Generates API documentation.
  package          Produces the main artifact, such as a binary jar.  This is typically an alias for the task that actually does the packaging.
  packageBin       Produces a main artifact, such as a binary jar.
  packageDoc       Produces a documentation artifact, such as a jar containing API documentation.
  packageSrc       Produces a source artifact, such as a jar containing sources and resources.
  publish          Publishes artifacts to a repository.
  publishLocal     Publishes artifacts to the local Ivy repository.
  publishM2        Publishes artifacts to the local Maven repository.
  run              Runs a main class, passing along arguments provided on the command line.
  runMain          Runs the main class selected by the first argument, passing the remaining arguments to the main method.
  test             Executes all tests.
  testOnly         Executes the tests provided as arguments or all tests if no arguments are provided.
  testQuick        Executes the tests that either failed before, were not run or whose transitive dependencies changed, among those provided as arguments.
  update           Resolves and optionally retrieves dependencies, producing a report.

More tasks may be viewed by increasing verbosity.  See 'help tasks'
compile
compile タスクは、ライブラリ依存性の解決とダウンロードを行った後に、ソースのコンパイルを行う。
> compile
これは以下のように表示されるはずだ:
sbt:breeze-parent> compile
[info] compiling 341 Scala sources and 1 Java source to /private/tmp/breeze/math/target/scala-3.1.3/classes ...
  | => math / Compile / compileIncremental 51s
run
run タスクは、サブプロジェクトのメインクラスを実行する。sbt シェルから math/run と打ち込む:
> math/run
math/run は、math サブプロジェクトにスコープ付けされた run タスクを意味する。これは、以下のように表示されるはずだ:
sbt:breeze-parent> math/run
[info] Scala version: 3.1.3 true
....

Multiple main classes detected. Select one to run:
 [1] breeze.optimize.linear.NNLS
 [2] breeze.optimize.proximal.NonlinearMinimizer
 [3] breeze.optimize.proximal.QuadraticMinimizer
 [4] breeze.util.UpdateSerializedObjects

Enter number:
プロンプトには 1 と入力する。
test
test タスクは、以前に失敗したテスト、未だ実行されていないテスト、及び間接依存ライブラリに変化があったテストを実行する。
> math/test
これは以下のように表示されるはずだ:
sbt:breeze-parent> math/testQuick
[info] FeatureVectorTest:
[info] - axpy fv dv (1 second, 106 milliseconds)
[info] - axpy fv vb (9 milliseconds)
[info] - DM mult (19 milliseconds)
[info] - CSC mult (32 milliseconds)
[info] - DM trans mult (4 milliseconds)
....
[info] Run completed in 58 seconds, 183 milliseconds.
[info] Total number of tests run: 1285
[info] Suites: completed 168, aborted 0
[info] Tests: succeeded 1285, failed 0, canceled 0, ignored 0, pending 0
[info] All tests passed.
[success] Total time: 130 s (02:10), completed Feb 19, 2024
watch (チルダ) コマンド
編集-コンパイル-テストの一連のサイクルの高速化のために、ソースが保存されるたびに自動的に再コンパイルか再テストを行うように sbt に命令することができる。
コマンドの前に ~ を付けることで、ファイルが変更されるたびに自動的にそのコマンドが実行されるようになる。例えば、sbt シェルから以下のように打ち込む:
> ~test
リターンキーを押下して、監視を中止する。~ の前置記法は sbt シェルからもバッチ・モードからでも使用可能。
ビルド定義の基本
このページは build.sbt のビルド定義を解説する。
ビルド定義とは何か
ビルド定義は、build.sbt にて定義され、プロジェクト (型は Project) の集合によって構成される。 プロジェクトという用語が曖昧であることがあるため、このガイドではこれらをサブプロジェクトと呼ぶことが多い。
例えば、カレントディレクトリにあるサブプロジェクトは build.sbt に以下のように定義できる:
scalaVersion := "3.3.3"
name := "Hello"
より明示的に書くと:
lazy val root = rootProject
  .settings(
    scalaVersion := "3.3.3",
    name := "Hello",
  )
それぞれのサブプロジェクトは、キーと値のペアによって詳細が設定される。例えば、name というキーがあるが、それはサブプロジェクト名という文字列の値に関連付けられる。キーと値のペア列は .settings(...) メソッド内に列挙される。
build.sbt DSL
build.sbt は、Scala に基づいた build.sbt DSL と呼ばれるドメイン特定言語 (DSL) を用いてサブプロジェクトを定義する。まずは scalaVersion と libraryDependencies のみを宣言して、YAML ファイルのように build.sbt を使うことができるが、ビルドの成長に応じてその他の機能を使ってビルド定義を整理することができる。
型付けされたセッティング式
build.sbt DSL をより詳しくみていこう:
organization  :=         "com.example"
^^^^^^^^^^^^  ^^^^^^^^   ^^^^^^^^^^^^^
key           operator   (setting/task) body
それぞれのエントリーはセッティング式と呼ばれる。セッティング式にはタスク式と呼ばれるものもある。この違いは後で説明する。
セッティング式は以下の 3部から構成される:
- 左辺項をキー (key) という。
- 演算子。この場合は
:=。 - 右辺項は本文 (body)、もしくはセッティング本文という。
左辺値の name、version、および scalaVersion はキーである。 キーは SettingKey[A]、 TaskKey[A]、もしくは InputKey[A] のインスタンスで、 A はその値の型である。キーの種類に関しては後述する。
name キーは SettingKey[String] に型付けされているため、 name の := 演算子も String に型付けされている。これにより、誤った型の値を使おうとするとビルド定義はコンパイルエラーになる:
name := 42 // コンパイルできない
val と lazy val
ライブラリのバージョン番号など同じ情報の繰り返しを避けるために、build.sbt 内の任意の行に val、lazy val、def を書くことができる。
val toolkitV = "0.2.0"
val toolkit = "org.scala-lang" %% "toolkit" % toolkitV
val toolkitTest = "org.scala-lang" %% "toolkit-test" % toolkitV

scalaVersion := "3.8.4"
libraryDependencies += toolkit
libraryDependencies += (toolkitTest % Test)
上の例で val は変数を定義し、上の行から順に初期化される。そのため、toolkitV が参照される前に定義される必要がある。
以下は悪い例:
// 悪い例
val toolkit = "org.scala-lang" %% "toolkit" % toolkitV // 未初期化の参照!
val toolkitTest = "org.scala-lang" %% "toolkit-test" % toolkitV // 未初期化の参照!
val toolkitV = "0.2.0"
build.sbt に未初期化の事前参照を含む場合、sbt は NullPointerException による java.lang.ExceptionInInitializerError を投げて起動に失敗する。これをコンパイラに直させる方法の 1つとして、変数に lazy を付けて遅延変数として定義するという方法がある:
lazy val toolkit = "org.scala-lang" %% "toolkit" % toolkitV
lazy val toolkitTest = "org.scala-lang" %% "toolkit-test" % toolkitV
lazy val toolkitV = "0.2.0"
何でも lazy val を付けるのに渋い顔をする人もいるかもしれないが、僕たちは Scala 3 の lazy val は効率が良く、ビルド定義をコピー・ペーストに対して堅牢にすると思っている。
ライブラリ依存性の基本
このページは、sbt を使ったライブラリ依存性管理の基本を説明する。
sbt はマネージ依存性 (managed dependency) を実装するのに内部で Coursier を採用していて、Coursier、npm、PIP などのパッケージ管理を使った事がある人は違和感無く入り込めるだろう。
JAR ファイルを 1つ 1つ手でダウンロードする (アンマネージ依存性) 代わりに、マネージ依存性システムはサブプロジェクトで使われる外部ライブラリの取得を自動化する。Coursier のようなツールは宣言された ModuleID 列を解釈して、依存性解決 (全ての間接的依存性を展開して、バージョン衝突を解決して、正確なバージョンを決定する) を行い、結果となったアーティファクトをダウンロードしキャッシュして、一貫性のある JAR 管理を保証する。
libraryDependencies キー
依存性の宣言は、以下のようになる。ここで、groupId、artifactId、と revision は文字列だ:
libraryDependencies += groupID % artifactID % revision
もしくは、以下のようになる。このときの configuration は文字列もしくは Configuration の値だ (Test など)。
libraryDependencies += groupID % artifactID % revision % configuration
コンパイルを実行すると:
> compile
sbt は自動的に依存性を解決して、JAR ファイルをダウンロードする。
%% を使って正しい Scala バージョンを入手する
groupID % artifactID % revision のかわりに、 groupID %% artifactID % revision を使うと(違いは groupID の後ろの二つ連なった %%)、 sbt はプロジェクトの Scala のバイナリバージョンをアーティファクト名に追加する。これはただの略記法なので %% 無しで書くこともできる:
libraryDependencies += "org.scala-lang" % "toolkit_3" % "0.2.0"
ビルドの Scala バージョンが 3.x だとすると、以下の設定は上記と等価だ("org.scala-lang" の後ろの二つ連なった %% に注意):
libraryDependencies += "org.scala-lang" %% "toolkit" % "0.2.0"
多くの依存ライブラリは複数の Scala バイナリバージョンに対してコンパイルされており、この機構はそのうちの中からプロジェクトとバイナリ互換性のある正しいものを選択する便利機能だ。
ライブラリ依存性を一箇所にまとめる
project 内の任意の .scala ファイルがビルド定義の一部となることを利用する一つの例として project/Dependencies.scala というファイルを作ってライブラリ依存性を一箇所にまとめるということができる。
// project/Dependencies.scala にこのファイルを置く

import sbt.*

object Dependencies:
  // versions
  lazy val toolkitV = "0.2.0"

  // libraries
  val toolkit = "org.scala-lang" %% "toolkit" % toolkitV
  val toolkitTest = "org.scala-lang" %% "toolkit-test" % toolkitV
end Dependencies
この Dependencies オブジェクトは build.sbt 内で利用可能となる。 定義されている val が使いやすいように Dependencies.* を import しておこう。
import Dependencies.*

scalaVersion := "3.8.4"
name := "something"
libraryDependencies += toolkit
libraryDependencies += toolkitTest % Test
ライブラリ依存性の可視化
sbt シェルに Compile/dependencyTree と入力すると、ライブラリ依存性の間接依存ライブラリを含むツリーが表示される:
> Compile/dependencyTree
これは以下のように表示されるはずだ:
sbt:bar> Compile/dependencyTree
[info] default:bar_3:0.1.0-SNAPSHOT
[info]   +-org.scala-lang:scala3-library_3:3.3.1 [S]
[info]   +-org.scala-lang:toolkit_3:0.2.0
[info]     +-com.lihaoyi:os-lib_3:0.9.1
[info]     | +-com.lihaoyi:geny_3:1.0.0
[info]     | | +-org.scala-lang:scala3-library_3:3.1.3 (evicted by: 3.3.1)
[info]     | | +-org.scala-lang:scala3-library_3:3.3.1 [S]
....
マルチプロジェクトの基本
簡単なプログラムならば単一プロジェクトから作り始めてもいいが、ビルドが複数の小さいのサブプロジェクトに分かれていくのが普通だ。
ビルド内のサブプロジェクトは、それぞれ独自のソースディレクトリを持ち、packageBin を実行すると独自の JAR ファイルを生成するなど、概ね通常のプロジェクトと同様に動作する。
サブプロジェクトは、lazy val を用いて Project 型の値を宣言することで定義される。例えば:
scalaVersion := "3.8.4"
LocalRootProject / publish / skip := true

lazy val core = (project in file("core"))
  .settings(
    name := "core",
  )

lazy val util = (project in file("util"))
  .dependsOn(core)
  .settings(
    name := "util",
  )
val 定義された変数名はプロジェクトの ID 及びベースディレクトリの名前になる。ID は sbt シェルからプロジェクトを指定する時に用いられる。
sbt は必ずルートプロジェクトを定義するので、上の例のビルド定義は合計 3つのサブプロジェクトを持つ。
サブプロジェクト間依存性
あるサブプロジェクトを、他のサブプロジェクトにあるコードに依存させたい場合、dependsOn(...) を使ってこれを宣言する。例えば、util に core のクラスパスが必要な場合は util の定義を次のように書く:
lazy val util = (project in file("util"))
  .dependsOn(core)
ルートプロジェクト
ビルドのルートにあるサブプロジェクトは、ルートプロジェクトと呼ばれ、ビルドの中で特別な役割を果たすことがある。もしルートディレクトリにサブプロジェクトが定義されてない場合、sbt は自動的に他のプロジェクトを集約するデフォルトのルートプロジェクトを生成する。
タスク集約
タスク集約は、集約する側のサブプロジェクトで任意のタスクを実行するとき、集約される側の複数のサブプロジェクトでも同じタスクが実行されるという関係を意味する。
scalaVersion := "3.8.4"

lazy val root = rootProject
  .autoAggregate
  .settings(
    publish / skip := true
  )

lazy val util = (project in file("util"))

lazy val core = (project in file("core"))
上の例では、ルートプロジェクトが util と core を集約する。そのため、sbt シェルに compile と打ち込むと、3つのサブプロジェクトが並列にコンパイルされる。
コモン・セッティング
sbt 2.x では、settings(...) を使わずに build.sbt にセッティングを直書きした場合、コモン・セッティングとして全サブプロジェクトに注入される。
scalaVersion := "3.8.4"

lazy val core = (project in file("core"))

lazy val app = (project in file("app"))
  .dependsOn(core)
上の例では、scalaVersion セッティングはデフォルトのルートプロジェクト、core、util に適用される。
既にサブプロジェクトにスコープ付けされたセッティングはこのルールの例外となる。
scalaVersion := "3.8.4"

lazy val core = (project in file("core"))

lazy val app = (project in file("app"))
  .dependsOn(core)

// これは app のみに適用される
app / name := "app1"
この例外を利用して、以下のように、ルートプロジェクトにのみ適用されるセッティングを書くことができる:
scalaVersion := "3.8.4"

lazy val core = (project in file("core"))

lazy val app = (project in file("app"))
  .dependsOn(core)

// これらは root にのみ適用される
LocalRootProject / name := "root"
LocalRootProject / publish / skip := true
プラグインの基本
プラグインとは何か
プラグインは、新しいセッティングやタスクを追加することでビルド定義を拡張する。例えば、プラグインを使って githubWorkflowGenerate というタスクを追加して、GitHub Actions のための YAML を自動生成することができる。
Scaladex を使ったプラグイン・バージョンの検索
Scaladex を用いてプラグインを検索して、そのプラグインの最新バージョンを探すことができる。
プラグインの宣言
ビルドが hello というディレクトリにあるとして、sbt-github-actions をビルド定義に追加したい場合、hello/project/plugins.sbt というファイルを作成して、プラグインの ModuleID を addSbtPlugin(...) に渡すことで、プラグイン依存性を宣言する:
// In project/plugins.sbt

addSbtPlugin("com.github.sbt" % "sbt-github-actions" % "0.28.0")
ビルドに sbt-assembly を追加する場合、以下を追加する:
// In project/plugins.sbt

addSbtPlugin("com.eed3si9n" % "sbt-assembly" % "2.3.1")
ソース依存性プラグインレシピには git リポジトリにホスティングされたプラグインを直接使う実験的技法が書かれてる。
プラグインは、通常サブプロジェクトに追加されるセッティングやタスクを提供することでその機能を実現する。次のセクションでその仕組みをもう少し詳しくみていく。
auto plugin の有効化と無効化
プラグインは、自身が持つセッティング群がビルド定義に自動的に追加されるよう宣言することができ、 その場合、プラグインの利用者は何もしなくてもいい。
auto plugin 機能は、セッティング群とその依存関係がサブプロジェクトに自動的、かつ安全に設定されることを保証する。auto plugin の多くはデフォルトのセッティング群を自動的に追加するが、中には明示的な有効化を必要とするものもある。
明示的な有効化が必要な auto plugin を使っている場合は、以下を build.sbt に追加する必要がある:
lazy val util = (project in file("util"))
  .enablePlugins(FooPlugin, BarPlugin)
  .settings(
    name := "hello-util"
  )
enablePlugins メソッドを使って、そのサブプロジェクトで使用したい auto plugin を明示的に定義できる。
逆に disablePlugins メソッドを使ってプラグインを除外することもできる。例えば、util から IvyPlugin のセッティングを除外したいとすると、build.sbt を以下のように変更する:
lazy val util = (project in file("util"))
  .enablePlugins(FooPlugin, BarPlugin)
  .disablePlugins(plugins.IvyPlugin)
  .settings(
    name := "hello-util"
  )
明示的な有効化が必要か否かは、それぞれの auto plugin がドキュメントで明記しておくべきだ。あるプロジェクトでどんな auto plugin が有効化されているか気になったら、 sbt シェルから plugins コマンドを実行してみよう。
sbt:hello> plugins
In build /tmp/hello/:
  Enabled plugins in hello:
    sbt.plugins.CorePlugin
    sbt.plugins.DependencyTreePlugin
    sbt.plugins.Giter8TemplatePlugin
    sbt.plugins.IvyPlugin
    sbt.plugins.JUnitXmlReportPlugin
    sbt.plugins.JvmPlugin
    sbt.plugins.SemanticdbPlugin
Plugins that are loaded to the build but not enabled in any subprojects:
  sbt.ScriptedPlugin
  sbt.plugins.SbtPlugin
ここでは、plugins の表示によって sbt のデフォルトのプラグインが全て有効化されていることが分かる。 sbt のデフォルトセッティングは 7つのプラグインによって提供される:
CorePlugin: タスクの並列実行などのコア機能。DependencyTreePlugin: 依存性のツリー表示タスク。Giter8TemplatePlugin:sbt new機能の提供。IvyPlugin: モジュールの依存性解決と公開機能。JUnitXmlReportPlugin: junit-xml の生成。JvmPlugin: Java/Scala サブプロジェクトのコンパイル、テスト、実行、パッケージ化の機構。SemanticdbPlugin: SemanticDB の生成。
利用可能なプラグイン
ビルドのレイアウト
sbt は、知らない sbt ビルドを見てもだいたい勝手が分かるようにファイルをどこに置くかの慣習を持っている:
.
├── build.sbt
├── project/
│   ├── build.properties
│   ├── Dependencies.scala
│   └── plugins.sbt
├── src/
│   ├── main/
│   │   ├── java/
│   │   ├── resources/
│   │   ├── scala/
│   │   └── scala-2.13/
│   └── test/
│       ├── java/
│       ├── resources/
│       ├── scala/
│       └── scala-2.13/
├── subproject-core/
│   └── src/
│       ├── main/
│       └── test/
├─── subproject-util/
│   └── src/
│       ├── main/
│       └── test/
└── target/
.で表記したローカルのルートディレクトリはビルドのスタート地点だ。- ベース・ディレクトリは sbt 用語で、サブプロジェクトを構成するディレクトリを指す。上の例では、
.、subproject-core、subproject-utilは全てベース・ディレクトリだ。 - ビルド定義は、ローカルのルートディレクトリに置かれた
build.sbtにて記述される(実は*.sbtという名前のファイルなら何でもいい)。 - sbt のバージョンは
project/build.propertiesによって管理される。 - 生成されたファイル (コンパイルされたクラス、パッケージ化された JAR、マネージファイル、キャッシュ、ドキュメンテーションなど) はデフォルトでは
targetディレクトリに書き込まれる。
ビルドサポートファイル
In addition to build.sbt, project directory can contain .scala files that define helper objects and one-off plugins.
.
├── build.sbt
├── project/
│   ├── build.properties
│   ├── Dependencies.scala
│   └── plugins.sbt
....
project/ 内に .sbt ファイルを見かけることもあるかもしれないが、これらは通常プラグインを宣言するのに用いられる。プラグインの基本参照。
ソースコード
ソースコードに関して sbt は、デフォルトで Maven と同じディレクトリ構造を使う:
....
├── src/
│   ├── main/
│   │   ├── java/        <main Java sources>
│   │   ├── resources/   <files to include in main JAR>
│   │   ├── scala/       <main Scala sources>
│   │   └── scala-2.13/  <main Scala 2.13 specific sources>
│   └── test/
│       ├── java/        <test Java sources>
│       ├── resources/   <files to include in test JAR>
│       ├── scala/       <test Scala sources>
│       └── scala-2.13/  <test Scala 2.13 specific sources>
....
src/ 内の他のディレクトリは無視される。また、隠しディレクトリも無視される。
ソースコードは hello/app.scala のようにプロジェクトのベースディレクトリに置くこともできるが、小さいプロジェクトはともかくとして、通常のプロジェクトでは src/main/ 以下のディレクトリにソースを入れて整理するのが普通だ。
バージョン管理の設定
.gitignore (もしくは、他のバージョン管理システムの同様のファイル)には以下を追加しておくとよいだろう:
target/
ここでは(ディレクトリだけにマッチさせるために)語尾の / を意図的につけていて、一方で (普通の target/ に加えて project/target/ にもマッチさせるために)先頭の / は意図的に つけていないことに注意。
sbt と IDE
エディタと sbt だけで Scala のコードを書くことも可能だが、今日日のプログラマの多くは統合開発環境 (IDE) を用いる。Scala の IDE は Metals と IntelliJ IDEA の二強で、それぞれ sbt ビルドとの統合をサポートする。
IDE を使う利点をいくつか挙げると:
- 定義へのジャンプ
- 静的型付けに基づくコード補完
- コンパイルエラーの列挙と、エラー地点へのジャンプ
- インタラクティブなデバッグ
IDE 統合のためのレシピをここにいくつか紹介する:
変更点
sbt 2.0 の変更点
互換性に影響のある変更点
- Scala 3 を用いたメタビルド。ビルド定義やプラグインに使われる sbt 2.x build.sbt DSL は Scala 3.x ベースとなった (現行では 3.8.4) (sbt 1.x 並びに 2.x は、Scala 2.x と 3.x の両方をビルドすることが可能) by @eed3si9n, @adpi2, and others.
- コモン・セッティング。build.sbt に直書きされたセッティングは、ルートサブプロジェクトだけではなく、全てのサブプロジェクトに追加され、これまで
ThisBuildが受け持ってきた役目を果たすことができる。 - 差分テスト。
testは、テスト結果をキャッシュする差分テストへと変更された。全テストを走らせたい場合はtestFullを使う by @eed3si9n in #7686 - キャッシュ化されたタスク。全てのタスクはデフォルトで、キャッシュ化されている。詳細はキャッシュ化を参照。
- 依存性のツリー表示。
dependencyTree関連のタスク群は 1つのインプット・タスクに統一された by @eed3si9n in #8199 testタスクの形がUnitからTestResultへと変更された by @eed3si9n in #8181- 以前
URLに型付けされていたデフォルトのセッティングやタスクキー (apiMappings,apiURL,homepage,organizationHomepage,releaseNotesURLなど) はURIに変更された in #7927 licenseキーの型がSeq[(String, URL)]からSeq[License]へと変更された in #7927- sbt 2.x プラグインは
_sbt2_3という suffix を用いて公開される by @eed3si9n in #7671 - sbt 2.x は、
platformセッティングを追加して、ModuleIDの%%%演算子を使わなくても、%%演算子だけで JVM、JS、Native のクロスビルドができるようにした by @eed3si9n in #6746 useCoursierセッティングを廃止して、Coursier をオプトアウトできないようにした by @eed3si9n in #7712Key.Classpath型は、Seq[Attributed[File]]からSeq[Attributed[xsbti.HashedVirtualFileRef]]型のへのエイリアスへと変更された。同様に、以前Fileを返していたタスクキーのいくつかはHashedVirtualFileRefを返すように変更された。ファイルのキャッシュ化も参照。- sbt 2.x では、
targetのデフォルトが<subproject>/target/からtarget/out/jvm/scala-3.8.4/<subproject>/へと変更された。 - sbt 2.x は
build.sbtに変更があると、デフォルトで自動的リロードされるようになった @eed3si9n in #8211 - sbt 2.x は、sbt シェル内でのスコープ付きタスクの委譲を禁止する @eed3si9n in #8539
- sbt 2.x は、エヴィクション・エラー規制を
Testコンフィギュレーションでも施行する by @calm329 and @zainab-ali in #8451 + #9102
勧告どおり廃止された機能
新機能
- project matrix。sbt 1.x からプラグインで使用可能だった project matrix が本体に取り込まれ、並列クロスビルドができるようになった。
- sbt クエリ。sbt 2.x は統一スラッシュ構文を拡張してサブプロジェクトのクエリを可能とする。詳細は下記参照。
- ローカル/リモート兼用のキャッシュ・システム。詳細は下記参照。
- クライアントサイド・ラン。詳細は下記参照。
- クライアントサイド REPL。詳細は下記参照。
- rootProject と autoAggregate。詳細は下記参照。
- Maven BOM (Bill of Materials) の使用。詳細は下記参照。
コモン・セッティング
sbt 2.x では、build.sbt に直書きされたセッティングはコモン・セッティングとして解釈され、全サブプロジェクトに注入される。そのため、ThisBuild スコープ付けを使わずに scalaVersion を設定できる:
scalaVersion := "3.8.4"
さらに、これはいわゆる動的ディスパッチ問題を解決する:
lazy val hi = taskKey[String]("")
hi := name.value + "!"
sbt 1.x では hi タスクはルートプロジェクトの名前を捕捉してしまっていたが、sbt 2.x は各サブプロジェクトの name に ! を追加する:
$ sbt show hi
[info] entering *experimental* thin client - BEEP WHIRR
[info] terminate the server with `shutdown`
> show hi
[info] foo / hi
[info]  foo!
[info] hi
[info]  root!
これは、@eed3si9n によって #6746 としてコントリされた。
sbt クエリ
サブプロジェクトが複数あるとき、選択範囲を狭めるのに sbt 2.x は sbt クエリを導入する。
$ sbt foo.../test
上の例では、foo から始まる全てのサブプロジェクトを実行する。
$ sbt ...@scalaBinaryVersion=3/test
上の例では、scalaBinaryVersion が 3 の全てのサブプロジェクトを実行する。これは、@eed3si9n によって #7699 としてコントリされた。
差分テスト
sbt 2.x では、test タスクはインプット・タスクとなって、実行するテスト・スイートをフィルターできるようになった:
> test ...ExampleTest
さらに、test はキャッシュ化された差分テストとなった。そのため、以前にテストが失敗したか、前回の実行から何かが変更されないと実行されないようになった。
詳細はtestを参照
ローカル/リモート兼用のキャッシュ・システム
sbt 2.x は、デフォルトでキャッシュ化されたタスクを実装するため、自動的にタスクの結果をローカルのディスクもしくは Bazel 互換のリモートキャッシュにてキャッシュ化することができる。
lazy val task1 = taskKey[String]("doc for task1")

task1 := name.value + version.value + "!"
これは task1 への入力を追跡してマシン・ワイドなディスクキャッシュを作成する。これはリモート・キャッシュとしても設定できるようになっている。sbt タスクはファイルを生成することがよくあるので、ファイルのコンテンツをキャッシュ化できる仕組みも提供する。
lazy val task1 = taskKey[String]("doc for task1")

task1 := {
  val converter = fileConverter.value
  ....
  val output = converter.toVirtualFile(somefile)
  Def.declareOutput(output)
  name.value + version.value + "!"
}
詳細はキャッシュ化を参照。これは @eed3si9n によって #7464 / #7525 としてコントリされた。
クライアントサイド・ラン
sbt 2.0 では、sbt server は run タスクを sbtn に送り返して、sbtn 側で新しい JVM にフォークさせる。以下のように実行するだけでいい:
sbt run
これは、sbt server をブロックしてしまうことを回避し、かつ複数の実行を行うことができる。これは @eed3si9n によって#8060 としてコントリされた。run ドキュメンテーション参照。
クライアントサイド REPL
クライアントサイド・ラン同様に、sbt server は console (Scala REPL) を sbtn に送り返して、sbtn 側で新しい JVM をフォークして REPL を実行する。以下のように実行するだけでいい:
sbt console
これは、sbt server をブロックしてしまうことを回避する。これは @eed3si9n と @calm329 によって#8018, #8604, #8677, #8705, #8722 としてコントリされた。
rootProject と autoAggregate
sbt 2.0 は rootProject マクロを追加する:
lazy val root = rootProject
これは build.sbt に頻出する (project in file(".")) 略記法だ。
lazy val root = rootProject
  .autoAggregate
sbt 2.0 は、ロード時にローカルの全サブプロジェクトに展開する autoAggregate メソッドを追加する。
Maven BOM (Bill of Materials) の使用
sbt 2.0 は Maven BOM (Bill of Materials) の使用を追加する。サブプロジェクトは .pomOnly() を使って BOM アーティファクトに依存することができる:
libraryDependencies += ("com.fasterxml.jackson" % "jackson-bom" % "2.21.0").pomOnly()
これらの部品表 (bill of materials) は Resolve.addBom() を経由して Coursier に渡され、(Jackson などの) 特定のライブラリに対するバージョン制限を導入する。"*" を使って無バージョンのライブラリ依存性を宣言することができる:
libraryDependencies += "com.fasterxml.jackson.core" % "jackson-core" % "*"
これによって Coursier に自動的に部品表からのバージョンを穴埋めさせることができる (この場合 "2.21.0")。これは @bitloi により #8675 としてコントリされた。
性能の改善
Adrien Piquerez さんが Scala Center に在籍していたときに、性能改善に関連するコントリをいくつか行った。
- perf: 長生きするオブジェクトの数を削減して、2.0.0-M2 比較で起動を 20% 高速化した by @adpi2 in #7866
- perf:
SettingとInitializeが作成される数を削減した by @adpi2 in #7880 - perf:
Settingsをリファクタリングして、集約キーのインデックス化を最適化した @adpi2 in #7879 - perf:
InfoとBasicAttributeMapのインスタンスを削除した by @adpi2 in #7882
過去の変更点
以下も参照:
sbt 1.x からのマイグレーション
build.sbt DSL の Scala 3.x への移行
念の為書いておくと、sbt 1.x 系 2.x 系のどちらを使ってもScala 2.x および Scala 3.x 両方のプログラムをビルドすることが可能だ。ただし、build.sbt DSL を裏付ける Scala は sbt のバージョンによって決定される。sbt 2.0 では、Scala 3.8.x 系に移行する。
そのため、sbt 2.x 用のカスタムタスクや sbt プラグインを実装する場合、それは Scala 3.x を用いて行われることとなる。Scala 3.x に関する詳細はScala 3.x incompatibility table や Scala 2 with -Xsource:3 なども参照。
// これは -Xsource:3 で Scala 2.12.20 上で動作する
import sbt.{ given, * }
given のインポート
Scala 2.x と 3.x の違いの 1つとして、型クラスのインスタンスの言語スコープへの取り込み方の違いが挙げられる。Scala 2.x では import FooCodec._ と書いたが、Scala 3 は、import FooCodec.given と書く。
// 以下は、sbt 1.x と 2.x の両方で動作する
import sbt.librarymanagement.LibraryManagementCodec.{ given, * }
後置記法の回避
特に ModuleID 関連で、 sbt 0.13 や 1.x のコード例で後置記法を見ることは珍しく無かった:
// BAD
libraryDependencies +=
  "com.github.sbt" % "junit-interface" % "0.13.2" withSources() withJavadoc()
これは、sbt 2.x では起動に失敗する:
-- Error: /private/tmp/foo/build.sbt:9:61 --------------------------------------
9 |  "com.github.sbt" % "junit-interface" % "0.13.2" withSources() withJavadoc()
  |                                                             ^^
  |can't supply unit value with infix notation because nullary method withSources
   in class ModuleIDExtra: (): sbt.librarymanagement.ModuleID takes no arguments;
   use dotted invocation instead: (...).withSources()
これを修正するには、普通の (ピリオドを使った) 関数呼び出しの記法で書く:
// GOOD
libraryDependencies +=
  ("com.github.sbt" % "junit-interface" % "0.13.2").withSources().withJavadoc()
ベア・セッティングの変更点
version := "0.1.0"
scalaVersion := "3.8.4"
settings(...) を介さず、上の例のように build.sbt に直書きされたセッティングをベア・セッティング (bare settings) と呼ぶ。
sbt 1.x において、ベア・セッティングはルートプロジェクトにのみ適用されるセッティングだった。sbt 2.x においては、build.sbt のベア・セッティングは全サブプロジェクトに注入されるコモン・セッティングとして解釈される。
name := "root"         // 全サブプロジェクトの名前が root になる!
publish / skip := true // 全サブプロジェクトがスキップされる!
ルートプロジェクトにのみセッティングを適用させるためには、マルチ・プロジェクトなビルドを定義するか、セッティングを LocalRootProject にスコープ付けさせる:
LocalRootProject / name := "root"
LocalRootProject / publish / skip := true
ThisBuild のマイグレーション
sbt 2.x においては、ベア・セッティングが ThisBuild にスコープ付けされる場面は無くなったはずだ。コモン・セッティングの ThisBuild に対する利点として委譲の振る舞いが、分かりやすくなるということがある。これらのセッティングはプラグインのセッティングと、settings(...) の間に入るため、 Compile / scalacOptions といったセッティングを定義するのに使える。 ThisBuild ではそれは不可能だった。
exportJars の変更点
exportJars のデフォルト値は false から true に変更された。これは getResource("/") や resource.toURI を壊す可能性がある。ビルドでこのロジックが壊れ、NullPointerException や FileSystemNotFoundException が発生する場合は exportJars := false を設定する。古い振る舞いを維持したい場合は exportJars := false をビルドに設定する。この変更は sbt/sbt#7464 によって導入された。ブログ も参照。
キャッシュ・タスクへのマイグレーション
sbt 2.x において、全タスクはデフォルトでキャッシュされる。キャッシュに参加するためには、タスクの戻り型が sjsonnew.JsonFormat の given を提供する必要がある。戻り型に JsonFormat が無い (ParadoxProcessor、ClassLoader、Seq[PathMapping] 等の複合オブジェクトや関数型など) タスクは sbt 2 においてビルドのロード時に失敗する。
given を定義したくない場合、最も簡単なマイグレーション方法はタスクを Def.uncached(...) でラップして sbt 2 がキャッシュをスキップして常に再実行するようにすることだ:
myTask := Def.uncached {
  // シリアライズ不可能な型を返すタスク本体
}
タスクのキャッシュを検討するにあたって、副作用のあるタスクには注意が必要だ。sbt 2 がディスクキャッシュからタスクの結果を復元するとき、タスク本体を再実行せずにキャッシュされた値を返す。副作用 (ファイルの書き込みやマッピングの同期など) はサイレントにスキップされる。タスクが毎回副作用を生じることを意図している場合、Def.uncached(...) でラップして sbt 2 が常に再実行するようにする。
sbt2-compat プラグインは sbt 1.x 上で Def.uncached を互換性 shim (no-op) として提供する。ビルド全体及びタスク単位でのオプトアウトの方法などの詳細は キャッシュ・タスク リファレンスを参照。
IntegrationTest の廃止
IntegrationTest コンフィギュレーションの廃止に対応するためには、別のサブプロジェクトを定義して、普通のテストとして実装するのが推奨される。
スラッシュ構文へのマイグレーション
sbt 1.x は sbt 0.13 スタイル構文とスラッシュ構文の両方をサポートしたきた。2.x で sbt 0.13 構文のサポートが無くなるので、sbt シェルと build.sbt の両方で統一スラッシュ構文を使う:
<project-id> / Config / intask / key
具体的には、test:compile という表記はシェルからは使えなくなる。代わりに Test/compile と書く。build.sbt ファイルの半自動的なマイグレーションには統一スラッシュ構文のための syntactic Scalafix rule 参照。
scalafix --rules=https://gist.githubusercontent.com/eed3si9n/57e83f5330592d968ce49f0d5030d4d5/raw/7f576f16a90e432baa49911c9a66204c354947bb/Sbt0_13BuildSyntax.scala *.sbt project/*.scala
sbt プラグインのクロスビルド
sbt 2.x では、sbt プラグインを Scala 3.x と 2.12.x に対してクロスビルドすると自動的に sbt 1.x 向けと sbt 2.x 向けにクロスビルドするようになっている。
// sbt 2.x を使った場合
lazy val plugin = (projectMatrix in file("plugin"))
  .enablePlugins(SbtPlugin)
  .settings(
    name := "sbt-vimquit",
  )
  .jvmPlatform(scalaVersions = Seq("3.8.4", "2.12.20"))
projectMatrix を使った場合、プラグインを plugin/ のようなサブディレクトリに移動させる必要がある。そうしないと、デフォルトのルートプロジェクトも src/ を拾ってしまうからだ。
sbt 1.x を使った sbt プラグインのクロスビルド
sbt 1.x を使ってクロスビルドする場合 sbt 1.10.2 以降を使う必要がある。
// sbt 1.x を使った場合
lazy val scala212 = "2.12.20"
lazy val scala3 = "3.8.4"
ThisBuild / crossScalaVersions := Seq(scala212, scala3)

lazy val plugin = (project in file("plugin"))
  .enablePlugins(SbtPlugin)
  .settings(
    name := "sbt-vimquit",
    (pluginCrossBuild / sbtVersion) := {
      scalaBinaryVersion.value match {
        case "2.12" => "1.5.8"
        case _      => "2.0.1"
      }
    },
  )
%% の変更点
sbt 2.x において ModuleID の %% 演算子は多プラットフォームに対応するようになった。JVM系のサブプロジェクトは、%% は以前同様に Maven リポジトリにおける (_3 のような) Scala バージョンの接尾辞をエンコードする。
%%% 演算子のマイグレーション
Scala.JS や Scala Native の sbt 2.x の対応ができるようになった場合、%% は (_3 のような) Scala バージョンと (_sjs1 その他の) プラットフォーム接尾辞をエンコードできるようになっている。そのため、%%% は %% に置き換えれるようになるはずだ:
libraryDependencies += "org.scala-js" %% "scalajs-dom" % "2.8.0"
JVM ライブラリが必要な場合は .platform(Platform.jvm) を使う。
target に関する変更
sbt 2.x では、target ディレクトリが単一の target/ ディレクトリに統一され、それぞれのサブプロジェクトがプラットフォーム、Scala バージョン、id をエンコードしたサブディレクトリを作る。scripted test でこの変更点を吸収するために、exists、absent、delete のコマンドは glob式 ** および || をサポートする。
# 変更前
$ absent target/out/jvm/scala-3.3.1/clean-managed/src_managed/foo.txt
$ exists target/out/jvm/scala-3.3.1/clean-managed/src_managed/bar.txt

# 変更後
$ absent target/**/src_managed/foo.txt
$ exists target/**/src_managed/bar.txt

# どちらでも ok
$ exists target/**/proj/src_managed/bar.txt || proj/target/**/src_managed/bar.txt
sbt 1.x では、target.value はプロジェクトルートの target/ ディレクトリを指す。sbt 2.x では代わりに target/out/jvm/scala-<ver>/<project-name> を指す。プラグインのマイグレーション時にこの変更点に注意する必要がある。
CI パイプラインのマイグレーション
CI パイプラインに影響する可能性のある振る舞いの変更点がいくつかある。
コマンドを連続して実行する
コマンドの連続実行はセミコロンで区切られたクォートされた文字列として指定するようになった:
sbt "clean ; compile ; test"
以前は sbt clean compile test と書くことができたが、現在では "Expected whitespace character" というエラーが発生する。
複数のステップを持つ sbt サーバー
CI パイプラインに sbt を実行する複数のステップが含まれている場合、後続のステップは毎回新しい sbt プロセスを起動する代わりに、最初の呼び出しで起動されたサーバーを再利用する。その結果、後続のステップは最初のセッションに渡された環境変数を引き続き使用する。
パイプラインが各セッションに異なる環境変数 (JAVA_OPTS など) を渡すことに依存している場合、全ての sbt 呼び出しで同一になるようにジョブレベルで全ての変数を提供するか、各ステップの後またはステップ間で sbt をシャットダウンする必要がある。
sbt "clean ; compile ; test ; shutdown"
これは sbt を直接実行する場合でも、内部的に sbt を呼び出す sbt-dependency-submission のようなサードパーティーのアクションを通じて実行する場合でも適用される点に注意。
テスト成果物
テスト結果などの出力成果物は target/out 以下のサブディレクトリに保存されるようになったため、テストパブリッシュや成果物のアーカイブに使用されるパスを更新する必要があるかもしれない:
path: target/out/**/test-reports/*.xml
グローバルベースディレクトリの変更
sbt 2.x において、グローバルベースディレクトリはディレクトリ標準に従う。Windows でのデフォルト値は %LOCALAPPDATA%/sbt/2 だ。その他の場合は $XDG_CONFIG_HOME/sbt/2 もしくは $HOME/.config/sbt/2 だ。詳細は sbt リファレンス を参照。
PluginCompat 技法
同じ *.scala ソースを sbt 1.x と 2.x の両方をターゲットとして使うために、例えば src/main/scala-2.12/ と src/main/scala-3/ の両方に PluginCompat という名前のオブジェクトなどの shim を作成することができる。マイグレーション時によく遭遇する API は sbt2-compat プラグインに抽象化されており、手動で shim を作成することを避けるために使用できる。sbt プラグインで使用するには、sbt プラグインの build.sbt に追加する:
addSbtPlugin("com.github.sbt" % "sbt2-compat" % "<version>")
そして共有ソース内で変換メソッドをインポートして使用する:
import sbtcompat.PluginCompat._

// 変換メソッドをここで使用する
sbt2-compat、PluginCompat パターン、及びそれらの使い方の詳細については以下のブログ記事を参照: Migrating sbt plugins to sbt 2 with sbt2-compat plugin。
Classpath 型のマイグレーション
sbt 2.x では Classpath 型が Seq[Attributed[File]] の代わりに Seq[Attributed[xsbti.HashedVirtualFileRef]] のエイリアスに変更された。I/O (クラスパス URL、マッピング、同期、検証) に File や Path を必要とするプラグインはこれらの参照を変換する必要がある。上記のように sbt2-compat を追加してインポートした場合、toNioPaths と toFiles を使う。例:
import sbtcompat.PluginCompat._

myTask := {
  implicit val conv: FileConverter = fileConverter.value
  val paths = toNioPaths((Compile / dependencyClasspath).value)
  val files = toFiles((Compile / dependencyClasspath).value)
  // ...
}
sbt2-compat は共有ソースで使用するための toNioPath、toFile、toFileRefsMapping、Def.uncached その他の便利メソッドも提供する。プラグインが提供する API の最新ドキュメントは sbt2-compat README を参照。
独自の PluginCompat shim の定義
sbt2-compat がカバーしていない sbt 1.x と 2.x 間で壊れた API に対しては、src/main/scala-2.12/PluginCompat.scala と src/main/scala-3/PluginCompat.scala に別々のソースファイルを作成することで独自の PluginCompat shim を定義することができる。例:
// src/main/scala-2.12/PluginCompat.scala

package sbtfoo

import sbt._
import Keys._

object PluginCompat {
  def someSharedMethod(): Unit = ...
}
// src/main/scala-3/PluginCompat.scala

package sbtfoo

import sbt._
import Keys._

object PluginCompat {
  def someSharedMethod(): Unit = ...
}
そして sbt プラグインで独自の PluginCompat shim を使用する:
import sbtfoo.PluginCompat._

myTask := {
  someSharedMethod()
}
このパターンは sbt2-compat と互換性があり、sbt 1.x と 2.x の違いを吸収するために併用することができる。
コンセプト
コマンドの基本
コマンドは、システム・レベルでの sbt の構成要素で、ユーザや IDE とのやり取りを捕捉する。

便宜的に、各コマンドは State => State への関数だと考えることができる。 sbt において状態 (state) は以下を表す。
- ビルド構造 (
build.sbtなど) - ディスク (ソースコード、JAR 成果物など)
そのため、コマンドは通常ビルド構造もしくはディスクを変更する。例えば、set コマンドはセッティングを適用してビルド構造を変更する。
> set name := "foo"
act コマンドは、compile のようなタスクをコマンドに持ち上げる:
> compile
コンパイルはディスクからの読み込みを行い、アウトプットをディスクに書き込むか画面にエラーメッセージを表示する。
コマンドは逐次処理される
状態は 1つしか存在しないものなので、コマンドは 1つづつ実行されるという特徴がある。

一部例外もあるが、基本的にコマンドは逐次実行される。メンタルモデルとしては、コマンドはカフェで注文を受け取るレジ係で、注文の順番に処理が行われると考えることができる。
タスクは並列実行される
前述の通り、act コマンドはタスクをコマンドのレベルに持ち上げる。その際に act コマンドは、集約されたサブプロジェクトにタスクを転送して、独立したタスクを並列実装する。
同様に、セッション起動時に実行される reload コマンドはセッティングを並列に初期化する。

sbt server の役割
sbt server は、コマンドラインもしくは Build Server Protocol と呼ばれるネットワーク API 経由からコマンドを受け取ることができるサービスだ。この機構によって、ビルドユーザと IDE が同一の sbt セッションを共有することができる。
クロスビルド
同じソースファイルの集合から複数のターゲットに対してビルドすることをクロスビルドと呼ぶ。これは、複数の Scala リリースを対象とする Scala クロスビルド、JVM、Scala.JS、Scala Native を対象とするプラットフォーム・クロスビルド、Spark バージョンのような仮想軸を含む。
クロスビルドされたライブラリの使用
複数の Scala バージョンに対してビルドされたライブラリを使うには ModuleID の最初の % を 2重に %% とする。これは、依存性の名前に Scala ABI (アプリケーション・バイナリ・インターフェイス) サフィックスを付随するという sbt への指示となる。具体例を用いて説明すると:
libraryDependencies += "org.typelevel" %% "cats-effect" % "3.5.4"
現行 Scala バージョンが Scala 3.x であるならば、上の例は以下と等価となる:
libraryDependencies += "org.typelevel" % "cats-effect_3" % "3.5.4"
セットアップに関しては、クロスビルドの設定を参照。
歴史的経緯
Scala の初期時代 (Scala 2.9 以前) は、Scala 標準ライブラリがパッチレベルでもバイナリ互換性を保たなかったため、新しい Scala バージョンがリリースされるたびに全ライブラリが、新しい Scala バージョンに対して再リリースされる必要があった。そのため、ライブラリのユーザ側は、自分が使う Scala バージョンに互換の特定のライブラリのバージョンを選ぶ必要があった。
Scala 2.9.x 以降も Scala 標準ライブラリはマイナーレベルでの互換性を持たなかったため、Scala 2.10.x に対してコンパイルされたライブラリは 2.11.x と互換性を持たなかった。
これらの問題の対策として、sbt は以下の特徴を持つクロスビルド機構を開発した:
- 同じソース・ファイルの集合から、複数の Scala バージョンに対してコンパイルできる
- Maven のアーティファクト名に ABI バージョン (
_2.12など) を付随するという慣例を定義した - この機構は Scala.JS その他のプラットフォームもサポートするよう拡張された
Project matrix
sbt 2.x は project matrix を導入して、並列クロスビルドを可能とする。
organization := "com.example"
scalaVersion := "3.8.4"
version      := "0.1.0-SNAPSHOT"

lazy val core = (projectMatrix in file("core"))
  .settings(
    name := "core"
  )
  .jvmPlatform(scalaVersions = Seq("3.8.4", "2.13.18"))
セットアップに関しては、クロスビルドの設定を参照。
sbt クエリ
sbt 2.x はスラッシュ構文を拡張してサブプロジェクトの集約を可能とする:
act ::= [ query / ] [ config / ] [ in-task / ] ( taskKey | settingKey )
言い換えると、sbt クエリはサブプロジェクト軸の新しい書き方だと言える。
サブプロジェクトの参照
サブプロジェクトの参照は、サブプロジェクトを選択するクエリとしてそのまま使える:
上のようなビルドがあるとき、sbt 1.x と同様の構文を使って foo サブプロジェクトのテストを実行できる:
foo/test
... ワイルドカード
... ワイルドカードはどの文字列にもマッチして、他の文字や数字とも組み合わせて、ルートの集約リストを絞り込むことができる。例えば、以下のようにして foo で始まる全サブプロジェクトのテストを実行することができる:
foo.../test
sbt クエリは、直感的に分かりやすそうな * (アスタリスク) でなく、意図的に ... (ドット・ドット・ドット) を採用する。これは * がシェル環境においてワイルドカードとして使われることが多いからだ。そのため、常にクォートで囲む必要があり、また */test をクォートし忘れると src/test のようなディレクトリにマッチしてしまう可能性が高い。
@scalaBinaryVersion パラメータ
@scalaBinaryVersion パラメータは、サブプロジェクトの scalaBinaryVersion セッティングにマッチする。
val toolkitV = "0.5.0"
val toolkit = "org.scala-lang" %% "toolkit" % toolkitV

lazy val foo = projectMatrix
  .settings(
    libraryDependencies += toolkit,
  )
  .jvmPlatform(scalaVersions = Seq("3.8.4", "2.13.18"))

lazy val bar = projectMatrix
  .settings(
    libraryDependencies += toolkit,
  )
  .jvmPlatform(scalaVersions = Seq("3.8.4", "2.13.18"))
例えば、全ての 3.x サブプロジェクトのテストを以下のように実行できる:
...@scalaBinaryVersion=3/test
以下のように、ターミナル上からも使うことができる:
$ sbt ...@scalaBinaryVersion=3/test
[info] entering *experimental* thin client - BEEP WHIRR
[info] terminate the server with `shutdown`
> ...@scalaBinaryVersion=3/test
[info] Passed: Total 0, Failed 0, Errors 0, Passed 0
[info] No tests to run for Test / testQuick
[info] compiling 1 Scala source to /tmp/foo/target/out/jvm/scala-3.6.4/foo/test-backend ...
[info] Passed: Total 0, Failed 0, Errors 0, Passed 0
[info] No tests to run for bar / Test / testQuick
example.ExampleSuite:
  + Scala version 0.003s
[info] Passed: Total 1, Failed 0, Errors 0, Passed 1
projectMatrix を使っていると集約サブプロジェクトの絞り込みが欲しくなる場面が多々あるが、sbt クエリがこれが解決する。
キャッシュ化
sbt 2.0 は、ローカル/リモートの両方で使えるハイブリッドなキャッシュ・システムを導入し、タスク結果をローカルのディスクもしくは、Bazel 互換のリモート・キャッシュにキャッシュ化することができる。 過去のリリースを通じて、sbt は update のキャッシュ、差分コンパイルなど、様々なキャッシュ化を実装してきたが、sbt 2.x のキャッシュはいくつかの理由により、大きな変化となる:
- 自動化。sbt 1.x ではプラグイン作者がタスク実装内でキャッシュ化関数を呼び出す必要があったが、sbt 2.x キャッシュはタスク・マクロに組み込まれているため、自動化されている。
- マシン・ワイド。sbt 2.x のディスク・キャッシュはマシン上の全ビルドから共有されている。
- リモート対応。sbt 2.x では、キャッシュのストレージは独立して設定可能なため、全てのキャッシュ可能なタスクは自動的にリモート・キャッシュに対応している。
キャッシュ化の全体目標は、コード量が増えるにつれて増加していくビルドとテスト時間の成長率を現状よりも平たく抑えることにある。そのため、高速化の比率はコード量などにもよるが、現行のテストに 10分以上かかるようなビルドの場合、5倍から 20倍を狙っていくことも可能となってくる。
キャッシュ化の基本
ビルドプロセスがあたかも (A1, A2, A3, ...) というインプットを受け取り、 (R1, List(O1, O2, O3, ...)) というアウトプットを返す純粋関数であるかのように扱うというのがキャッシュ化の基本的な考えだ。例えば、ソース・ファイルのリストと Scala バージョンを受け取って、*.jar ファイルを生成することができる。もし仮定が成立するなら、同一のインプットに対してはアウトプットの JAR を全員に対してメモ化できる。メモ化された JAR を使うほうが、Scala コンパイルのような実際のタスクを実行するよりも高速であることがこのような技法を使うメリットとなる。
密閉ビルド
「純粋関数としてのビルド」のメンタルモデルとして、ビルド界隈のエンジニアは密閉ビルド (hermetic build)、つまり砂漠の真ん中に置かれたコンテナの中で時計も Internet も無い状態で行われるビルドという用語を使うことがある。そのような状態で JAR ファイルを生成することができれば、その JAR ファイルはどのマシンと共有しても大丈夫なはずだ。何故時計の話が出てきたのだろうか? それは、JAR ファイルが仕様としてタイムスタンプを捕捉するため、毎回少しづつ違った JAR を生成するからだ。これを回避するために、「密閉な」ビルドツールはいつビルドが実行されてもタイムスタンプを 2010-01-01 に上書きする慣習がある。
逆に、不安定なインプットを捕捉してしまったビルドは「密閉性を壊した」、または「非密閉である」という。密閉性が壊れるもう 1つのよくあるパターンは、インプットもしくはアウトプットで絶対パスを捕捉してしまうことだ。時としてはパスはマクロ経由で JAR に入ってしまう事があるので、バイトコードの差を検査しないと発見できないかもしれない。
自動キャッシュ
以下に、自動的キャッシュ化を具体例を用いて解説する:
val someKey = taskKey[String]("something")

someKey := name.value + version.value + "!"
sbt 2.x では、このタスクの結果は、name と version という 2つのセッティングの値に基づいて自動的にキャッシュ化される。最初にこのタスクが実行されたときには、オンサイトで実行され、2回目以降はディスク・キャッシュの値が用いられる:
sbt:demo> show someKey
[info] demo0.1.0-SNAPSHOT!
[success] elapsed time: 0 s, cache 0%, 1 onsite task
sbt:demo> show someKey
[info] demo0.1.0-SNAPSHOT!
[success] elapsed time: 0 s, cache 100%, 1 disk cache hit
キャッシュ化はシリアライゼーション問題と同等に困難だ
キャッシュの自動化に参加するためには、(name や version などの) インプットキーは sjsonnew.HashWriter 型クラスの given、戻り値は sjsonnew.JsonFormat 型クラスの given を提供する必要がある。Contraband を使って sjson-new のコーデックを生成することができる。
生焼け
キャッシュ化タスクの失敗状態を表す言葉があると便利なので定義しよう。
- 焼き過ぎ (overbaking): キャッシュ化タスクに余計な入力
(A1, A2, A3, ...)があることで必要以上に無効化され、過剰な作業が行われる状態であるとき、そのタスクは「焼き過ぎ」だということができる。 - 生焼け (underbaking): キャッシュ化タスクのインプットが不十分で、無効化に失敗し、無効な結果を返す状態であるとき、そのタスクは「生焼け」だということができる。特に、差分コンパイルの局面では、under-compilation という。
例えば、@transient なキーをキャッシュ化タスクに混ぜると、生焼けにつながるリスクがあるということができる。
ファイルのキャッシュ化
ファイル (java.io.File など) のキャッシュ化は特別な配慮を必要とするが、それは技術的に難しいからというよりは、ファイルが関わったときに発生する曖昧さと思い込みによる所が大きい。一言に「ファイル」といっても、実は様々なことを意味する:
- 取り決められた場所からの相対パス
- 現物化された実際のファイル
- コンテンツ・ハッシュ値などの一意的なファイルの証明
厳密には、File はファイルパスのみを指すため、target/a/b.jar というようなファイル名のみを復元すればいい。これは、下流のタスクが target/a/b.jar というファイルがファイル・システムに存在すると思い込んでいた場合失敗してしまう。これを明瞭化しつつ、絶対パスを回避するために、sbt 2.x は 3つのそれぞれの場合に対して別々の型を提供する。
xsbti.VirtualFileRefは、ただの相対パスのみを表すのに用いられ、これは文字列を渡すのと等価だxsbti.VirtualFileは、コンテンツを持つ現物化されたファイルを表し、仮想ファイルもしくはディスク上のファイルであってもいい
しかしながら、密閉ビルドという観点から見ると、ファイルのリストを表すのにどちらも優れていない。ファイル名のみを持っていてもファイルが同一性を保証できないし、ファイルの全コンテンツを持ち回すのは JSON などに使うには非効率的だ。
ここで謎の 3つ目方法、ファイルの一意的な証明が便利になる。HashedVirtualFileRef は、相対パスの他にも SHA-256 コンテンツ・ハッシュとファイル・サイズを追跡する。これは、JSON に簡単にシリアライズできるが、特定のファイルを参照することもできる。
ファイル作成の作用
ファイルを生成するが、VirtualFile を戻り値の型として使わないタスクがたくさんある。例えば、sbt 1.x では compile は Analysis を返し、*.class ファイルの生成は「副作用」として行われる。
キャッシュ化に参加するためには、これらの作用も後に残しておきたいものとして宣言する必要がある。
someKey := {
  val conv = fileConverter.value
  val out: java.nio.file.Path = createFile(...)
  val vf: xsbti.VirtualFile = conv.toVirtualFile(out)
  Def.declareOutput(vf)
  vf: xsbti.HashedVirtualFileRef
}
リモート・キャッシュ
オプションとして、ビルドを拡張してローカルでのディスク・キャッシュの他にリモート・キャッシュも使うことができる。リモート・キャッシュは、複数のマシンがビルドの成果物やアウトプットを共有することでビルドの性能を向上できる。
自分のプロジェクトもしくは会社に 10名ぐらいのメンバーがいると想像してほしい。毎朝、その 10名の書いた変更を git pull で取り込んで、書かれたコードをビルドする必要がある。プロジェクトが順調にいけば、コード量は時間とともに増加していき、一日のうち他人のコードをビルドする時間の割合も増えていく。これは、いずれチーム規模とコード量の制限要因となる。リモート・キャッシュは、CI システムにキャッシュを補給させ自分たちは成果物やタスクのアウトプットをダウンロードできるようにすることでこの傾向を逆転させる。
sbt 2.x は、Bazel 互換の gRPC インターフェイスを実装するため、オープンソース及び商用の複数のバックエンド・システムと統合する。詳細はリモート・キャッシュの設定を参照。
レファレンス
キャッシュ・タスクのレファレンスガイドも参照。
レファレンス
sbt
基本的な導入としては、sbt 入門ガイドの基本タスクをまず読んでみてほしい。
概要
sbt
sbt コマンド 引数
sbt --server
sbt --script-version
説明
sbt は最初は Scala と Java のために作られたシンプルなビルド・ツールだ。sbt はサブプロジェクト、様々な依存性、カスタムタスクなどを宣言することで高速かつ再現性の高いビルドが得られることを保証する。
sbt runner と sbt server
- sbt runner は
sbtという名前のシステム・シェル・スクリプトで、Windows ではsbt.batと呼ばれる。これは、どのバージョンの sbt でも実行することが可能で、これは「sbt という名前のシェル・スクリプト」とも呼ばれる。- sbt 2.x が検知されると、sbt runner は、典型的には GraalVM ネイティブで実装されたクライアント・プログラムである sbtn を用いて、クライアント・モードで実行する。
- sbt runner は sbt ランチャーという、全てのバージョンの sbt を起動できるランチャーを実行する。
- sbt をインストールした場合、インストールされるのは sbt runner だ。
- sbt server は、sbt の本体で、実際のビルドツールだ。
- sbt のバージョンは、それぞれのワーキング・ディレクトリ内にある
project/build.propertiesによって決定される。 - sbt server は、sbtn、ネットワーク API、もしくは独自の sbt シェルのいずれかからコマンドを受け取る。
- sbt のバージョンは、それぞれのワーキング・ディレクトリ内にある
sbt.version=2.0.1
この機構によってビルドを特定のバージョンの sbt に設置することができ、プロジェクトで作業する人全員が、マシンにインストールされた sbt runner に関わらず同一のビルド意味論を共有できるようになる。
このような分割があるため、機能の一部は sbt runner や sbtn のレベルで実装され、その他の機能は sbt server レベルで実装される。
sbt コマンド
sbt には、サブプロジェクトのレベルで動作するタスク (compile など) とビルド定義そのものを操作することも可能な狭義のコマンド (set など) がある。
しかし、act コマンドによってセッティングやタスクもコマンドに持ち上げることが可能なため「sbt シェルに打ち込むことができるもの全て」を広義のコマンドとしても解釈できる。
詳細はコマンドのコンセプトのページを参照。
サブプロジェクト・レベルのタスク
clean生成されたファイル (targetディレクトリ) を削除する。publishpublishToセッティングで指定されたリポジトリにJAR ファイルなどのアーティファクトを公開する。publishLocalJAR ファイルなどのアーティファクトをローカルの Ivy リポジトリに公開する。updateライブラリ依存性の解決と取得を行う。
コンフィギュレーション・レベルのタスク
コンフィギュレーション・レベルのタスクは、コンフィギュレーションに関連付けされたタスクだ。例えば、compile は Compile/compile と等価であり、(Compile コンフィギュレーションで管理される) main のソースコードをコンパイルする。Test/compile は (Test コンフィギュレーションで管理される) テストのソースコードをコンパイルする。Compile コンフィギュレーションのほとんどのタスクはTest コンフィギュレーション内に対応するものがあり、Test/ とプレフィックスを付けることで実行できる。
-
compile(src/main/scalaディレクトリの中の) main のソースをコンパイルする。Test/compileは、 (src/test/scalaディレクトリの中の) テストのソースをコンパイルする。 -
consoleコンパイルされたソース、libディレクトリ内の全ての JAR、マネージ依存性を含んだクラスパスを用いて Scala インタプリタを起動する。sbt へ戻るには、:quit、Ctrl+D (Unix)、もしくは Ctrl+Z (Windows) と打ち込む。同様に、Test/consoleはテストクラスとクラスパスを用いてインタプリタを起動する。 -
docscaladoc を用いてsrc/main/scala/内の Scala ソースの API ドキュメンテーションを生成する。Test/docは、src/test/scala内のソースファイルのための API ドキュメンテーションを生成する。 -
packagesrc/main/resources内のファイルとsrc/main/scalaからコンパイルされたクラスを含む JAR ファイルを作成する。Test/packageは、src/test/resources内のファイルとsrc/test/scalaからコンパイルされたクラスを含む JAR ファイルを作成する。 -
packageDocsrc/main/scala内の Scala ソースより生成された API ドキュメンテーションを含む JAR ファイルを作成する。Test/packageDocは、src/test/scala内のテスト・ソースより生成された API ドキュメンテーションを含む JAR ファイルを作成する。 -
packageSrc全ての main のソースファイルとリソースを含む JAR ファイルを作成する。パッケージはsrc/main/scalaおよびsrc/main/resourcesからの相対パスとなる。同様に、Test/packageSrcはテストソースとリソースをパッケージ化する。 -
run <引数>*サブプロジェクトのメインクラスを sbt と同じ JVM 上から実行する。引数はそのままメインクラスに渡される。 -
runMain <メインクラス> <引数>*サブプロジェクトから指定されたメインクラスを sbt と同じ JVM 上から実行する。引数はそのままメインクラスに渡される。 -
test <test>*Runs the tests specified as arguments (or all tests if no arguments are given) that:- 未だ実行されていない、もしくは
- 前回実行されたときに失敗した、もしくは
- 前に成功してから間接依存ライブラリのいずれかが再コンパイルされた
*は、テスト名のワイルドカードとして解釈される。
-
testFullテストのコンパイル時に検知された全てのテストを実行する。
一般コマンド
shutdownsbt server をシャットダウンして現行の sbt セッションを終了する。exitまたはquit現行の sbt セッションまたはビルドを終了する。また、Ctrl+D (Unix) または Ctrl+Z (Windows) でもシェルを終了できる。help <command>渡されたコマンドの詳細なヘルプを表示する。コマンドが存在しない場合、引数(正規表現として解釈される)に名前または説明が一致するコマンドの詳細ヘルプを一覧表示する。引数が指定されていない場合、主要なコマンドの簡潔な説明を表示する。関連コマンド: tasks、settingsprojects [add|remove <URI>]引数が指定されていない場合は利用可能なプロジェクトを一覧表示し、指定された URI のビルドを追加または削除する。
-
Watch コマンド
~ <command>ソースファイルが変更されるたびに指定されたアクションを実行する。 -
< filename指定されたファイル内のコマンドを実行する。各コマンドは1行ずつ記述する。空行と '#' で始まる行は無視される。 -
A ; BA を実行し、成功したら B を実行する。先頭のセミコロンが必要であることに注意。 -
eval <Scala-expression>渡された Scala 式を評価し、結果と推論された型を返す。システムプロパティの設定、電卓としての使用、プロセスのフォークなどに使用できる。例:> eval System.setProperty("demo", "true") > eval 1+1 > eval "ls -l" !
ビルド定義を管理するコマンド
-
reload [plugins|return]引数が指定されていない場合、ビルドをリロードし、必要に応じてビルド定義やプラグイン定義を再コンパイルする。reload pluginsはカレント・プロジェクトをメタビルドプロジェクト (project/内) に切り替える。ビルド定義を直接操作するのに便利である。例えば、ビルド定義プロジェクトで clean を実行すると、スナップショットの更新とビルド定義の再コンパイルが強制される。reload returnはメインプロジェクトに戻る。 -
set <setting-expression>渡されたセッティング定義を評価して適用する。セッティングは sbt が再起動されるか、ビルドがリロードされるか、別の set コマンドで上書きされるか、session コマンドで削除されるまで有効である。 -
session <command>setコマンドで定義されたセッションセッティングを管理する。プロンプトで設定したセッティングを永続化できる。 -
inspect <setting-key>値、説明、定義スコープ、依存関係、委譲チェーン、関連セッティングなど、セッティングに関する情報を表示する。
sbt runner とランチャー
システムシェルから sbt runner を起動する際、動作に影響を与える様々なシステムプロパティや JVM の追加オプションを指定できる。
sbt の JVM オプションとシステムプロパティ
sbt 起動時に JAVA_OPTS および/または SBT_OPTS 環境変数が定義されている場合、その内容は sbt server を実行する JVM にコマンドライン引数として渡される。
カレントディレクトリに .jvmopts という名前のファイルが存在する場合、sbt 起動時にその内容が JAVA_OPTS に追加される。同様に、.sbtopts および/または /etc/sbt/sbtopts が存在する場合、その内容が SBT_OPTS に追加される。JAVA_OPTS のデフォルト値は -Dfile.encoding=UTF8 である。
JVM のシステムプロパティとコマンドラインオプションは、sbt の引数として直接指定することもできる。-Dkey=val 形式の引数はそのまま JVM に渡され、-J-Xfoo は -Xfoo として渡される。
詳細はsbt --helpも参照。
sbt の JVM ヒープ、permgen、スタックサイズ
permgen やメモリが不足している場合は、他の Java アプリケーションと同様に JVMの設定を調整する必要がある。
例えば、メモリ関連の一般的なオプションは以下の通り:
export SBT_OPTS="-Xmx2048M -Xss2M"
sbt
現行セッションのみで指定したい場合:
sbt -J-Xmx2048M -J-Xss2M
ブートディレクトリ
sbt runner はただの起動スクリプトであり、実際の sbt server、Scala コンパイラ、標準ライブラリはデフォルトで共有ディレクトリ $HOME/.sbt/boot/ にダウンロードされる。
このディレクトリの場所を変更するには、sbt.boot.directory システムプロパティを設定する。相対パスはカレントワーキングディレクトリに対して解決される。プロジェクト間でブートディレクトリを共有したくない場合に便利である。例えば、以下は 0.11 以前のスタイルで project/boot/ にブートディレクトリを配置する:
sbt -Dsbt.boot.directory=project/boot/
グローバルベースディレクトリ
グローバルベースディレクトリは、マシンワイドなセッティングとプラグインを含むディレクトリ。これは、以下の設定により決定される:
-Dsbt.boot.directoryシステムプロパティー$SBT_CONFIG_HOME環境変数- Windows の場合、
%LOCALAPPDATA%/sbt - 非 Windows の場合、
$XDG_CONFIG_HOME/sbt $HOME/.config/sbt
次に、$HOME/.config/sbt/2 というふうに 2 という名前の子ディレクトリが作られる。
ターミナルエンコーディング
ターミナルで使用する文字エンコーディングは、プラットフォームの Java デフォルトエンコーディングと異なる場合がある。その場合、file.encoding=<encoding> システムプロパティを指定する必要がある。例:
export JAVA_OPTS="-Dfile.encoding=Cp1252"
sbt
HTTP/HTTPS/FTP プロキシ
Unix では、sbt は標準の http_proxy、https_proxy、ftp_proxy 環境変数からHTTP、HTTPS、FTP のプロキシ設定を取得する。認証が必要なプロキシの内側にいる場合、sbt 起動時に追加のフラグを渡す必要がある。詳細はJVM ネットワーキングシステムプロパティを参照。
例:
sbt -Dhttp.proxyUser=username -Dhttp.proxyPassword=mypassword
Windows では、スクリプトでプロキシホスト、ポート、必要に応じてユーザー名とパスワードのプロパティを設定する。例えば HTTP の場合:
sbt -Dhttp.proxyHost=myproxy -Dhttp.proxyPort=8080 -Dhttp.proxyUser=username -Dhttp.proxyPassword=mypassword
上記のコマンドラインで http を https または ftp に置き換えて HTTPS または FTP を設定する。
その他のシステムプロパティ
以下のシステムプロパティも sbt runner に渡すことができる:
-Dsbt.banner=true
新機能を宣伝するウェルカムバナーを表示する。
-Dsbt.ci=true
デフォルトは false(環境変数 BUILD_NUMBER が設定されている場合を除く)。CI 環境用。supershell とカラー出力を抑制する。
-Dsbt.client=true
sbt クライアントを実行する。
-Dsbt.color=auto
- カラーを有効にするには
alwaysまたはtrueを使用する。 - カラーを無効にするには
neverまたはfalseを使用する。 - 出力がカラーをサポートするターミナル(パイプではない)の場合にカラーを使用するには
autoを使用する。
-Dsbt.coursier.home=$HOME/.cache/coursier/v1
Coursier アーティファクトキャッシュの場所。デフォルトはCoursier キャッシュ解決ロジックで定義される。値は csrCacheDirectory コマンドで確認できる。
-Dsbt.genbuildprops=true
存在しない場合に build.properties を生成する。未設定の場合、sbt.skip.version.write に委譲される。
-Dsbt.override.build.repos=true
true の場合、ビルド定義で設定されたリポジトリは無視され、ランチャー用に設定されたリポジトリが代わりに使用される。
-Dsbt.repository.config=$HOME/.sbt/repositories
ランチャーが使用するリポジトリを含むファイル。フォーマットは sbt ランチャー設定ファイルの [repositories] セクションと同じである。この設定は通常 sbt.override.build.repos を true に設定することと併用される。
sbt update
基本的な導入としては、入門ガイドのライブラリ依存性の基礎をまずは読んでみてほしい。
概要
sbt [query / ] update
説明
sbt は Coursier を使ってライブラリ管理(他エコシステムではパッケージマネージャーとも呼ばれる)を実装している。ライブラリ管理の一般的な考え方は、
- 指定リポジトリにそのバージョンが存在するか確認する
- 間接依存ライブラリ(つまり、ライブラリが使用しているライブラリ)を検索する
- バージョン競合があれば解決を試みる
- リポジトリから JAR ファイルなどのアーティファクトをダウンロードする
ライブラリ依存性
ライブラリ依存性の宣言は以下のようになる:
libraryDependencies += groupID %% artifactID % revision
または
libraryDependencies += groupID %% artifactID % revision % configuration
複数のライブラリ依存性をまとめて宣言することもできる:
libraryDependencies ++= Seq(
  groupID %% artifactID % revision,
  groupID %% otherID % otherRevision
)
sbt でビルドされたライブラリ依存性を使用する場合、最初の % を %% にする:
libraryDependencies += groupID %% artifactID % revision
これにより、現在使用している Scala のバージョンでビルドされたライブラリ依存性に正しい JAR が使用される。この種のライブラリ依存性の解決中にエラーが発生した場合、そのライブラリ依存性は使用している Scala のバージョン用に公開されていない可能性がある。詳細はクロスビルドを参照。
versionScheme と eviction エラー
sbt では、ライブラリ作者が versionScheme セッティングを使ってバージョン意味論を宣言できる:
// 0.x および 1.x、2.x などにセマンティックバージョニングを適用
versionScheme := Some(VersionScheme.EarlySemVer)
Coursier がライブラリの複数バージョン(例えば Cats Effect 2.x と Cats Effect 3.0.0-M4)を検出すると、グラフから古いバージョンを削除して競合を解決することが多い。このプロセスは eviction(退去)と呼ばれ、「Cats Effect 2.2.0 evict された」のように表現される。
新しいバージョンが Cats Effect 2.2.0 とバイナリ互換性がある場合は問題ない。今回のケースでは、ライブラリ作者がバイナリ互換性がないと宣言しているため、eviction は実際には安全ではない。 安全でない eviction は ClassNotFoundException などのランタイム問題を引き起こすため、Coursier は解決に失敗すべきだった。
lazy val use = project
  .settings(
    name := "use",
    libraryDependencies ++= Seq(
      "org.http4s" %% "http4s-blaze-server" % "0.21.11",
      "org.typelevel" %% "cats-effect" % "3.0.0-M4",
    ),
  )
sbt は Coursier が候補を返した後に、この二次互換性チェックを行う:
[error] stack trace is suppressed; run last use / update for the full output
[error] (use / update) found version conflict(s) in library dependencies; some are suspected to be binary incompatible:
[error]
[error]   * org.typelevel:cats-effect_2.12:3.0.0-M4 (early-semver) is selected over {2.2.0, 2.0.0, 2.0.0, 2.2.0}
[error]       +- use:use_2.12:0.1.0-SNAPSHOT                        (depends on 3.0.0-M4)
[error]       +- org.http4s:http4s-core_2.12:0.21.11                (depends on 2.2.0)
[error]       +- io.chrisdavenport:vault_2.12:2.0.0                 (depends on 2.0.0)
[error]       +- io.chrisdavenport:unique_2.12:2.0.0                (depends on 2.0.0)
[error]       +- co.fs2:fs2-core_2.12:2.4.5                         (depends on 2.2.0)
[error]
[error]
[error] this can be overridden using libraryDependencySchemes or evictionErrorLevel
この機構は eviction エラー と呼ばれる。
eviction エラーを無効にする
ライブラリ作者が互換性の破壊を宣言している場合でも、厳格なチェックを無視したい場合(scala-xml でよくある)は、project/plugins.sbt と build.sbt に以下を記述する:
libraryDependencySchemes += "org.scala-lang.modules" %% "scala-xml" % VersionScheme.Always
全ての eviction エラーを無視するには:
evictionErrorLevel := Level.Info
リゾルバ
sbt はデフォルトで標準の Maven Central リポジトリを使用する。追加のリポジトリは以下の形式で宣言する:
resolvers += name at location
例:
libraryDependencies ++= Seq(
    "org.apache.derby" % "derby" % "10.4.1.3",
    "org.specs" % "specs" % "1.6.1"
)

resolvers += "Sonatype OSS Snapshots" at "https://oss.sonatype.org/content/repositories/snapshots"
リポジトリとして追加すれば、sbt はローカルの Maven リポジトリを検索できる:
resolvers += Resolver.mavenLocal
デフォルトのリゾルバを上書きする
resolvers は追加のインラインユーザーリゾルバを設定する。デフォルトでは、sbt はこれらのリゾルバとデフォルトリポジトリ(Maven Central とローカル Ivy リポジトリ)を組み合わせて externalResolvers を形成する。リポジトリをより細かく制御するには、externalResolvers を直接設定する。通常のデフォルトに加えてリポジトリを指定するだけの場合は、resolvers を設定する。
例えば、デフォルトのリポジトリに加えて Sonatype OSS Snapshots リポジトリを使用するには、
resolvers += "Sonatype OSS Snapshots" at "https://oss.sonatype.org/content/repositories/snapshots"
ローカルリポジトリを使用し、Maven Central は使用しない場合:
externalResolvers := Resolver.combineDefaultResolvers(resolvers.value.toVector, mavenCentral = false)
全てのビルドのリゾルバを上書きする
sbt、Scala、プラグイン、アプリケーションのライブラリ依存依存性の取得に使用するリポジトリは、グローバルに設定し、ビルドまたはプラグイン定義で設定されたリゾルバを上書きするように宣言できる。以下の 2つの手順を踏む:
- ランチャー用のリポジトリを定義する。
- これらのリポジトリがビルド定義のリポジトリを上書きすることを指定する。
ランチャーが使用するリポジトリは、~/.sbt/repositories を定義することで上書きできる。このファイルには Launcher 設定ファイルと同じ形式の [repositories] セクションを含める必要がある。例:
[repositories]
local
my-maven-repo: https://example.org/repo
my-ivy-repo: https://example.org/ivy-repo/, [organization]/[module]/[revision]/[type]s/[artifact](-[classifier]).[ext]
リポジトリファイルの別の場所は、sbt 起動スクリプトの sbt.repository.config システムプロパティで指定できる。最後に、ライブラリ依存性の解決と取得にこれらのリポジトリを使用するには、sbt.override.build.repos を true に設定する。
間接依存ライブラリを除外する
特定のケースでは、間接依存ライブラリを全てのライブラリ依存性から除外する必要がある。excludeDependencies で ExclusionRules を設定することで実現できる。
excludeDependencies ++= Seq(
  // commons-logging は jcl-over-slf4j で置き換えられる
  ExclusionRule("commons-logging", "commons-logging")
)
ライブラリ依存性の特定の間接依存ライブラリを除外するには、excludeAll または exclude メソッドを使用する。プロジェクト用の POM を公開する場合は exclude メソッドを使用する。除外するには組織名とモジュール名が必要である。例:
libraryDependencies +=
  ("log4j" % "log4j" % "1.2.15").exclude("javax.jms", "jms")
明示的な URL
プロジェクトにリポジトリに存在しないライブラリ依存性が必要な場合、その jar への直接 URL を以下のように指定できる:
libraryDependencies += "slinky" % "slinky" % "2.1" from "https://slinky2.googlecode.com/svn/artifacts/2.1/slinky.jar"
URL は、設定されたリポジトリでライブラリ依存性が見つからない場合のフォールバックとしてのみ使用される。また、明示的な URL は公開メタデータ(pom や ivy.xml)には含まれない。
推移性を無効にする
デフォルトでは、これらの宣言は全てのプロジェクトライブラリ依存性を推移的に取得する。場合によっては、プロジェクトにリストされたライブラリ依存性がビルドに不要なことがある。例えば、Felix OSGI フレームワークを使用するプロジェクトでは、コンパイルと実行にメイン jar のみが明示的に必要である。この例のように intransitive() またはnotTransitive() でアーティファクトのライブラリ依存性の取得を避ける:
libraryDependencies += ("org.apache.felix" % "org.apache.felix.framework" % "1.8.0").intransitive()
クラシファイア
classifier メソッドでライブラリ依存性のクラシファイアを指定できる。例えば、TestNG の jdk15 バージョンを取得するには:
libraryDependencies += ("org.testng" % "testng" % "5.7").classifier("jdk15")
複数のクラシファイアには、複数回 classifier を呼び出す:
libraryDependencies +=
  "org.lwjgl.lwjgl" % "lwjgl-platform" % lwjglVersion classifier "natives-windows" classifier "natives-linux" classifier "natives-osx"
全てのライブラリ依存性の特定クラシファイアを推移的に取得するには、updateClassifiers タスクを実行する。デフォルトでは、sources または javadoc クラシファイアを持つ全アーティファクトを解決する。取得するクラシファイアは transitiveClassifiers セッティングで選択する。例えば、ソースのみを取得するには:
transitiveClassifiers := Seq("sources")
ソースのダウンロード
ソースと API ドキュメントの JAR ファイルのダウンロードは通常 IDE プラグインが行う。これらのプラグインは updateClassifiers と updateSbtClassifiers タスクを使用し、これらの JAR を参照する UpdateReport を生成する。
IDE プラグインを使わずに sbt にライブラリ依存性のソースをダウンロードさせるには、ライブラリ依存性の定義に withSources() を追加する。API JAR をダウンロードするには withJavadoc() を追加する。例:
libraryDependencies +=
  ("org.apache.felix" % "org.apache.felix.framework" % "1.8.0").withSources().withJavadoc()
これは推移的ではないことに注意。その場合は update*Classifiers タスクを使用する。
sbt dependencyTree
概要
sbt dependencyTree [サブコマンド] [オプション]
sbt dependencyTree list [オプション]
sbt dependencyTree graph [オプション]
sbt dependencyTree html [オプション]
sbt dependencyTree html-graph [オプション]
sbt dependencyTree json [オプション]
sbt dependencyTree xml [オプション]
sbt dependencyTree stats [オプション]
説明
dependencyTree タスクは、プロジェクトの依存関係グラフを様々な形式で表示し、間接依存ライブラリの可視化と分析を支援する。このタスクは、sbt 1.4.0 で Johannes Rudolph さん作の sbt-dependency-graph より取り込まれたDependencyTreePlugin により提供される。なお、グラフの生成時にライブラリ依存性が解決されるため、実行時にダウンロードが発生する場合がある。
使用方法
sbt シェルから実行する。デフォルトのサブコマンドは tree で、ASCII ツリーを表示する。
サブコマンド
tree(デフォルト): ライブラリ依存性の ASCII ツリーを表示し、階層関係を示す。概要の把握に便利。list: 全てのライブラリ依存性を1行ずつフラットなリストで表示する。スクリプトや grep に適している。graph/dot: 可視化用の GraphViz DOT ファイルを出力する。互換性のためdotエイリアスが提供されている。html: 依存関係グラフをテキストで描画したスタンドアロン HTML ページを作成する。html-graph: GraphViz 図を埋め込んだ HTML ページを作成する(システムに GraphViz のインストールが必要)。json: ライブラリ依存性を JSON 形式で出力する。プログラムでの利用に適した構造である。xml: ライブラリ依存性を GraphML 形式で出力する。グラフ解析ツールに適している。stats: ライブラリ依存性の総数やバージョン数などの要約統計を表示する。help: 使用ヘルプを表示する(引数なしでdependencyTreeを実行した場合と同様)。
オプション
--quiet: コンソール出力を抑制し、タスク値として結果を返す(他タスクでの利用など)。--out <ファイル>: 標準出力の代わりに指定ファイルへ出力する。ファイル拡張子でデフォルトのサブコマンドが決まる:.txt:tree.dot:graph.html:html.json:json.xml:xml
--browse: 出力ファイルをデフォルトブラウザで自動的に開く(graphまたはhtmlサブコマンドでのみ動作)。
例
ASCII ツリー(デフォルト)
ライブラリ依存性の階層ビューを表示する。[S] は Scala ライブラリ依存性を示す。
> Compile/dependencyTree
[info] default:example_3:0.1.0-SNAPSHOT
[info]   +-org.scala-lang:scala3-library_3:3.3.1 [S]
[info]   +-com.example:library_3:1.0.0
[info]     +-org.typelevel:cats-core_3:2.9.0
[info]     | +-org.typelevel:cats-kernel_3:2.9.0
[info]     |   +-org.scala-lang:scala3-library_3:3.1.3 (evicted by: 3.3.1)
[info]     +-org.typelevel:cats-effect_3:3.4.0
Evicted されたライブラリ依存性(新しいバージョンで置き換えられた古いバージョン)は括弧内に表示される。
ライブラリ依存性の一覧
> Compile/dependencyTree list
org.scala-lang:scala3-library_3:3.3.1
com.example:library_3:1.0.0
org.typelevel:cats-core_3:2.9.0
org.typelevel:cats-kernel_3:2.9.0
org.typelevel:cats-effect_3:3.4.0
GraphViz DOT ファイル
グラフ描画用の DOT ファイルを生成する(例: dot コマンドで使用)。
> Compile/dependencyTree graph --out dependencies.dot
dependencies.dot の内容:
digraph "dependency-graph" {
    graph[rankdir="LR"; splines=polyline]
    edge [arrowtail="none"]
    "default:example_3:0.1.0-SNAPSHOT" -> "org.scala-lang:scala3-library_3:3.3.1"
    "default:example_3:0.1.0-SNAPSHOT" -> "com.example:library_3:1.0.0"
    "com.example:library_3:1.0.0" -> "org.typelevel:cats-core_3:2.9.0"
    // ... more edges
}
PNG に変換: dot -Tpng dependencies.dot -o dependencies.png
HTML 出力
> Compile/dependencyTree html --out deps.html --browse
テキストベースのグラフを含む deps.html を作成し、ブラウザで開く。
グラフ埋め込み HTML
> Compile/dependencyTree html-graph --browse
GraphViz のインストールが必要。HTML に視覚的なグラフを埋め込む。
JSON 出力
> Compile/dependencyTree json --out deps.json
出力例:
{
  "organization": "default",
  "name": "example_3",
  "version": "0.1.0-SNAPSHOT",
  "dependencies": [
    {
      "organization": "org.scala-lang",
      "name": "scala3-library_3",
      "version": "3.3.1",
      "configurations": ["compile"],
      "evicted": false
    },
    // ... more
  ]
}
XML (GraphML) 出力
> Compile/dependencyTree xml --out deps.graphml
yEd などのグラフ可視化ツールへのインポートに適している。
統計
> Compile/dependencyTree stats
Total dependencies: 15
Unique organizations: 5
Versions: 10 distinct
Evictions: 2
設定キー
build.sbt で以下の設定により動作をカスタマイズできる:
dependencyTreeIncludeScalaLibrary := true: 出力に Scala ライブラリ依存性を含める(デフォルト:false)。dependencyDotNodeColors := false: DOT ノードラベルの色を無効にする(デフォルト:true)。dependencyDotNodeLabel := (org: String, name: String, version: String) => s"$org:$name:$version": DOT ノードラベルをカスタマイズする。dependencyDotHeader := """digraph "custom" { rankdir="TB"; }""": カスタム DOT ヘッダーを設定する。
関連タスク
whatDependsOn <モジュール>: 特定のモジュールに依存しているものを表示する(例:whatDependsOn org.example:lib:1.0)。dependencyLicenseInfo: ライブラリ依存性のライセンス情報を表示する。
スコープ
Compile と Test コンフィギュレーションで利用可能。必要に応じて Global/ でクロスコンフィギュレーション表示を行う。
sbt compile
概要
sbt [query / ] compile
sbt [query / ] Test / compile
説明
compile タスクは、選択されたサブプロジェクトとそのサブプロジェクト依存関係をコンパイルする。sbt 2.x 以降、コンパイルされたアーティファクトは自動的にキャッシュされる。
生の Scala コンパイラでの Scala コードのコンパイルは遅いため、sbt の開発努力の相当部分はコンパイル高速化の様々な戦略に費やされている。
コンパイラ再起動のオーバーヘッドを削減
sbt server はバックグラウンドで稼働し続け、Scala のコンパイルが同じ Java 仮想マシン (JVM) 上で実行される。JVM を「温まった」状態に保つことでコンパイルが大幅に高速化される。コンパイラのクラスロードと Just-in-Time コンパイラによる最適化に時間がかかるためである。
差分コンパイル
任意のソース A.scala が変更されると、sbt は A.scala の変更に伴って再コンパイルされる他のソースファイルを最小限に抑えるよう努める。言語構成要素間の依存関係を追跡し、必要なソースのみを再コンパイルするこのプロセスは差分コンパイルと呼ばれる。
(リモート)キャッシュ
sbt 2.x では、コンパイルされたアーティファクトはセッションやビルド間でキャッシュされるだけでなく、Bazel 互換のリモートキャッシュを使って異なるマシン間でオプションとしてキャッシュすることもできる。詳細はキャッシュ化を参照。
Test / compile
Test / compile のようにコンフィギュレーションで compile タスクをスコープ付けすると、テストソースとそのソース依存関係をコンパイルする。
コンパイル設定
scalaVersion
コンパイルに使用する Scala のバージョン。
scalaVersion := "3.8.4"
scalacOptions
Scala コンパイラのオプション。
Compile / scalacOptions += "-Werror"
javacOptions
Java コンパイラのオプション。
Compile / javacOptions ++= List("-Xlint", "-Xlint:-serial")
sbt run
概要
sbt [query / ] run [args]
説明
run タスクはユーザープログラムを実行する手段を提供する。
sbt 1.x 以前では、run タスクはユーザープログラムを sbt server と同じ Java 仮想マシン (JVM) 上で実行していた。sbt 2.x ではクライアントサイド runを実装している。run タスクはプログラムを含むサンドボックス環境を作成し、情報を sbtn に送り返す。ユーザープログラムは、sbtn が起動する新しい JVM 内で実行されるという仕組みだ。
特長
クライアントサイド run にはいくつかの特長がある。
- sys.exit のサポート。ユーザーコードは
sys.exitを呼び出せる。通常これは JVM をシャットダウンする。sbt 1.x では、JDK の SecurityManager を使ってこれらのsys.exit呼び出しをトラップし、runが sbt セッションをシャットダウンするのを防ぐ必要があった。しかし JDK 17 で SecurityManager が非推奨になったため、TrapExit は sbt 1.6.0 (2021) で削除された。クライアントサイド run はユーザープログラムを専用の JVM で実行するため、sys.exitを呼び出せる。 - 分離。ユーザーコードはスレッドを開始したり、main メソッドが戻った後も動作し続けるリソースを割り当てたりできる。別の JVM でユーザーコードを実行することで、sbt server とユーザーコードの間の分離が得られる。
- sbt server の可用性。プログラムは sbt server の外で実行されるため、テストや IDE 連携など、他のクライアントからのより多くのリクエストに対応できる。
sbt test
概要
sbt [query / ] test [testname1 testname2] [ -- options ]
説明
test タスクはテストのコンパイルと実行の手段を提供する。
sbt 2.x の test タスクの特長:
- サブプロジェクトの並列化。クエリで指定された関連サブプロジェクトのコンパイルを並列で実行する。
- テストスイートの並列化。検出されたテストスイートをタスクにマッピングし、並列で実行する。
- 差分テスト。前回失敗したテスト、未実行のテスト、または sbt がテストやその依存関係の変更を検出した場合のみ実行する。
- キャッシュ。テスト結果はマシン全体でキャッシュされ、オプションでリモートキャッシュも可能。
テスト用の標準ソース配置は以下の通り:
src/test/scala/内の Scala ソースsrc/test/java/内の Java ソースsrc/test/resources/内のテストクラスパス用リソース
リソースは java.lang.Class または java.lang.ClassLoader の getResource メソッドでテストからアクセスできる。
テストインターフェース
sbt は JVM ベースのテストフレームワーク用の共通インターフェースを定義し、テストスイートの自動検出と並列実行を可能にする。デフォルトで sbt は MUnit、ScalaTest、Hedgehog、ScalaCheck、Specs2、Weaver、ZIO Test、JUnit 4 と連携する。テストフレームワークをクラスパスに追加するだけで sbt で利用できる。例えば MUnit は libraryDependency として宣言して使用する:
lazy val munit = "org.scalameta" %% "munit" % "1.2.0"

libraryDependencies += munit % Test
上記では、Test は Test コンフィギュレーションを表し、MUnit はテストクラスパスにのみ含まれ、main ソースでは不要であることを意味する。
JUnit
JUnit 5 のサポートは sbt-jupiter-interface にて提供される。プロジェクトに JUnit Jupiter サポートを追加するには、プロジェクトのメイン build.sbt に jupiter-interface のライブラリ依存性を追加する。
libraryDependencies += "com.github.sbt.junit" % "jupiter-interface" % "0.15.1" % Test
project/plugins.sbt に sbt-jupiter-interface プラグインを追加する:
addSbtPlugin("com.github.sbt.junit" % "sbt-jupiter-interface" % "0.15.1")
JUnit 4 のサポートは junit-interface にて提供される。プロジェクトのメイン build.sbt に junit-interface のライブラリ依存性を追加する。
libraryDependencies += "com.github.sbt" % "junit-interface" % "0.13.3" % Test
テストフィルタリング
sbt 2.x では、test タスクは実行するテスト名の空白区切りリストを受け付ける。例:
> test example.ExampleSuite example.ExampleSuite2
出力例:
> test example.ExampleSuite example.ExampleSuite2
[info] compiling 1 Scala source to /tmp/foo/target/out/jvm/scala-3.7.2/foo/backend ...
[info] compiling 2 Scala sources to /tmp/foo/target/out/jvm/scala-3.7.2/foo/test-backend ...
example.ExampleSuite:
  + addition 0.003s
example.ExampleSuite2:
  + subtraction 0.003s
[info] Passed: Total 2, Failed 0, Errors 0, Passed 2
[success] elapsed time: 3 s, cache 49%, 25 disk cache hits, 26 onsite tasks
ワイルドカードもサポートする:
> test *Example*
差分テスト
明示的なフィルタに加え、test タスクは以下のいずれかの条件を満たすテストのみを実行する:
- 前回失敗したテスト
- 以前実行されていなかったテスト
- 1つ以上の間接依存ライブラリが、別のプロジェクトにある場合も含め、再コンパイルされたテスト。
フルテスト
sbt 1.x のようにキャッシュなしのフルテストを実行するには、testFull タスクを使用する。
その他のタスク
main ソースで利用可能なタスクは、テストソースでも利用可能である。コマンドラインでは Test / をプレフィックスとして付け、Scala コードでも Test / で参照する。これらのタスクには以下が含まれる:
Test / compileTest / consoleTest / consoleQuickTest / runTest / runMain
これらのタスクの詳細はsbt runを参照。
出力
デフォルトでは、各テストソースファイルのログはそのファイルの全テストが完了するまでバッファリングされる。logBuffered を設定することで無効にできる:
Test / logBuffered := false
テストレポート
デフォルトでは、sbt はビルド内の全テストの JUnit XML テストレポートをプロジェクトの target/test-reports ディレクトリに生成する。JUnitXmlReportPlugin を無効にすることで無効にできる。
val myProject = (project in file(".")).disablePlugins(plugins.JUnitXmlReportPlugin)
オプション
テストフレームワークの引数
テストフレームワークへの引数は、-- 区切りに続けて test タスクのコマンドラインで指定できる。例:
> test org.example.MyTest -- -verbosity 1
ビルドの一部としてテストフレームワークの引数を指定するには、Tests.Argument で構築したオプションを追加する:
Test / testOptions += Tests.Argument("-verbosity", "1")
特定のテストフレームワーク用にのみ指定する場合:
Test / testOptions += Tests.Argument(TestFrameworks.ScalaCheck, "-verbosity", "1")
セットアップとクリーンアップ
Tests.Setup と Tests.Cleanup でセットアップとクリーンアップのアクションを指定する。() => Unit 型と ClassLoader => Unit 型の両方の関数を受け付ける。ClassLoader を受け取るバリアントには、テスト実行に使用される(または使用されていた)クラスローダーが渡される。テストクラスとテストフレームワーククラスにアクセスできる。
例:
Test / testOptions += Tests.Setup( () => println("Setup") )
Test / testOptions += Tests.Cleanup( () => println("Cleanup") )
Test / testOptions += Tests.Setup( loader => ... )
Test / testOptions += Tests.Cleanup( loader => ... )
テストスイートの並列実行を無効にする
デフォルトでは、sbt は全タスクを sbt 自身と同じ JVM 内で並列実行する。各テストスイートはタスクにマッピングされるため、テストもデフォルトで並列実行される。特定のプロジェクト内のテストを直列実行するには:
Test / parallelExecution := false
異なるプロジェクトのテストは依然として並行実行される場合がある。
クラスのフィルタ
名前が "Test" で終わるテストクラスのみを実行するには、Tests.Filter を使用する:
Test / testOptions := Seq(Tests.Filter(s => s.endsWith("Test")))
テストのフォーク
設定:
Test / fork := true
全てのテストを単一の外部 JVM で実行することを指定する。
テストを JVM に割り当てる方法や渡すオプションの詳細は、testGrouping キーで制御できる。
同時に実行できるフォーク JVM の最大数は、Tags.ForkedTestGroup タグの制限で制御する(デフォルトは 1)。グループがフォークされる場合、Setup と Cleanup アクションには実際のテストクラスローダーを渡せない。
sbt inspect
概要
sbt inspect [subproject / ] [ config / ] task
sbt inspect actual [subproject / ] [ config / ] task
sbt inspect tree [subproject / ] [ config / ] task
説明
inspect コマンドはタスクとセッティングのグラフを調査する手段を提供する。例えば、別のタスクに影響を与えるためにどのセッティングを変更すべきか判断するのに使える。
値、説明、提供元
inspect が提供する最初の情報は、タスクの型またはセッティングの値と型である。
例:
$ sbt inspect libraryDependencies
[info] Setting: interface scala.collection.immutable.Seq =
  List(org.scala-lang:scala3-library:3.7.2,
       org.typelevel:toolkit:0.1.29,
       org.typelevel:toolkit-test:0.1.29:test)
[info] Description:
[info]  Declares managed dependencies.
[info] Provided by:
[info]  ProjectRef(uri("file:/tmp/aaa/"), "aaa") / libraryDependencies
....
出力の次のセクションは「Provided by」とラベル付けされる。セッティングが定義されている実際のスコープを示す。
libraryDependencies がカレント・プロジェクト(ProjectRef(uri("file:/tmp/aaa/"), "aaa"))で定義されていることを示す。
関連セッティング
inspect 出力の「Related」セクションは、キーの全ての定義を一覧表示する。例:
> inspect compile
...
[info] Related:
[info]  Test / compile
要求された Compile / compile タスクに加え、Test / compile タスクも存在することを示す。
セッティング依存性
順方向セッティング依存性は、セッティング(またはタスク)の定義に使用される他のセッティング(またはタスク)を示す。逆方向セッティング依存性は逆方向に、どの設定が与えられたセッティングを使用するかを示す。inspect は指定セッティング依存性または実効セッティング依存性に基づいてこの情報を提供する。指定セッティング依存性はセッティングが直接指定するものである。実効セッティングはそれらの依存関係が解決された結果である。この区別は以下のセクションで詳しく説明する。
指定セッティング依存性
例として、console を見てみる:
$ sbt inspect console
...
[info] Dependencies:
[info]  Compile / console / initialCommands
[info]  Compile / console / compilers
[info]  Compile / state
[info]  Compile / console / cleanupCommands
[info]  Compile / console / taskTemporaryDirectory
[info]  Compile / console / scalaInstance
[info]  Compile / console / scalacOptions
[info]  Compile / console / fullClasspath
[info]  Compile / fileConverter
[info]  Compile / console / streams

...
console タスクへの入力が表示される。クラスパスとオプションは Compile / console / fullClasspath と Compile / console / scalacOptions から取得されることが分かる。inspect コマンドの情報により、変更すべきセッティングを見つけるのに役立つ。console や fullClasspath などのキーの慣例では、Scala 識別子はキャメルケース、文字列表現は小文字でハイフン区切りである。コンフィギュレーションの Scala 識別子は compile や test などのタスクと区別するため大文字である。例えば、前の例から Scala インタプリタ起動時に実行するコードの追加方法を推測できる:
> set Compile / console / initialCommands := "import mypackage._"
> console
...
import mypackage._
...
inspect は console が Compile / console / initialCommands セッティングを使用していることを示した。initialCommands 文字列を Scala 識別子に変換すると initialCommands になる。compile は main ソース用であることを示す。console / はセッティングが console 専用であることを示す。このため、consoleQuick タスクに影響を与えずに console タスクの初期コマンドを設定できる。
実効セッティング依存性
inspect actual <スコープ付きキー> は使用される実効セッティング依存性を表示する。委譲により依存関係が指定されたスコープ以外から来る可能性があるため有用である。inspect actual を使うと、どのスコープがセッティングに値を提供しているか正確に分かる。inspect actual と通常の inspect を組み合わせると、セッティングに影響するスコープの範囲が分かる。上記の例に戻ると、
$ sbt inspect actual console
...
[info] Dependencies:
[info]  Compile / console / streams
[info]  Global / taskTemporaryDirectory
[info]  scalaInstance
[info]  Compile / scalacOptions
[info]  Global / initialCommands
[info]  Global / cleanupCommands
[info]  Compile / fullClasspath
[info]  console / compilers
...
initialCommands はグローバルスコープ(Global)から来ていることが分かる。これを inspect console の関連出力と組み合わせると:
Compile / console / initialCommands
この例から分かるのは initialCommands セッティングは、グローバルスコープを使って全域スコープ付けしたり、カレント・プロジェクトの console タスクスコープのように狭くスコープ付けしたり、またはその間の任意のスコープで設定できるということだ。例えば、プロジェクト全体で initialCommands を設定すると console に影響する:
> set initialCommands := "import mypackage._"
...
ここで設定したい理由は、他の console 系タスクもこの値を使用するようになるためである。inspect actual の逆方向セッティング依存性の出力を見ると、どのタスクが新しいセッティングを使用するか分かる:
$ sbt inspect actual Global/initialCommands
...
[info] Reverse dependencies:
[info]  Compile / console
[info]  consoleProject
[info]  Test / console
[info]  Test / consoleQuick
[info]  Compile / consoleQuick
...
プロジェクトで initialCommands を設定すると、そのプロジェクトの全コンフィギュレーションの全 console 系タスクに影響する例をみた。プロジェクトのクラスパスが利用できない consoleProject には初期コマンドを適用したくない場合、より具体的なタスク軸を使用できる:
> set console / initialCommands := "import mypackage._"
> set consoleQuick / initialCommands := "import mypackage._"`
またはコンフィギュレーション軸:
> set Compile/ initialCommands := "import mypackage._"
> set Test / initialCommands := "import mypackage._"
次は Delegates セクションについて説明する。スコープの委譲チェーンを示す。
スコープ委譲
セッティングはキーとスコープを持つ。スコープ A の任意のキーへの要求があるが、スコープ A にて値が定義されていない場合、要求は別のスコープに委譲される。委譲チェーンは明確に定義され、inspect コマンドの Delegates セクションに表示される。Delegates セクションは、要求されたキーに値が定義されていない場合にスコープが検索される順序を示す。
具体例として、console の initialCommands を再び考える:
$ sbt inspect console/initialCommands
...
[info] Delegates:
[info]  console / initialCommands
[info]  initialCommands
[info]  ThisBuild / console / initialCommands
[info]  ThisBuild / initialCommands
[info]  Zero / console / initialCommands
[info]  Global / initialCommands
...
console/initialCommands 用に具体的な値がない場合、Delegates の下にリストされたスコープが定義された値が見つかるまで順に検索されることを意味する。
inspect tree
前述のセクションで説明した直接の順方向・逆方向セッティング依存性の表示に加え、inspect tree コマンドはタスクまたはセッティングのセッティング依存性ツリーを表示できる。例:
$ sbt inspect tree console
[info] Compile / console = Task[void]
[info]   +-Global / cleanupCommands =
[info]   +-console / compilers = Task[class xsbti.compile.Compilers]
[info]   +-Compile / fullClasspath = Task[Seq[class sbt.internal.util.Attributed]]
[info]   +-Global / initialCommands =
[info]   +-scalaInstance = Task[class sbt.internal.inc.ScalaInstance]
[info]   +-Compile / scalacOptions = Task[Seq[class java.lang.String]]
[info]   +-Compile / console / streams = Task[interface sbt.std.TaskStreams]
[info]   | +-Global / streamsManager = Task[interface sbt.std.Streams]
[info]   |
[info]   +-Global / taskTemporaryDirectory = target/....
[info]   +-Global / fileConverter = sbt.internal.inc.MappedFileConverter@10095d95
[info]   +-Global / state = Task[class sbt.State]
[info]
[success] elapsed: 0 s
各タスクについて、inspect tree はタスクが生成する値の型を表示する。セッティングの場合は、セッティングの toString が表示される。
sbt publish
概要
sbt [query / ] publish
sbt [query / ] publishSigned
sbt [query / ] publishLocal
sbt [query / ] publishM2
説明
publish 系タスクはプロジェクトのコンパイルと公開の手段を提供する。この文脈での公開とは、Maven POM や ivy.xml などのディスクリプタと、JAR や war ファイルなどのアーティファクトをリポジトリにアップロードし、他のプロジェクトがライブラリ依存性として指定できるようにすることである。
publishタスクはプロジェクトを JFrog Artifactory や Sonatype Nexus などのリモートリポジトリに公開する。publishSignedタスクは sbt-pgp プラグイン で有効化され、GPG 署名付きアーティファクトの公開に使用する。publishLocalタスクはプロジェクトを Ivy のローカルファイルリポジトリ(通常は$HOME/.ivy2/local/)に公開する。同一マシン上の他のプロジェクトからこのプロジェクトをライブラリ依存性として利用できる。publishM2タスクはプロジェクトをローカル Maven リポジトリに公開する。
Central Repo への公開 に関してはレシピ参照。
公開のスキップ
公開を避けるには、スキップしたいサブプロジェクトに以下のセッティングを追加する:
publish / skip := true
一般的な用途はルートプロジェクトの公開を防ぐことである。
リポジトリの定義
リポジトリを指定するには、publishTo にリポジトリを割り当て、必要に応じて公開スタイルを設定する。例えば Nexus にアップロードする場合:
publishTo := Some("Sonatype Snapshots Nexus" at "https://oss.sonatype.org/content/repositories/snapshots")
ローカル Maven リポジトリに公開する場合:
publishTo := Some(MavenCache("local-maven", file("path/to/maven-repo/releases")))
ローカル Ivy リポジトリに公開する場合:
publishTo := Some(Resolver.file("local-ivy", file("path/to/ivy-repo/releases")))
Central Repository に公開する場合、アーティファクトに応じて適切なリポジトリを選択する必要がある。SNAPSHOT バージョンは central-snapshots リポジトリへ、それ以外のバージョンはローカルのステージングリポジトリへ公開する。この選択は version セッティングの値を使って行える:
publishTo := {
  val centralSnapshots = "https://central.sonatype.com/repository/maven-snapshots/"
  if version.value.endsWith("-SNAPSHOT") then Some("central-snapshots" at centralSnapshots)
  else localStaging.value
}
ローカルへの公開
publishLocal タスクは、デフォルトでは $HOME/.ivy2/local/ である「ローカル」の Ivy リポジトリに公開する。同一マシン上の他のビルドがこのプロジェクトをライブラリ依存性として指定できる。例えば、公開するプロジェクトに以下のような設定がある場合:
organization := "com.example"
version := "0.1-SNAPSHOT"
name := "hello"
同一マシン上の別のビルドで以下のように依存関係として指定できる:
libraryDependencies += "com.example" %% "hello" % "0.1-SNAPSHOT"
選択するバージョン番号は SNAPSHOT で終わるか、変更されるアーティファクトであることを示すため公開のたびにバージョン番号を変更する必要がある。
publishLocal と同様に、publishM2 タスクはユーザーの Maven ローカルリポジトリに公開する。場所は $HOME/.m2/settings.xml で指定されるか、デフォルトでは $HOME/.m2/repository/ である。別のビルドから解決するには Resolver.mavenLocal が必要である:
resolvers += Resolver.mavenLocal
認証情報
リポジトリの認証情報を指定する方法は2つある。
推奨される方法はファイルから読み込むことである。例:
credentials += Credentials(Path.userHome / ".sbt" / ".credentials")
認証情報ファイルは realm、host、user、password をキーとするプロパティファイルである。例:
realm=Sonatype Nexus Repository Manager
host=my.artifact.repo.net
user=admin
password=admin123
2つ目の方法はインラインで指定することである:
credentials += Credentials("Sonatype Nexus Repository Manager", "my.artifact.repo.net", "admin", "admin123")
認証情報のマッチングは realm と host の両方のキーを使って行う。
realm キーは HTTP の WWW-Authenticate ヘッダーの realm ディレクティブで、
HTTP Basic Authentication に対する HTTP サーバーのレスポンスの一部である。
リポジトリごとに、受信した全ヘッダーを読むことで確認できる。
例:
curl -D - my.artifact.repo.net
クロス公開
互換性のない複数の Scala バージョンをサポートするには、projectMatrix と publish を使用する(クロスビルドの設定 を参照)。
公開規約のオーバーライド
デフォルトでは sbt は使用中の Scala のバイナリバージョンでアーティファクトを公開する。例えばプロジェクトが Scala 2.13.x を使用している場合、example アーティファクトは example_2.13 として公開される。多くの場合これで十分だが、純粋な Java アーティファクトやコンパイラプラグインを公開する場合は CrossVersion を変更する必要がある。詳細はクロスビルドの設定 の Publishing convention セクションを参照。
公開されるアーティファクト
デフォルトでは、メインのバイナリ JAR、ソース JAR、API ドキュメント JAR が公開される。他の種類のアーティファクトを公開する宣言や、デフォルトのアーティファクトの無効化・変更が可能である。詳細はArtifactを参照。
バージョンスキーム
versionScheme セッティングはビルドのバージョンスキームを追跡する:
versionScheme := Some("early-semver")
サポートされる値は "early-semver"、"pvp"、"semver-spec"、"strict" である。sbt はこの情報を pom.xml と ivy.xml にプロパティとして含める。
Some("early-semver"): 0.Y.z 内のパッチ更新(例: 0.13.0 と 0.13.2)でバイナリ互換性を保つ Early Semantic Versioning。1.0.0 以降は通常の Semantic Versioning に従い、1.1.0 は 1.0.0 とバイナリ互換である。Some("semver-spec"): すべての 0.y.z を初期開発として扱う Semantic Versioning (バイナリ互換性の保証なし)。Some("pvp"): X.Y をメジャーバージョンとして扱う Haskell Package Versioning Policy。Some("strict"): バージョンの完全一致を要求する。
この情報は pom.xml に注釈として追加され、下流プロジェクトがバージョン競合を安全に解決できるか判断するのに役立つ。Preventing version conflicts with versionScheme (2021)を参照。
生成される POM の変更
publishMavenStyle が true の場合、makePom アクションで POM が生成され、Ivy ファイルの代わりにリポジトリに公開される。いくつかのセッティングを変更することで POM ファイルを編集できる。pomExtra に XML(scala.xml.NodeSeq)を設定すると、生成される pom に直接挿入される。例:
pomExtra := <something></something>
pomPostProcess セッティングもあり、書き込み前に最終的な XML を操作できる。型は Node => Node である。
pomPostProcess := { (node: Node) =>
  ....
}
makePom は宣言した Maven 形式のリポジトリを POM に追加する。pomRepositoryFilter を変更してフィルタリングでき、デフォルトではローカルリポジトリを除外する。ローカルリポジトリのみを含める場合:
pomIncludeRepository := { (repo: MavenRepository) =>
  repo.root.startsWith("file:")
}
Watch コマンド
概要
sbt ~ command1
sbt ~ command1 [ ; command2 ; ... ]
説明
Watch コマンドは ~ (チルダ) で表し、特定タスクの入力ファイルを監視し、ファイルに変更が発生したときにタスクを再実行する機能を提供する。
以下に使用例を用いて解説する:
コンパイル
一般的な用途は継続的コンパイルである。以下のコマンドはそれぞれ Test と Compile (デフォルト)のコンフィギュレーションでソース変更を監視し、compile コマンドを再実行する。
> ~ Test / compile

> ~ compile
Test / compile は Compile / compile に依存するため、メインソースディレクトリの変更はテストソースの再コンパイルも駆動することに注意。
テスト
トリガー実行はテスト駆動開発(TDD)スタイルでの開発でよく使われる。以下のコマンドはビルドのメインおよびテストソースの変更を監視し、前回のテスト実行以降に再コンパイルされたクラスを参照するテストのみを再実行する。
> ~ test
依存関係が変更された場合に特定のテストのみを再実行することも可能である。
> ~ test foo.BarTest
テストが更新されたソースファイルに依存しているかどうかに関わらず、ソース変更が検出されたときに常にテストを再実行することも可能である。
> ~ testOnly foo.BarTest
ソースが変更されたときにプロジェクト内のすべてのテストを実行するには、以下を使用する:
> ~ testFull
複数コマンドの実行
Watch コマンドはセミコロンで区切られた複数タスクの監視をサポートする。例えば、以下のコマンドはソースファイルの変更を監視し、clean と test を実行する:
> ~ clean; test
ビルドソース
Global / onChangedBuildSource := ReloadOnSourceChanges を設定してビルドソース変更時に自動リロードするように構成されている場合、sbt はビルドソース(project ディレクトリ内の *.sbt および *.{java,scala} ファイル)を監視する。ビルドソースの変更が検出されると、ビルドがリロードされ、リロード完了時に sbt はトリガー実行モードに再入する。
画面のクリア
sbt はタスクを評価する前、またはイベントがトリガーされた後にコンソール画面をクリアできる。イベントトリガー後に画面をクリアするには、以下を追加する:
ThisBuild / watchTriggeredMessage := Watch.clearScreenOnTrigger
ビルド設定に追加する。タスク実行前に画面をクリアするには、以下を追加する:
ThisBuild / watchBeforeCommand := Watch.clearScreen
ビルド設定に追加する。
設定
トリガー実行の動作は様々なセッティングによって設定できる。
-
watchTriggers: Seq[Glob]は、タスクが直接依存していないが評価をトリガーすべきファイルの検索クエリを追加する。例えば、プロジェクトの build.sbt にfoo / watchTriggers += baseDirectory.value.toGlob / "*.txt"が含まれている場合、txt拡張子のファイルへの変更はトリガー実行モードでfooコマンドをトリガーする。 -
watchTriggeredMessage: (Int, Path, Seq[String]) => Option[String]は、ファイル変更が新規ビルドをトリガーしたときに表示するメッセージを設定する。入力パラメータは現在の watch イテレーション回数、ビルドをトリガーしたファイル、実行予定のコマンドである。デフォルトでは、どのファイルがビルドをトリガーしたか、どのコマンドを実行するかを示すメッセージを出力する。関数がNoneを返すとメッセージは出力されない。メッセージ出力前に画面をクリアするには、タスク定義内にWatch.clearScreen()を追加する。これにより画面がクリアされ、定義されていればメッセージがその後に出力される。 -
watchInputOptions: Seq[Watch.InputOption]はビルドがデフォルトの watch オプションをオーバーライドできるようにする。例えば、'l' キーでビルドをリロードする機能を追加するには、build.sbtにThisBuild / watchInputOptions += Watch.InputOption('l', "reload", Watch.Reload)を追加する。デフォルトのwatchStartMessageを使用している場合、'?' オプションで表示される一覧にも追加される。 -
watchBeforeCommand: () => Unitはタスク評価前に実行するコールバックを提供する。プロジェクトの build.sbt にThisBuild / watchBeforeCommand := Watch.clearScreenを追加するとコンソール画面をクリアできる。デフォルトでは何もしない。 -
watchLogLevelはファイル監視システムのログレベルを設定する。ソースファイルが変更されているのにトリガー実行が評価されない場合や、監視すべきでないファイルの変更で予期せずトリガーされる場合に有用である。 -
watchInputParser: Parser[Watch.Action]は監視が入力イベントを処理する方法を変更する。例えば、watchInputParser := 'l' ^^^ Watch.Reload | '\r' ^^^ new Watch.Run("")を設定すると、'l' キーでビルドがリロードされ、改行でシェルに戻る。デフォルトではwatchInputOptionsから自動的に導出される。 -
watchStartMessage: (Int, ProjectRef, Seq[String]) => Option[String]は、watch プロセスがファイルまたは入力イベントを待機しているときに表示するバナーを設定する。入力はイテレーション回数、カレント・プロジェクト、実行するコマンドである。デフォルトのメッセージには watch の終了や利用可能なオプションの表示の説明が含まれる。このバナーはwatchOnIterationがwatchStartMessageの結果をログ出力する場合にのみ表示される。 -
watchOnIteration: (Int, ProjectRef, Seq[String]) => Watch.Actionは、ソースまたは入力イベントを待つ前に評価される関数である。例えば、一定回数のイテレーションに達した場合に watch を早期終了するのに使える。デフォルトではwatchStartMessageの結果をログ出力するだけである。 -
watchForceTriggerOnAnyChange: Booleanは、ビルドをトリガーするためにソースファイルの内容が変更されている必要があるかを設定する。デフォルト値は false である。 -
watchPersistFileStamps: Booleanは、sbt が複数のタスク評価実行にわたってソースファイル用に計算したファイルハッシュを永続化するかどうかを切り替える。ソースファイルが多いプロジェクトでパフォーマンスが向上する。ファイルハッシュがキャッシュされるため、多くのソースファイルが同時に変更されている場合、評価されたタスクが無効なハッシュを読み取る可能性がある。デフォルト値は false である。 -
watchAntiEntropy: FiniteDurationは、以前ビルドをトリガーした同じファイルがビルドを再トリガーするまでに経過すべき時間を制御する。ファイルが短時間に連続して変更されたときに発生する不要なビルドを防ぐためのものである。デフォルト値は 500ms である。
キャッシュ化タスク
このページではキャッシュ化タスクの詳細を説明する。概要の解説はキャッシュ化を参照。
自動キャッシュ
val someKey = taskKey[String]("something")

someKey := name.value + version.value + "!"
sbt 2.x では、タスク結果は name と version の 2 つのセッティングに基づいて自動的にキャッシュされる。初回実行時はオンサイトで実行されるが、2 回目以降はディスクキャッシュが使用される:
sbt:demo> show someKey
[info] demo0.1.0-SNAPSHOT!
[success] elapsed time: 0 s, cache 0%, 1 onsite task
sbt:demo> show someKey
[info] demo0.1.0-SNAPSHOT!
[success] elapsed time: 0 s, cache 100%, 1 disk cache hit
キャッシュ化はシリアライズ困難である
自動キャッシュに参加するには、入力キー(例: name と version)が sjsonnew.HashWriter 型クラス用の given インスタンスを提供し、戻り値の型が sjsonnew.JsonFormat 用の given インスタンスを提供する必要がある。
[error] -- Error: /Users/xxx/caching/project/FooPlugin.scala:17:4 -
[error]  17 |    foo := {
[error]     |    ^
[error]     |given evidence sjsonnew.JsonFormat[sbt.HashedVirtualFileRef] is not found; opt out of caching by annotating the key with @transient, or as foo := Def.uncached(...), or provide a given value
[error]     |
[error]  18 |      val b = baseDirectory.value
HashedVirtualFileRef のような組み込み型のコーデックは CacheImplicits.given にて提供される:
import CacheImplicits.given

....

  override lazy val projectSettings: Seq[Setting[?]] = Seq(
    foo := {
      val b = baseDirectory.value
      val conv = fileConverter.value
      conv.toVirtualFile((b / "build.sbt").toPath)
    },
    bar := foo.value,
  )
Contraband で sjson-new のコーデックを生成することもできる。
エフェクトの追跡
ファイル作成のエフェクト
ファイル名を返すだけでなく、ファイル作成のエフェクトをキャッシュするには、Def.declareOutput(vf) を使ってファイル作成のエフェクトを追跡する必要がある。
someKey := {
  val conv = fileConverter.value
  val out: java.nio.file.Path = createFile(...)
  val vf: xsbti.VirtualFile = conv.toVirtualFile(out)
  Def.declareOutput(vf)
  vf: xsbti.HashedVirtualFileRef
}
システム・プロパティーのエフェクト
キャッシュ化タスクからシステム・プロパティーや環境変数の捕獲するとキャッシュの安定性を破壊することがある。以下に具体例を用いて説明する:
lazy val someInt = taskKey[Int]("")

// BAD
someInt := {
  sys.props("release").toInt + 1
}
まずは -Drelease=0 とともに実行したとする:
$ sbt --server -Drelease=0
....
sbt:caching> show someInt
[info] 1
[success] elapsed time: 0 s, cache 0%, 1 onsite task
しかし、次に -Drelease=1 とともに実行したとしても、値は変化しない:
$ sbt --server -Drelease=1
....
sbt:caching> show someInt
[info] 1
[success] elapsed time: 0 s, cache 100%, 1 disk cache hit
これは、someInt がタスク定義のコードの形と入力となるセッティングとタスクのみをキャッシュ・キーとして見ているためだ。someInt を正しくキャッシュ化するには、システム・プロパティーをセッティングで包む必要がある:
lazy val someInt = taskKey[Int]("")
lazy val releaseVer = settingKey[Int]("")

releaseVer := sys.props("release").toInt
someInt := releaseVer.value + 1
これでビルドが読み込まれるたびにシステム・プロパティーが再評価されるようになった:
$ sbt --server -Drelease=1
sbt:caching> show someInt
[info] 2
[success] elapsed time: 0 s, cache 0%, 1 onsite tas
キャッシュからのオプトアウト
タスクキー単位でのオプトアウト
次に、一部のタスクキーをキャッシュからオプトアウトしたい場合は、以下のようにキャッシュレベルを設定する:
@transient
val someKey = taskKey[String]("something")
または
@cacheLevel(include = Array.empty)
val someKey = taskKey[String]("something")
タスク単位でのオプトアウト
キャッシュを個別にオプトアウトするには、以下のように Def.uncached(...) を使用する:
val someKey = taskKey[String]("something")

someKey := Def.uncached {
  name.value + somethingUncachable.value + "!"
}
ビルド全体でのオプトアウト
デフォルトのカスタムタスクキャッシュをオプトアウトするには、project/plugins.sbt に以下を追加する:
Compile / scalacOptions += "-Xmacro-settings:sbt:no-default-task-cache"
実行ログ
キャッシュ化に関連する問題をデバッグするために、sbt は実行ログ機能を持つ。実行ログ機能は、sbt.experimental_execution_log システム・プロパティを true もしくはファイル名に設定することで、有効化される:
$ sbt --server -Dsbt.experimental_execution_log=true compile
true に設定した場合、実行ログは target/global-logging 以下に生成される:
{
  "input": {
    "digest": "sha256-a50da1cd086987bc273861a815da4e90ba4735d4a21b965e861e583382a985d6/48",
    "codeContentHash": "murmur3-0000000000000000ffffffffce70de5a/0",
    "extraHash": "murmur3-00000000000000000000000000000000/0",
    "str": "(CompileInputs2(Vector(
${CSR_CACHE}/https/repo1.maven.org/maven2/org/scala-lang/scala3-library_3/3.7.4/scala3-library_3-3.7.4.jar, ...))))"
  },
  "cacheHit": true,
  "exitCode": 0,
  "outputs": [
    "${OUT}/value/sha256-a50da1cd086987bc273861a815da4e90ba4735d4a21b965e861e583382a985d6/48.json>
    sha256-f222bfd59f319bb6a2d4d58003b2131c0c42a10cdb4da9df971480ca8d044f7b/179",
  ]
}
JSON の形式は将来的に変更される可能性があるので、この機能は実験的 (experimental) フラグを使っている。
リモート・キャッシュ
sbt 2.x は Bazel 互換の gRPC インターフェースを実装しており、オープンソースおよび商用の多数のバックエンドと連携する。詳細はリモート・キャッシュの設定を参照。
クロスビルドの設定
このページではクロスビルドの設定を説明する。概要はクロスビルドを読んでほしい。
クロスビルドされたライブラリの使用
複数の Scala バージョン向けにビルドされたライブラリを使用するには、ModuleID の最初の % を %% にする。これにより sbt はライブラリのビルドに使用中の Scala バージョンをライブラリ依存性のモジュール名に追加する。例:
libraryDependencies += "org.typelevel" %% "cats-effect" % "3.5.4"
これをほぼ等価の ModuleID に、特定の Scala に対して手で書き換えると以下のようになる:
libraryDependencies += "org.typelevel" % "cats-effect_3" % "3.5.4"
Scala 3 専用のクロスバージョン
Scala 3 でアプリケーションを開発している場合、Scala 2.13 のライブラリを使用できる:
("a" % "b" % "1.0").cross(CrossVersion.for3Use2_13)
%% を使用するのと等価だが、scalaVersion が 3.x.y のときにライブラリの _2.13 バリアントに解決する点が異なる。
逆に、scalaVersion が 2.13.x のときにライブラリの _3 バリアントを使用するには CrossVersion.for2_13Use3 がある:
("a" % "b" % "1.0").cross(CrossVersion.for2_13Use3)
ライブラリ作者への警告: Scala 2.13 ライブラリに依存する Scala 3 ライブラリ、またはその逆を公開するのは一般的に安全ではない。エンドユーザーのクラスパスに scala-xml_2.13 と scala-xml_3 のように同じライブラリの 2 バージョンが混在する可能性がある。
クロスビルドされたライブラリの使用について(詳細)
ModuleID の cross メソッドを使うと、異なる Scala バージョンに対する動作を細かく制御できる。以下は等価である:
"a" % "b" % "1.0"
("a" % "b" % "1.0").cross(CrossVersion.disabled)
以下も等価である:
"a" %% "b" % "1.0"
("a" % "b" % "1.0").cross(CrossVersion.binary)
Scala のバイナリバージョンではなくフルバージョンを常に使用するようにデフォルトをオーバーライドする:
("a" % "b" % "1.0").cross(CrossVersion.full)
CrossVersion.patch は CrossVersion.binary と CrossVersion.full の中間的存在で、末尾の -bin-... サフィックスを削除して、バイナリ互換な Scala ツールチェーンの開発版をサポートする。
("a" % "b" % "1.0").cross(CrossVersion.patch)
CrossVersion.constant は固定値を指定する:
("a" % "b" % "1.0").cross(CrossVersion.constant("2.9.1"))
以下と等価である:
"a" % "b_2.9.1" % "1.0"
Project matrix
sbt 2.x では project matrix が導入され、クロスビルドをサブプロジェクトとして表すことで、並列実行できるようになった。
lazy val scala3 = "3.8.4"
lazy val scala2_13 = "2.13.18"

organization := "com.example"
scalaVersion := scala3
version      := "0.1.0-SNAPSHOT"

lazy val core = (projectMatrix in file("core"))
  .settings(
    name := "core",
  )
  .jvmPlatform(scalaVersions = Seq(scala3, scala2_13))
  .nativePlatform(scalaVersions = Seq(scala3, scala2_13))
  // .jsPlatform(scalaVersions = Seq(scala3))

// optional
lazy val core3 = core.jvm(scala3)
lazy val coreNative3 = core.native(scala3)
サプブロジェクトの生成
読み込み時に project matrix は、プラットフォームと Scala バージョンの組み合わせをサブプロジェクトへと展開する。
sbt:cross-root> projects
[info]     core
[info]     core2_13
[info]     coreNative
[info]     coreNative2_13
[info]   * cross-root
規約により、マトリックス中の JVM Scala 3 バリアントは、coreのように接尾辞を持たない名前が与えられる。
sbt:cross-root> core/run
[info] running (fork) example.main
Hello
[success] ok
build.sbt 内で、サブプロジェクトを参照するには、jvm(...)、js(...), もしくは native(...) を呼ぶことができる:
// For Scala
lazy val core3 = core.jvm(scalaVersion = scala3)

// For Java
lazy val intf0 = intf.jvm(autoScalaLibrary = false)
Virtual axis
マトリックスの各組み合わせは ProjectRow と呼ばれ、ProjectRow は、VirtualAxis の列によって構成されている。
final class ProjectRow(
    val autoScalaLibrary: Boolean,
    val axisValues: Seq[VirtualAxis],
    val process: Project => Project
)

object VirtualAxis:

  /**
   * WeakAxis allows a row to depend on another row with Zero value.
   * For example, Scala version can be Zero for Java project, and it's ok.
   */
  abstract class WeakAxis extends VirtualAxis

  /** StrongAxis requires a row to depend on another row with the same selected value. */
  abstract class StrongAxis extends VirtualAxis
end VirtualAxis
VirtualAxis はさらに、WeakAxis と StrongAxis に分岐する。Scala バージョンは、弱い軸の例で、ある Scala バージョンを持つ列は、Scala バージョンを持たない Java の列に依存することができる。一方、同一のプラットフォーム間でしか依存することができないため、プラットフォームは強い軸として定義される。
例えば、SparkAxis は以下のように定義できる:
import sbt.*

case class SparkAxis(idSuffix: String, directorySuffix: String)
  extends VirtualAxis.WeakAxis
具体的な SparkAxis の使用方法に関しては VirtualAxis に対するクロスビルドのレシピ参照。
公開規約
ライブラリのコンパイルに使用した Scala のバージョンを示すため、Scala ABI(アプリケーションバイナリインターフェース)バージョンをサフィックスとして使用する。例えば、アーティファクト名 cats-effect_2.13 は Scala 2.13.x が使用されたことを意味し、cats-effect_3 は Scala 3.x が使用されたことを意味する。このシンプルな方式で Maven、Ant などのビルドツールユーザーとの相互運用が可能である。2.13.0-RC1 のようなプレリリース版の Scala では、フルバージョンが ABI バージョンとして扱われる。
crossVersion セッティングで公開規約をオーバーライドできる:
CrossVersion.disabled(サフィックスなし)CrossVersion.binary(_<scala-abi-version>)CrossVersion.full(_<scala-version>)
デフォルト値は crossPaths に応じて CrossVersion.binary または CrossVersion.disabled に設定される。ただし、Scala 標準ライブラリと異なり Scala コンパイラはパッチリリース間で前方互換性がないため、コンパイラプラグインは CrossVersion.full を採用することが推奨される。
リモート・キャッシュの設定
このページではリモート・キャッシュの設定を説明する。キャッシュシステムの導入としてキャッシュ化をまず読んでみてほしい。
gRPC リモート・キャッシュ
将来的に別のリモートキャッシュストア実装が出てくる可能性はあるが、sbt 2.0 は Bazel リモートキャッシュバックエンドと互換性のある gRPC クライアントを採用している。sbt 2.x を設定するには、project/plugins.sbt に以下を追加する:
addRemoteCachePlugin
Bazel リモートキャッシュバックエンドにはオープンソースおよび商用の多くの実装がある。このページは全ての Bazel リモートキャッシュ実装を網羅する訳ではないが、多角的に様々な実装向けにセットアップする方法を示す。
認証
gRPC 認証にはいくつかの種類があり、Bazel リモートキャッシュバックエンドは様々な方式を使用する:
- 認証なし。テストに有用。
- デフォルト TLS/SSL。
- カスタムサーバー証明書付き TLS/SSL。
- カスタムサーバー・クライアント証明書付き TLS/SSL、mTLS。
- API トークンヘッダー付きデフォルト TLS/SSL。
認証なしの bazel-remote
buchgr/bazel-remote からコードを取得し、Bazel を使ってラップトップで実行できる:
bazel run :bazel-remote  -- --max_size 5 --dir $HOME/work/bazel-remote/temp \
  --http_address localhost:8000 \
  --grpc_address localhost:2024
sbt 2.x を設定するには、project/plugins.sbt に以下を追加する:
addRemoteCachePlugin
build.sbt に以下を追加する:
Global / remoteCache := Some(uri("grpc://localhost:2024"))
mTLS 付き bazel-remote
本番環境では、mTLS によりトランスポートの暗号化と相互認証を保証できる。bazel-remote は以下のように起動できる:
bazel run :bazel-remote  -- --max_size 5 --dir $HOME/work/bazel-remote/temp \
  --http_address localhost:8000 \
  --grpc_address localhost:2024 \
  --tls_ca_file /tmp/sslcert/ca.crt \
  --tls_cert_file /tmp/sslcert/server.crt \
  --tls_key_file /tmp/sslcert/server.pem
このシナリオでは sbt 2.x のセッティングは以下のようになる:
Global / remoteCache := Some(uri("grpcs://localhost:2024"))
Global / remoteCacheTlsCertificate := Some(file("/tmp/sslcert/ca.crt"))
Global / remoteCacheTlsClientCertificate := Some(file("/tmp/sslcert/client.crt"))
Global / remoteCacheTlsClientKey := Some(file("/tmp/sslcert/client.pem"))
grpc:// ではなく grpcs:// である点に注意。
EngFlow
EngFlow GmbH は Bazel チームのコアメンバーが 2020 年に設立した
https://my.engflow.com/ でトライアルに登録すると、ページの指示に従って Docker で試用クラスターを起動する。指示に従っていれば、ポート 8080 でリモートキャッシュサービスが起動する。試用クラスター用の sbt 2.x の設定は以下のようになる:
Global / remoteCache := Some(uri("grpc://localhost:8080"))
BuildBuddy
BuildBuddy は元 Google エンジニアが設立したビルドソリューション企業で、Bazel 向けのビルド分析とリモート実行バックエンドを提供する。buildbuddy-io/buildbuddy としてオープンソースでも利用可能である。
登録後、BuildBuddy Personal プランでインターネット経由で BuildBuddy を利用できる。
- https://app.buildbuddy.io/ から Settings を開いて、Organization URL を
<something>.buildbuddy.ioに変更する。 - 次に Quickstart を開いて、URL と
--remote_headersをメモする。 $HOME/.sbt/buildbuddy_credential.txtというファイルを作成し、API キーを記述する:
x-buildbuddy-api-key=*******
sbt 2.x の設定は以下のようになる:
Global / remoteCache := Some(uri("grpcs://something.buildbuddy.io"))
Global / remoteCacheHeaders += IO.read(BuildPaths.defaultGlobalBase / "buildbuddy_credential.txt").trim
NativeLink
NativeLink は Rust で実装されたオープンソースの Bazel リモート実行バックエンドで、パフォーマンスを重視している。2024 年 6 月時点で NativeLink Cloud がベータ提供されている。
- https://app.nativelink.com/ から Quickstart を開いて、URL と
--remote_header $HOME/.sbt/nativelink_credential.txtというファイルを作成し、API キーを記述する:
x-nativelink-api-key=*******
sbt 2.x の設定は以下のようになる:
Global / remoteCache := Some(uri("grpcs://something.build-faster.nativelink.net"))
Global / remoteCacheHeaders += IO.read(BuildPaths.defaultGlobalBase / "nativelink_credential.txt").trim
アーティファクト
説明
サブプロジェクトの特定バージョンを公開するためのファイルは、特別に「アーティファクト」と呼ばれる。この概念は Apache Maven と Ivy に由来する。
JVM エコシステムでは、一般的なアーティファクトは Java アーカイブ(JAR ファイル)である。管理・ダウンロード・保存が容易なため、圧縮パッケージ形式が好まれる。
例として、ライブラリのアーティファクト一覧を ivy.xml ファイルで示す:
  <publications>
    <artifact name="core_3" type="jar" ext="jar" conf="compile"/>
    <artifact e:classifier="sources" name="core_3" type="src" ext="jar" conf="sources"/>
    <artifact e:classifier="javadoc" name="core_3" type="doc" ext="jar" conf="docs"/>
    <artifact name="core_3" type="pom" ext="pom" conf="pom"/>
  </publications>
ここから、アーティファクトは name、type、extension という属性を持ち、オプションで classifier があることが分かる。
- name。サブプロジェクトのモジュール名と同じになる。
- type。アーティファクトの機能カテゴリ。
jar、src、docなど。 - extension。
jar、war、zip、xmlなどのファイル拡張子。 - classifier。Maven では、代替または二次アーティファクト用に付加できる任意の文字列である。
デフォルト・アーティファクトの選択
デフォルトで公開されるアーティファクトは以下の通りである:
- メインのバイナリ JAR
- メインのソースとリソースを含む JAR
- API ドキュメントを含む JAR
テストクラス、ソース、API 用のアーティファクトを追加したり、メインアーティファクトの一部を無効にしたりできる。
すべての Test アーティファクトを追加する場合:
lazy val app = (project in file("app"))
  .settings(
    Test / publishArtifact := true,
  )
個別に追加する場合:
lazy val app = (project in file("app"))
  .settings(
    // enable publishing the jar produced by `Test/package`
    Test / packageBin / publishArtifact := true,

    // enable publishing the test API jar
    Test / packageDoc / publishArtifact := true,

    // enable publishing the test sources jar
    Test / packageSrc / publishArtifact := true,
  )
メインアーティファクトを個別に無効にする場合:
lazy val app = (project in file("app"))
  .settings(
    // disable publishing the main jar produced by `package`
    Compile / packageBin / publishArtifact := false,

    // disable publishing the main API jar
    Compile / packageDoc / publishArtifact := false,

    // disable publishing the main sources jar
    Compile / packageSrc / publishArtifact := false,
  )
デフォルト・アーティファクトの変更
組み込みアーティファクトには publishArtifact に加え、いくつかの設定可能なセッティングがある。基本となるのは artifact(型 SettingKey[Artifact])、mappings(型 TaskKey[(File, String)])、artifactPath(型 SettingKey[File])である。前セクションで示した通り、(Config / <task>) でスコープされる。
メインアーティファクトの type を変更する例:
Compile / packageBin / artifact := {
  val prev: Artifact = (Compile / packageBin / artifact).value
  prev.withType("bundle")
}
生成されるアーティファクト名は artifactName セッティングで決まる。このセッティングの型は (ScalaVersion, ModuleID, Artifact) => String である。ScalaVersion 引数は Scala のフルバージョン文字列とバイナリ互換部分を提供する。結果の文字列は生成するファイル名である。デフォルト実装は Artifact.artifactName _ である。この関数を変更すると、artifact 定義とリポジトリパターンで決まる公開名に影響せず、ローカル名を変えられる。
例えば、classifier や cross path なしの最小限の名前を生成する場合:
artifactName := { (sv: ScalaVersion, module: ModuleID, artifact: Artifact) =>
  artifact.name + "-" + module.revision + "." + artifact.extension
}
(実際には classifier を削除することはほとんどない。)
最後に、packagedArtifact タスクをマッピングしてアーティファクトの (Artifact, File) ペアを取得できる。Artifact が不要な場合は、パッケージタスク(package、packageDoc、packageSrc)から File のみ取得できる。いずれの場合も、タスクをマッピングしてファイルを取得すると、アーティファクトが先に生成され、ファイルが最新であることが保証される。
例:
val myTask = taskKey[Unit]("My task.")

myTask :=  {
  val (art, file) = (Compile / packageBin / packagedArtifact).value
  println("Artifact definition: " + art)
  println("Packaged file: " + file.getAbsolutePath)
}
カスタムアーティファクトの定義
組み込みアーティファクトの設定に加え、公開する他のアーティファクトを宣言できる。Ivy メタデータでは複数アーティファクトが許可されるが、Maven POM ファイルは classifier による区別のみサポートし、これらは POM に記録されない。
基本的な Artifact の構築は以下のようになる:
Artifact("name", "type", "extension")
Artifact("name", "classifier")
Artifact("name", url: URL)
Artifact("name", Map("extra1" -> "value1", "extra2" -> "value2"))
例:
Artifact("myproject", "zip", "zip")
Artifact("myproject", "image", "jpg")
Artifact("myproject", "jdk15")
アーティファクトの詳細はIvy ドキュメントを参照。上記パラメータの組み合わせと [Configurations] および追加属性の指定はArtifact APIを参照。
これらのアーティファクトを公開用に宣言するには、アーティファクトを生成するタスクにマッピングする:
val myImageTask = taskKey[File](...)

myImageTask := {
  val artifact: File = makeArtifact(...)
  artifact
}

addArtifact(Artifact("myproject", "image", "jpg"), myImageTask)
addArtifact はセッティングのシーケンスを返す(SettingsDefinition でラップされる)。完全なビルドコンフィギュレーションでは、以下のように使用する:
lazy val app = (project in file("app"))
  .settings(
    addArtifact(...)
  )
.war ファイルの公開
Web アプリケーションの一般的な用途として、.jar ファイルの代わりに .war ファイルを公開する。
lazy val app = (project in file("app"))
  .settings(
    // disable .jar publishing
    Compile / packageBin / publishArtifact := false,

    // create an Artifact for publishing the .war file
    Compile / packageWar / artifact := {
      val prev: Artifact = (Compile / packageWar / artifact).value
      prev.withType("war").withExtension("war")
    },

    // add the .war file to what gets published
    addArtifact(Compile / packageWar / artifact, packageWar),
  )
アーティファクト付きライブラリ依存性の使用
カスタムまたは複数アーティファクトを持つライブラリ依存性から使用するアーティファクトを指定するには、ライブラリ依存性の artifacts メソッドを使用する。例:
libraryDependencies += ("org" % "name" % "rev").artifacts(Artifact("name", "type", "ext"))
from と classifier メソッド(sbt update で説明)は、実際にはartifacts に変換される便利メソッドである:
def from(url: String) = artifacts(Artifact(name, new URL(url)))
def classifier(c: String) = artifacts(Artifact(name, c))
つまり、以下の 2つのライブラリ依存性宣言は等価である:
libraryDependencies += ("org.testng" % "testng" % "5.7").classifier("jdk15")

libraryDependencies += ("org.testng" % "testng" % "5.7").artifacts(Artifact("testng", "jdk15"))
インプットタスク
sbt はユーザー入力をパースし、タブ補完を提供するカスタムタスクを定義する機能を提供する。パーサーの詳細は後でタブ補完パーサー で説明する。
このページでは、パーサーコンビネータをインプットタスク・システムに組み込む方法を説明する。
Input キー
インプットタスクのキーは InputKey 型であり、SettingKey がセッティングを、TaskKey がタスクを表すのと同様にインプットタスクを表す。inputKey.apply ファクトリメソッドで新しいインプットタスクのキーを定義する:
// goes in project/Build.scala or in build.sbt
val demo = inputKey[Unit]("A demo input task.")
インプットタスクの定義は通常のタスクと同様だが、ユーザー入力を捕獲した Parser の結果も使用できる。セッティングやタスクの値を取得する特殊な value メソッドと同様に、Parser の結果は特殊な parsed メソッドで取得する。
基本的なインプットタスクの定義
最もシンプルなインプットタスクはスペース区切りの引数シーケンスを受け付ける。パースは簡素で、有用なタブ補完は提供されない。スペース区切り引数用の組み込みパーサーは spaceDelimited メソッドで構築され、唯一の引数としてタブ補完時にユーザーに表示するラベルを受け取る。
例えば、以下のタスクは現在の Scala バージョンを表示し、渡された引数を各行にエコーする。
import complete.DefaultParsers.{ *, given }

demo := {
  // get the result of parsing
  val args: Seq[String] = spaceDelimited("<arg>").parsed
  // Here, we also use the value of the `scalaVersion` setting
  println("The current Scala version is " + scalaVersion.value)
  println("The arguments to demo were:")
  args.foreach(println(_))
}
Parser を使ったインプットタスク
spaceDelimited メソッドが提供する Parser は入力構文の定義に柔軟性がない。カスタムパーサーを使うには、タブ補完パーサーで説明する通り独自の Parser を定義すればよい。
Parser の構築
最初のステップは、以下のいずれかの型の値を定義して実際の Parser を構築することである:
Parser[I]: セッティングを使用しない基本パーサーInitialize[Parser[I]]: 定義が 1 つ以上のセッティングに依存するパーサーInitialize[State => Parser[I]]: セッティングと現在の state の両方を使って定義されるパーサー
spaceDelimited による最初のケースの例は既に見た。定義でセッティングを使用していない。3 つ目のケースの例として、以下はプロジェクトの Scala と sbt のバージョンセッティングおよび state を使う作為的な Parser を定義する。これらのセッティングを使うには、Parser の構築を Def.setting でラップし、特殊な value メソッドでセッティング値を取得する必要がある:
import sbt.complete.DefaultParsers.{ *, given }
import sbt.complete.Parser

val parser: Def.Initialize[State => Parser[(String,String)]] =
Def.setting {
  (state: State) =>
    ( token("scala" <~ Space) ~ token(scalaVersion.value) ) |
    ( token("sbt" <~ Space) ~ token(sbtVersion.value) ) |
    ( token("commands" <~ Space) ~
        token(state.remainingCommands.size.toString) )
}
This Parser definition will produce a value of type (String,String). The input syntax defined isn't very flexible; it is just a demonstration. It will produce one of the following values for a successful parse (assuming the current Scala version is 3.8.4, the current sbt version is 2.0.1, and there are 3 commands left to run):
- (scala,3.8.4)
- (sbt,2.0.1)
- (commands,3)
プロジェクトの現在の Scala と sbt のバージョンにアクセスできたのは、それらがセッティングだからである。タスクはパーサーの定義に使用できない。
タスクの構築
次に、Parser の結果から実行する実際のタスクを構築する。通常通りタスクを定義するが、Parser の特殊な parsed メソッドでパース結果にアクセスできる。
以下の作為的な例は、前の例の出力(型 (String,String))と package タスクの結果を使って、画面に情報を表示する。
demo := {
    val (tpe, value) = parser.parsed
    println("Type: " + tpe)
    println("Value: " + value)
    println("Packaged: " + packageBin.value.getAbsolutePath)
}
InputTask 型
インプットタスクのより高度な使い方を理解するには InputTask 型を見るとよい。コアとなるインプットタスク 型は以下の通りである:
class InputTask[A1](val parser: State => Parser[Task[A1]])
通常、インプットタスクはセッティングに割り当てられ、Initialize[InputTask[A1]] を扱う。
分解すると、
- 他のセッティング(Initialize 経由)を使ってインプットタスクを構築できる。
- 現在の State を使ってパーサーを構築できる。
- パーサーはユーザー入力を受け付け、タブ補完を提供する。
- パーサーは実行するタスクを生成する。
つまり、セッティングまたは State を使って インプットタスク のコマンドライン構文を定義するパーサーを構築できる。これは前セクションで説明した。次に、セッティング、State、またはユーザー入力を使って実行するタスクを構築できる。これは インプットタスク 構文に暗黙的に含まれる。
他のインプットタスクの再利用
インプットタスクに関わる型は合成可能であるため、インプットタスクを再利用できる。InputTask には .parsed と .evaluated メソッドが定義され、一般的な状況で便利になる:
InputTask[A1]またはInitialize[InputTask[A1]]で.parsedを呼ぶと、コマンドラインをパースした後に作成されたTask[A1]を取得するInputTask[A1]またはInitialize[InputTask[A1]]で.evaluatedを呼ぶと、そのタスクを評価した型A1の値を取得する
いずれの場合も、基となる Parser はインプットタスク定義内の他のパーサーと順序付けられる。.evaluated の場合は、生成されたタスクが評価される。
以下の例は run インプットタスク、リテラル区切りパーサー --、そして再度 run を適用する。パーサーは構文的な出現順に並べられるため、-- の前の引数は最初の run に、後の引数は 2 番目の run に渡される。
val run2 = inputKey[Unit](
    "Runs the main class twice with different argument lists separated by --")

val separator: Parser[String] = "--"

run2 := {
   val one = (Compile / run).evaluated
   val sep = separator.parsed
   val two = (Compile / run).evaluated
}
引数をエコーするメインクラス Demo の場合、以下のようになる:
$ sbt
> run2 a b -- c d
[info] Running Demo c d
[info] Running Demo a b
c
d
a
b
入力の事前適用
InputTask は Parser から構築されるため、プログラムで入力を適用して新しい InputTask を生成できる。(Task を生成することも可能で、次セクションで説明する。)適用する String を受け取る 2 つの便利メソッドが InputTask[T] と Initialize[InputTask[T]] に用意されている。
partialInputは入力を適用し、コマンドラインなどからの追加入力を許可するfullInputは入力を適用してパースを終了し、追加入力を受け付けない
いずれの場合も、入力は インプットタスク のパーサーに適用される。インプットタスク はタスク名以降のすべての入力を扱うため、入力に先頭の空白を含める必要があることが多い。
前セクションの例を考える。以下のように変更できる:
- 最初の
runへの引数をすべて明示的に指定する。nameとversionを使って、セッティングでパーサーを定義・変更できることを示す。 - 2 番目の
runに渡す初期引数を定義するが、コマンドラインからの追加入力を許可する。
lazy val run2 = inputKey[Unit]("Runs the main class twice: " +
   "once with the project name and version as arguments"
   "and once with command line arguments preceded by hard coded values.")

// The argument string for the first run task is ' <name> <version>'
lazy val firstInput: Initialize[String] =
   Def.setting(s" ${name.value} ${version.value}")

// Make the first arguments to the second run task ' red blue'
lazy val secondInput: String = " red blue"

run2 := {
   val one = (Compile / run).fullInput(firstInput.value).evaluated
   val two = (Compile / run).partialInput(secondInput).evaluated
}
引数をエコーするメインクラス Demo の場合、以下のようになる:
$ sbt
> run2 green
[info] Running Demo demo 1.0
[info] Running Demo red blue green
demo
1.0
red
blue
green
InputTask から Task を取得する
前セクションでは入力を適用して新しい InputTask を導出する方法を示した。このセクションでは、入力を適用すると Task が生成される。Initialize[InputTask[A1]] の toTask メソッドは適用する String 入力を受け取り、通常通り使用できるタスクを生成する。例えば、以下は他のタスクから使用したり、入力を渡さずに直接実行できる通常のタスク runFixed を定義する:
lazy val runFixed = taskKey[Unit]("A task that hard codes the values to `run`")

runFixed := {
   val _ = (Compile / run).toTask(" blue green").value
   println("Done!")
}
引数をエコーするメインクラス Demo の場合、runFixed の実行は以下のようになる:
$ sbt
> runFixed
[info] Running Demo blue green
blue
green
Done!
toTask の各呼び出しは新しいタスクを生成するが、各タスクは元の InputTask (この場合は run)と同じように設定され、異なる入力が適用される。例:
lazy val runFixed2 = taskKey[Unit]("A task that hard codes the values to `run`")

run / fork := true

runFixed2 := {
   val x = (Compile / run).toTask(" blue green").value
   val y = (Compile / run).toTask(" red orange").value
   println("Done!")
}
異なる toTask 呼び出しは、それぞれ新しい JVM でプロジェクトのメインクラスを実行する異なるタスクを定義する。つまり、fork セッティングが両方に適用され、同じクラスパスを持ち、同じメインクラスを実行する。ただし、各タスクはメインクラスに異なる引数を渡す。引数をエコーするメインクラス Demo の場合、runFixed2 の実行出力は以下のようになる:
$ sbt
> runFixed2
[info] Running Demo blue green
[info] Running Demo red orange
blue
green
red
orange
Done!
タブ補完パーサー
このページでは sbt のパーサーコンビネータを解説する。これらのパーサーはユーザー入力をパースし、インプットタスクとコマンドのタブ補完を提供するために使われる。
パーサーコンビネータは、小さなパーサー組み合わせてパーサーを組み立てる。最も基本的な用法では、Parser[A] は String => Option[A] という関数だと考えることができる。パースする String を受け取り、パースが成功すれば Some に包んだ値を、失敗すれば None を返す。エラー処理とタブ補完により話は複雑になるが、本稿では Option に留める。
基本パーサー
最もシンプルなパーサーコンビネータは入力と完全に一致する:
import sbt.{ *, given }
import sbt.complete.DefaultParsers.{ *, given }

// 入力が 'x' なら成功して Char 'x' を返し、
//  それ以外は失敗するパーサー
val singleChar: Parser[Char] = 'x'

// 入力が "blue" なら成功して String "blue" を返し、
//  それ以外は失敗するパーサー
val litString: Parser[String] = "blue"
これらの例では、暗黙変換により Char または String からリテラル Parser が生成される。その他の基本パーサー構築子は charClass、success、failure メソッドである:
import sbt.{ *, given }
import sbt.complete.DefaultParsers.{ *, given }

// 文字が数字なら成功し、マッチした Char を返すパーサー。
//   第 2 引数 "digit" はパーサーを説明し、エラーメッセージで使われる
val digit: Parser[Char] = charClass((c: Char) => c.isDigit, "digit")

// 空の入力文字列なら値 3 を返し、それ以外は失敗するパーサー
val alwaysSucceed: Parser[Int] = success(3)

// 失敗を表す(入力 String に対して常に None を返す)。
//  引数はエラーメッセージである。
val alwaysFail: Parser[Nothing] = failure("Invalid input.")
組み込みパーサー
sbt には sbt.complete.DefaultParsers で定義された複数の組み込みパーサーが含まれる。
よく使われる組み込みパーサーは以下の通りである:
Space、NotSpace、OptSpace、OptNotSpaceはスペースまたは非スペースをパースし、必須か任意かを指定する。StringBasicは引用符付きのテキストをパースする。IntBasicは符号付き Int 値をパースする。DigitとHexDigitは 1 桁の 10 進または 16 進数字をパースする。BoolはBoolean値をパースする
詳細は DefaultParsers API を参照。
パーサーの組み合わせ
これらの基本パーサーを土台に、より興味深いパーサーを構築する。パーサーを順序で組み合わせたり、パーサー間で選択したり、パーサーを繰り返したりできる。
// 入力が "blue" または "green" なら成功し、
//  マッチした入力を返すパーサー
val color: Parser[String] = "blue" | "green"

// "fg" または "bg" にマッチするパーサー
val select: Parser[String] = "fg" | "bg"

// "fg" または "bg"、スペース、そして色にマッチし、マッチした値を返すパーサー
val setColor: Parser[(String, Char, String)] =
  select ~ ' ' ~ color

// 多くの場合、上記のスペースのようにパーサーがマッチした値は不要である
//  そのため ~> または <~ を使い、
//  右または左のパーサーの結果をそれぞれ保持する
val setColor2: Parser[(String, String)]  =  select ~ (' ' ~> color)

// 1 桁以上の数字にマッチし、マッチした文字のリストを返す
val digits: Parser[Seq[Char]] = charClass(_.isDigit, "digit").+

// 0 桁以上の数字にマッチし、マッチした文字のリストを返す
val digits0: Parser[Seq[Char]] = charClass(_.isDigit, "digit").*

// オプションで 1 桁の数字にマッチする
val optDigit: Parser[Option[Char]] = charClass(_.isDigit, "digit").?
結果の変換
パーサーコンビネータの重要な側面は、結果をより有用なデータ構造へと変換することである。そのための基本メソッドは map と flatMap である。以下は map の例と、map の上に実装された便利メソッドである。
// `digits` パーサーを適用し、マッチした
//   文字シーケンスに提供された関数を適用する
val num: Parser[Int] = digits.map: (chars: Seq[Char]) =>
  chars.mkString.toInt }

// 数字文字にマッチし、マッチした文字を返す。入力が数字でなければ '0' を返す
val digitWithDefault: Parser[Char] = charClass(_.isDigit, "digit") ?? '0'

// 上記の例は以下と等価である:
val digitDefault: Parser[Char] =
  charClass(_.isDigit, "digit").?.map: (d: Option[Char]) =>
    d.getOrElse('0')

// 入力が "blue" なら成功し、値 4 を返す
val blue = "blue" ^^^ 4

// 上記は以下と等価である:
val blueM = "blue".map((s: String) => 4)
タブ補完の制御
ほとんどのパーサーは妥当なデフォルトのタブ補完動作を持つ。例えば、文字列および文字リテラルパーサーは空の入力文字列に対して基となるリテラルを提案する。しかしcharClass は任意の条件関数を受け付けるため、有効な補完を決定するのは現実的ではない。examples(...) はそのようなパーサーの明示的な補完を定義する:
val digit = charClass(_.isDigit, "digit").examples("0", "1", "2")
タブ補完は examples を提案として使う。タブ補完を制御するもう一つのメソッドは token である。token の主な目的は提案の境界を決めることである。例えば、パーサーが以下の場合:
("fg" | "bg") ~ ' ' ~ ("green" | "blue")
空入力時の候補補完は以下の通りである: console fg green fg blue bg green bg blue
通常、より小さなセグメントを提案したい。そうしないと提案数が扱いにくくなる。より良いパーサーは以下の通りである:
token( ("fg" | "bg") ~ ' ') ~ token("green" | "blue")
この場合、初期提案は(_ がスペースを表す): console fg_ bg_ となる。
token("green" ~ token("blue")) のようにトークンを重ねたりネストしたりしないこと。動作は未定義であり(将来的にはエラーを生成する予定)、通常は最も外側のトークン定義が使われる。
依存パーサー
パーサーがデータを解析した後、その結果に依存してさらにデータをパースする必要がある場合がある。この動作を得るには flatMap 関数を使う。
例として、有効なリストから複数項目を補完付きで選択する方法を示す。重複は不可能である。項目の区切りにはスペースを使う。
def select1(items: Iterable[String]) =
token(Space ~> StringBasic.examples(FixedSetExamples(items)))
def selectSome(items: Seq[String]): Parser[Seq[String]] = {
select1(items).flatMap: v =>
val remaining = items.filter(_ != v)
if remaining.size == 0 then success(v :: Nil)
else selectSome(remaining).?.map(v +: _.getOrElse(Seq()))
}
この例から分かる通り、flatMap 関数は前の値を提供する。この情報で、残りの項目用に新しいパーサーが構築される。パーサーの出力を変換するために map コンビネータも使われる。
パーサーは、選択肢がなくなる自明なケースに達するまで再帰的に呼ばれる。
コマンド
このページではコマンドの詳細を解説する。概要はコマンドの基本を参照。
説明
コマンドは、システムレベルの構成要素であり、ユーザとのやり取りを捕捉するのによく使われる。コマンドレベルではサブプロジェクトや並列処理のサポートはほとんどなく、それらは act コマンドで実装されている。
プラグイン作者は、まずセッティング、タスク、インプットタスクで問題を解決することを試みるべきである。主な例外は次の通りである:
- sbt 自体の UX を拡張する場合
- 順次処理を必要とする場合(例:
releaseコマンド)
はじめに
コマンドには主に 3つの側面がある:
- ユーザーがコマンドを呼び出すために使う構文。これには次が含まれる:
- 構文のタブ補完
- 入力を適切なデータ構造に変換するパーサー
- パースしたデータ構造を使って実行するアクション。このアクションはビルドの
Stateを変換する。 - ユーザー向けのヘルプ
sbt では、タブ補完を含む構文部分はパーサーコンビネータで指定する。Scala 標準ライブラリのパーサーコンビネータに慣れていれば、似たようなものだと思って構わない。具体的なパーサーコンビネータの使い方はタブ補完パーサーを参照。
State はビルド状態へのアクセスを提供する。登録済みのすべてのコマンド、実行残りのコマンド、プロジェクト関連の情報などである。
最後に、help コマンドがコマンドヘルプを表示するために使う基本的なヘルプ情報を提供できる。
コマンドの定義
コマンドは関数 State => Parser[T] とアクション (State, T) => State を組み合わせる。単に Parser[T] ではなく State => Parser[T] とするのは、現在の State をパーサー構築に使うことが多いためである。例えば、(State が提供する)現在ロード済みのサブプロジェクトが project コマンドの有効な補完を決定する。一般的なケースと個別のケースの例は次の節に示す。
コマンド構築のソース API の詳細は Command.scala を参照。
一般コマンド
一般的なコマンドの構築は次のようになる:
val action: (State, A) => State = ...
val parser: State => Parser[A] = ...
val command: Command = Command("name")(parser)(action)
引数なしコマンド
引数を受け付けないコマンドを構築するための便利メソッド:
val action: State => State = ...
val command: Command = Command.command("name")(action)
単一引数コマンド
任意の内容の単一引数を受け付けるコマンドを構築するための便利メソッド:
// State と単一の引数を受け取る
val action: (State, String) => State = ...
val command: Command = Command.single("name")(action)
複数引数コマンド
スペースで区切られた複数の引数を受け付けるコマンドを構築するための便利メソッド:
val action: (State, Seq[String]) => State = ...
// <arg> は引数のタブ補完時に表示されるヒントである
val command: Command = Command.args("name", "<arg>")(action)
例
次の例は、プロジェクトにコマンドを追加するサンプルビルドである。試すには:
build.sbtとproject/CommandExample.scalaを作成する。- プロジェクトで sbt を実行する。
hello、helloAll、failIfTrue、color、printStateコマンドを試す。- タブ補完と以下のコードを参考にする。
build.sbt は次の通りである:
import CommandExample.*
scalaVersion := "3.8.4"
LocalRootProject / commands ++= Seq(hello, helloAll, failIfTrue, changeColor, printState)
project/CommandExample.scala は次の通りである:
import sbt.*
import Keys.*
import scala.Console
// imports standard command parsing functionality
import complete.DefaultParsers.*
object CommandExample:
// A simple, no-argument command that prints "Hi",
// leaving the current state unchanged.
def hello = Command.command("hello"): s0 =>
Console.out.println("Hi!")
s0
// A simple, multiple-argument command that prints "Hi" followed by the arguments.
// Again, it leaves the current state unchanged.
def helloAll = Command.args("helloAll", "<name>"): (s0, args) =>
println("Hi " + args.mkString(" "))
s0
// A command that demonstrates failing or succeeding based on the input
def failIfTrue = Command.single("failIfTrue"):
case (s0, "true") => s0.fail
case (s0, _) => s0
// Demonstration of a custom parser.
// The command changes the foreground or background terminal color
// according to the input.
lazy val change = Space ~> (reset | setColor)
lazy val reset = token("reset" ^^^ Console.RESET)
lazy val color = token( Space ~> ("blue" ^^^ "4" | "green" ^^^ "2") )
lazy val select = token( "fg" ^^^ "3" | "bg" ^^^ "4" )
lazy val setColor = (select ~ color).map: (g, c) =>
s"\u001B[${g}${c}m"
def changeColor = Command("color")(_ => change): (s0, ansicode) =>
Console.out.print(ansicode)
Console.out.println("Hi")
s0
// A command that demonstrates getting information out of State.
def printState = Command.command("printState"): s0 =>
import s0.*
println(s"definedCommands.size registered commands")
println(s"commands to run: ${show(remainingCommands)}")
println()
println(s"original arguments: ${show(configuration.arguments.toSeq)}")
println(s"base directory: ${configuration.baseDirectory}")
println()
println(s"sbt version: ${configuration.provider.id.version}")
println(s"Scala version (for sbt): ${configuration.provider.scalaProvider.version}")
println()
val extracted = Project.extract(s0)
import extracted.*
println(s"Current build: ${currentRef.build}")
println(s"Current project: ${currentRef.project}")
println(s"Original setting count: ${session.original.size}")
println(s"Session setting count: ${session.append.size}")
s0
def show[A1](s: Seq[A1]) =
s.map("'" + _ + "'").mkString("[", ", ", "]")
end CommandExample
プラグイン
このページでは中級者向けにプラグインの詳細を解説する。 プラグインシステムの概要はプラグインの基本を参照。
説明
プラグインはビルド定義を拡張する手段であり、組み込みのセッティングやタスクではできない機能を追加するのに使われる。例としては Docker コンテナの構築、Scala.JS のサポート、GitHub Actions の YAML 生成などがある。
プラグインは sbt のセッティングの列を定義し、すべてのプロジェクトに自動的に追加するか、選択したプロジェクトに明示的に宣言する。プラグインは新しいコマンドも定義できる。sbt 1.x および 2.x のプラグインは sbt.AutoPlugin トレイトを継承し、依存プラグイン間のセッティングの順序を自動化する。
プラグインの作成
Conceptually we can think of the sbt plugins to be any other libraries on the metabuild, which is currently on Scala 3.8.4. However, in practice modern sbt plugins are built around auto plugin (sbt.AutoPlugin), which provides tasks and settings in the correct order. See the Plugin dependencies section for more details.
build.sbt の設定
auto plugin を作るには、プロジェクトを作成し SbtPlugin を有効にする。
version := "0.1.0-SNAPSHOT"
organization := "com.example"
homepage := Some(url("https://github.com/sbt/sbt-hello"))
lazy val root = rootProject
.enablePlugins(SbtPlugin)
.settings(
name := "sbt-hello",
pluginCrossBuild / sbtVersion := {
scalaBinaryVersion.value match
case "3" => "2.0.0-RC10" // set minimum sbt version
}
)
- sbt 2.x のプラグインは Scala 3.x でコンパイルする必要がある。
scalaVersionを指定しない場合、sbt はプラグインに適した Scala バージョンをデフォルトとする。 pluginCrossBuild / sbtVersionは、プラグインを より古い sbt バージョン向けにコンパイルするためのセッティングであり、プラグイン利用者が sbt のバージョン範囲から選べるようにする。
projectSettings
適切な名前空間で、sbt.AutoPlugin を継承して auto plugin オブジェクトを定義する。auto plugin では、セッティングはプラグインが projectSettings メソッドを通じて直接提供する。サブプロジェクトに hello という名前のタスクを追加する例を示す:
package sbthello
import sbt.*
import Keys.*
object HelloPlugin extends AutoPlugin:
override def trigger = allRequirements
object autoImport:
val helloGreeting = settingKey[String]("greeting")
val hello = taskKey[Unit]("say hello")
end autoImport
import autoImport.*
override lazy val globalSettings: Seq[Setting[?]] = Seq(
helloGreeting := "hi",
)
override lazy val projectSettings: Seq[Setting[?]] = Seq(
hello := {
val s = streams.value
val g = helloGreeting.value
s.log.info(g)
}
)
end HelloPlugin
Scala では、def メソッドは統一アクセス原理と呼ばれる仕組みで lazy val によりオーバーライドできる。
projectSettings には lazy val を使うことを推奨する。セッティング定義は不変であることが多いためである。
globalSettings
globalSettings はグローバルなセッティングに一度だけ追加される(例: Global / helloGreeting)。これによりプラグインは新しい機能や新しいデフォルトを提供できる。主な用途の一つは、IDE プラグインのようにコマンドをグローバルに追加することである。
override lazy val globalSettings: Seq[Setting[?]] = Nil
可能な限り、プラグインは globalSettings でデフォルト値を定義すべきである。値を最も広いスコープで提供し、最も狭いスコープで使用すると、ユーザーがセッティングを変更できる自由度が最大になる。
プラグイン依存性の実装
次にプラグイン依存性を定義する。
package sbtless
import sbt.*
import Keys.*
object SbtLessPlugin extends AutoPlugin:
override def requires = SbtJsTaskPlugin
override lazy val projectSettings = ...
end SbtLessPlugin
requires メソッドは Plugins 型の値を返し、依存リストを構築する DSL である。requires メソッドには通常、次のいずれかが含まれる:
empty(プラグインなし)- 他の auto plugin
&&演算子(複数の依存を定義する)
ルートプラグインとトリガー付きプラグイン
一部のプラグインは常にサブプロジェクトで明示的に有効化される必要がある。これらをルートプラグインと呼ぶ。プラグイン依存グラフの「ルート」ノードとなるからだ。
auto plugin は、依存が満たされるサブプロジェクトに自動的に発動される方法も提供する。これらをトリガー付きプラグインと呼び、trigger メソッドをオーバーライドして作成する。
例えば、ビルドにコマンドを自動的に追加できるトリガー付きプラグインを作りたい場合がある。そうするには、requires メソッドが empty を返すようにし、trigger メソッドを allRequirements でオーバーライドする。
package sbthello
import sbt.*
import Keys.*
object HelloPlugin2 extends AutoPlugin:
override def trigger = allRequirements
....
end HelloPlugin2
ビルドユーザーは、このプラグインを project/plugins.sbt に含める必要があるが、build.sbt に含める必要はなくなる。この機能はプラグイン依存性と組み合わせると真価を発揮する。SbtLessPlugin を別のプラグインに依存するよう修正してみる:
package sbtless
import sbt.*
import Keys.*
object SbtLessPlugin extends AutoPlugin:
override def trigger = allRequirements
override def requires = SbtJsTaskPlugin
override lazy val projectSettings = ...
end SbtLessPlugin
実際、PlayScala プラグイン(Play フレームワークは sbt プラグインである)は SbtJsTaskPlugin をプラグイン依存性の 1つとして列挙している。したがって、次のような build.sbt を定義すると:
lazy val root = rootProject
.enablePlugins(PlayScala)
SbtLessPlugin からのセッティング列が、PlayScala のセッティングの後のどこかに自動的に追加される。
これによりプラグインは、既存のプラグインを透過的に、かつ正しく、機能拡張することができる。またユーザーから手動でセッティング列の順序付けをする負担を取り除くことで、プラグイン作者は安心して機能拡張を提供することができる。
autoImport によるインポートの制御
auto plugin が autoImport という名前の val、lazy val、または object を提供すると、そのフィールドの内容は set、eval、および *.sbt ファイルでワイルドカードインポートされる。
package sbthello
import sbt.*
import Keys.*
object HelloPlugin3 extends AutoPlugin:
object autoImport:
val greeting = settingKey[String]("greeting")
val hello = taskKey[Unit]("say hello")
end autoImport
import autoImport.*
override def trigger = allRequirements
....
end HelloPlugin3
通常、autoImport は新しいキー(SettingKey、TaskKey、または InputKey)や、インポートや修飾なしで使えるコアメソッドを提供するために使われる。
プラグインの例
典型的なプラグインの例:
version := "0.1.0-SNAPSHOT"
organization := "com.example"
homepage := Some(url("https://github.com/sbt/sbt-obfuscate"))
lazy val root = rootProject
.enablePlugins(SbtPlugin)
.settings(
name := "sbt-obfuscate",
pluginCrossBuild / sbtVersion := {
scalaBinaryVersion.value match
case "3" => "2.0.1" // set minimum sbt version
}
)
package sbtobfuscate
import sbt.*
import sbt.Keys.*
import sbt.CacheImplicits.given
import xsbti.HashedVirtualFileRef
object ObfuscatePlugin extends AutoPlugin:
// by defining autoImport, the settings are automatically
// imported into user's `*.sbt`
object autoImport:
val obfuscate = taskKey[Seq[HashedVirtualFileRef]]("Obfuscates files.")
// configuration points, like built-in `version` and `libraryDependencies`
val obfuscateLiterals = settingKey[Boolean]("Obfuscate literals.")
end autoImport
import autoImport.*
// This plugin is automatically enabled for projects which are JvmPlugin.
override def trigger = allRequirements
// default values for the settings
override lazy val globalSettings: Seq[Def.Setting[?]] = Seq(
obfuscateLiterals := false,
)
// default implementations for the tasks
val baseObfuscateSettings: Seq[Def.Setting[?]] = Seq(
obfuscate := {
Obfuscate(sourcesVF.value, (obfuscate / obfuscateLiterals).value)
},
)
// a group of settings that are automatically added to projects.
override lazy val projectSettings: Seq[Def.Setting[?]] =
inConfig(Compile)(baseObfuscateSettings) ++
inConfig(Test)(baseObfuscateSettings)
end ObfuscatePlugin
object Obfuscate:
def apply(
sources: Seq[HashedVirtualFileRef],
obfuscateLiterals: Boolean
): Seq[HashedVirtualFileRef] =
// TODO obfuscate stuff!
sources
end Obfuscate
使用例
プラグインを使うビルド定義は、例えば次のような build.sbt になる:
obfuscateLiterals := true
auto plugin の利用
よくあるのは、リポジトリに公開されたバイナリプラグインを使う場合である。必要な sbt プラグイン、一般的な依存、必要なリポジトリをすべて含む project/plugins.sbt を作成できる:
addSbtPlugin("org.example" % "plugin" % "1.0")
addSbtPlugin("org.example" % "another-plugin" % "2.0")
// ビルド定義で使う通常のライブラリ(sbt プラグインではない)
libraryDependencies += "org.example" % "utilities" % "1.3"
resolvers += "Example Plugin Repository" at "https://example.org/repo/"
多くの auto plugin はプロジェクトにセッティングを自動追加するが、明示的な有効化が必要なものもある。例を示す:
lazy val util = (project in file("util"))
.enablePlugins(FooPlugin, BarPlugin)
.disablePlugins(plugins.IvyPlugin)
.settings(
name := "hello-util"
)
メタビルド
メタビルドは project/ フォルダ下のプロジェクトである。このプロジェクトのクラスパスは、project/ 内のビルド定義およびプロジェクトのベースディレクトリにある .sbt ファイルに使われる。eval および set コマンドにも使われる。
具体的には、
- メタビルドが宣言したマネージ依存性は取得され、通常のプロジェクトと同様にビルド定義のクラスパスで利用できる。
project/lib/のアンマネージ依存性は、通常のプロジェクトと同様にビルド定義で利用できる。project/プロジェクト内のソースはビルド定義ファイルであり、マネージ依存性とアンマネージ依存性から構築したクラスパスでコンパイルされる。- サブプロジェクト依存は
project/plugins.sbtに宣言できる(通常プロジェクトのbuild.sbtと同様)し、ビルド定義から利用できる。
ビルド定義のクラスパスから sbt/sbt.autoplugins 記述子ファイルが検索され、sbt.AutoPlugin 実装の名前が含まれる。
reload plugins コマンドは現在のビルドを(ルート)プロジェクトのメタビルド定義に切り替える。これによりメタビルドプロジェクトを通常のサブプロジェクトのように操作できる。reload return は元のビルドに戻る。メタビルドプロジェクトのセッションで保存されていないセッティングは破棄される。
auto plugin は、サブプロジェクトに自動注入するセッティングを定義するモジュールである。さらに auto plugin は次の機能を提供する:
- 選択した名前を
.sbtファイルおよびevalとsetコマンドに自動インポートする。 - 他の auto plugin へのプラグイン依存を指定する。
- すべての依存が揃うと自動的に自身を有効化する。
- 必要に応じて
projectSettings、buildSettings、globalSettingsを指定する。
プラグイン依存性
sbt 0.13.5 で AutoPlugin システムが導入される前は、あるプラグインが別のプラグインのセッティングやタスクに依存する場合、ビルド利用者が正しい順序でプラグインを含める必要があった。アプリケーション内のプラグイン数が増えると複雑でエラーが起きやすくなった。
auto plugin は他の auto plugin に依存でき、これらの依存セッティングが先にロードされるようにできる。
SbtLessPlugin と、さらに SbtJsTaskPlugin、SbtWebPlugin、JvmPlugin に依存する SbtCoffeeScriptPlugin があるとする。これらすべてを手動で有効化する代わりに、プロジェクトは次のように SbtLessPlugin と SbtCoffeeScriptPlugin だけを有効化すればよい:
lazy val root = (project in file("."))
.enablePlugins(SbtLessPlugin, SbtCoffeeScriptPlugin)
これにより、正しい順序でプラグインから適切なセッティング列が引き込まれる。
Maven 公開の慣例
sbt 2.x のプラグインは、成果物名に _sbt2_3 サフィックスを付けて Maven レイアウトのリポジトリに公開される。例えば sbt-ci-release 1.11.2 は Central Repo に https://repo1.maven.org/maven2/com/github/sbt/sbt-ci-release_sbt2_3/1.11.2/ として公開される。このサフィックスは sbt が自動的に付加するため、build.sbt の name は sbt-ci-release などとだけ書けばよい。
Community Plugins
The GitHub sbt Organization
The sbt organization is available for use by any sbt plugin. Developers who contribute their plugins into the community organization will still retain control over their repository and its access. The goal of the sbt organization is to organize sbt software into one central location.
A side benefit to using the sbt organization for projects is that you can use gh-pages to host websites under the https://www.scala-sbt.org domain.
The sbt autoplugin giter8 template is a good place to start. This sets up a new sbt plugin project appropriately. The generated README includes a summary of the steps for publishing a new community plugin.
[Edit] this page to submit a pull request that adds your plugin to the list.
Code formatter plugins
- sbt-scalafmt: code formatting using Scalafmt.
- sbt-java-formatter: code formatting for Java sources.
One jar plugins
- sbt-assembly: create über JARs.
Release plugins
- sbt-native-packager (docs): build native packages (RPM, .deb etc) for your projects.
- sbt-release: create a customizable release process.
- sbt-ci-release: automate Central Repo releases from GitHub Actions.
- sbt-native-image: generate GraalVM native-image binaries.
- sbt-pgp: sign artifacts using PGP/GPG and manage signing keys.
IDE integration plugins
- sbt-structure: extract project structure in XML for IntelliJ Scala plugin.
- Metals: Scala language server.
Test plugins
- sbt-jmh: run Java Microbenchmark Harness (JMH) benchmarks from sbt.
- sbt-stryker4s: Test your tests with mutation testing.
- junit-interface: test interface for JUnit 4.
- sbt-doctest: generate and run tests from Scaladoc comments.
- snapshot4s: snapshot testing
- sbt-jupiter-interface: test interface for JUnit 5.
- test-times-reporter: report slow tests.
Library dependency plugins
- sbt-license-report: generate reports of licenses used by dependencies.
- sbt-dependency-submission: Dependency Submission API integration.
- sbt-conflict-classes: show conflict classes in the classpath.
- sbt-akka-version-check: detect Akka module mismatches and fail build.
- sbt-license-check: check and report on licenses used, fail build for disallowed licenses.
- sbt-pekko-version-check: check if the Apache Pekko modules match.
- sbt-jackson-version-check: check if the Jackson modules match.
- sbt-dependency-rules: enforce user-defined rules on project dependencies.
Code generator plugins
-
sbt-buildinfo: generate Scala code from sbt setting keys.
-
smithy4s: Smithy for Scala
-
sbt-scalaxb: generate model classes from XML schemas and WSDL.
-
avrohugger: generate case classes from Avro schemas.
-
sbt-github-actions: generate GitHub Actions YAML
-
sbt-header: auto-generate source code file headers (such as copyright notices).
-
sbt-protobuf: protobuf code generator.
-
sbt-boilerplate: TupleX and FunctionX boilerplate code generator.
-
sbt-contraband (docs): generate pseudo-case classes from GraphQL schemas.
-
sbt-openapi-generator: OpenAPI generator.
-
sbt-teavm: generate JavaScript and WebAssembly from Java bytecode
Language support plugins
- sbt-redacted: redacted compiler plugin.
Web and frontend development plugins
-
sbt-war: package and run WAR files
-
sbt-web: library for building sbt plugins for the web.
-
sbt-js-engine: support for sbt plugins that use JavaScript.
-
sbt-less: Less CSS compilation support.
-
sbt-coffeescript: CoffeeScript support.
Database plugins
- flyway-sbt Flyway database migration.
- sbt-dao-generator generate code for O/R Mapper Free
- sbt-sliquibase: generate code for Slick API types from a Liquibase changelog.
Static code analysis plugins
- wartremover: flexible Scala linting tool.
- sbt-scalafix: refactoring and linting tool for Scala using Scalafix.
- sbt-warning-diff: show added/removed warnings.
Utility and system plugins
-
MiMa: binary compatibility management for Scala libraries.
-
sbt-git: run git commands from sbt.
-
sbt-dotenv: load environment variables from .env into the JVM System Environment for local development.
-
sbt-dynver: set project version dynamically from git metadata.
-
sbt-javaagent: add Java agents to projects.
-
sbt-nocomma: reduce commas.
-
sbt-jshell: Java REPL for sbt.
-
sbt-config: configures subproject via HOCON.
-
sbt-vimquit: adds
:qcommand.
Documentation plugins
- mdoc: typechecked markdown documentation for Scala
- sbt-unidoc: create unified API documentation across subprojects.
- sbt-class-diagram: generate class diagrams from Scala source code.
- sbt-plantuml: generate PlantUML diagram.
Code coverage plugins
- sbt-scoverage: Scala code coverage using Scoverage.
- sbt-jacoco: Scala and Java code coverage using JaCoCo.
レシピ
レシピセクションは、目的を達成することを主眼に説明無しで手順だけが書かれた中上級者向けのドキュメントだ。
そのため、sbt の初学者は、まず例題でみる sbt と sbt 入門から読み始めてほしい。
Hello World の書き方
目的
Scala で Hello World プログラムを書き、実行したい。
手順
-
hello_scala/のような新規ディレクトリを作成する -
hello_scala/の下にproject/ディレクトリを作成し、project/build.propertiesを次の内容で作成する:sbt.version=2.0.1 -
hello_scala/の下にbuild.sbtを作成する:scalaVersion := "3.8.4" -
hello_scala/の下にHello.scalaを作成する:@main def main(args: String*): Unit = println(s"Hello ${args.mkString}") -
ターミナルで
hello_scala/に移動し、sbtを実行する:$ sbt -
プロンプトが表示されたら
runと入力する:sbt:hello_scala> run -
sbt シェルを終了するには
exitと入力する:sbt:hello_scala> exit
代替方法
急ぐ場合は、新規ディレクトリで sbt init を実行し、最初のテンプレートを選択すればよい。
Central Repo への公開
レシピセクションは目的に焦点を当て、説明は最小限に留める。
Central Portal への公開の一般的な概念については、Sonatype の Publish guides も参照。
目的
プロジェクトを Central Repository に公開したい。
手順
事前準備 1: Central Portal の登録
Sonatype の Publish guides に従って Central Portal アカウントを作成する。
- OSSRH アカウントを持っていた場合は、Forgot password フローで新しい Central Portal に移行できる。これにより以前のネームスペース関連を維持できる。
- GitHub で認証する場合、
io.github.<user_name>が自動的にアカウントに紐づく。
register a namespace ガイドの手順に従い、ドメイン名をアカウントに紐づける。
事前準備 2: PGP 鍵ペア
Sonatype の GPG guide に従って PGP 鍵ペアを生成する。
GnuPG をインストールし、バージョンを確認する:
$ gpg --version
gpg (GnuPG/MacGPG2) 2.2.8
libgcrypt 1.8.3
Copyright (C) 2018 Free Software Foundation, Inc.
License GPLv3+: GNU GPL version 3 or later <https://gnu.org/licenses/gpl.html>
次に鍵を生成する:
$ gpg --gen-key
鍵を一覧表示する:
$ gpg --list-keys
/home/foo/.gnupg/pubring.gpg
------------------------------
pub rsa4096 2018-08-22 [SC]
1234517530FB96F147C6A146A326F592D39AAAAA
uid [ultimate] your name <[email protected]>
sub rsa4096 2018-08-22 [E]
鍵を配布する:
$ gpg --keyserver keyserver.ubuntu.com --send-keys 1234517530FB96F147C6A146A326F592D39AAAAA
手順 1: sbt-pgp
sbt-pgp プラグイン は公開アーティファクトを GPG/PGP で署名できる。(オプションで sbt-ci-release により公開プロセスを自動化できる。)
ビルドで有効にするため、project/plugins.sbt に次の行を追加する:
addSbtPlugin("com.github.sbt" % "sbt-pgp" % "2.3.1")
手順 2: 認証情報
認証情報として使うユーザートークンをポータルで生成する。トークンは安全な場所(リポジトリ内ではない)に保存すること。
sbt 2.x は環境変数 SONATYPE_USERNAME と SONATYPE_PASSWORD からも読み取り、central.sonatype.com 用の認証情報をそのまま追加できる。GitHub Actions など CI 環境からの自動公開に便利である。
- run: sbt ci-release
env:
PGP_PASSPHRASE: ${{ secrets.PGP_PASSPHRASE }}
PGP_SECRET: ${{ secrets.PGP_SECRET }}
SONATYPE_PASSWORD: ${{ secrets.SONATYPE_PASSWORD }}
SONATYPE_USERNAME: ${{ secrets.SONATYPE_USERNAME }}
ローカルマシンでは、$HOME/.sbt/2/credentials.sbt ファイルに次の内容を記述するのが一般的である:
credentials += Credentials(Path.userHome / ".sbt" / "sonatype_central_credentials")
次に $HOME/.sbt/sonatype_central_credentials ファイルを作成する:
host=central.sonatype.com
user=<your username>
password=<your password>
手順 3: build.sbt の設定
Maven リポジトリに公開するには、正しいメタデータが生成されるよういくつかのセッティングを設定する必要がある。
注意: Central Portal に公開するには、publishTo を localStaging リポジトリに設定する必要がある:
// new setting for the Central Portal
publishTo := {
val centralSnapshots = "https://central.sonatype.com/repository/maven-snapshots/"
if version.value.endsWith("-SNAPSHOT") then Some("central-snapshots" at centralSnapshots)
else localStaging.value
}
これらのセッティングを build.sbt の末尾または別の publish.sbt に追加する:
organization := "com.example.project2"
organizationName := "example"
organizationHomepage := Some(url("http://example.com/"))
scmInfo := Some(
ScmInfo(
url("https://github.com/your-account/your-project"),
"scm:[email protected]:your-account/your-project.git"
)
)
developers := List(
Developer(
id = "Your identifier",
name = "Your Name",
email = "your@email",
url = url("http://your.url")
)
)
description := "Some description about your project."
licenses := List(License.Apache2)
homepage := Some(url("https://github.com/example/project"))
// POM から Maven Central 以外の追加リポジトリをすべて削除する
pomIncludeRepository := { _ => false }
publishMavenStyle := true
// new setting for the Central Portal
publishTo := {
val centralSnapshots = "https://central.sonatype.com/repository/maven-snapshots/"
if version.value.endsWith("-SNAPSHOT") then Some("central-snapshots" at centralSnapshots)
else localStaging.value
}
pom.xml(Maven が使うプロジェクトコンフィギュレーションの最終成果物)の完全な形式は POM Reference に記載されている。build.sbt の pomExtra オプションでさらにデータを追加できる。
手順 4: アーティファクトのステージング
sbt シェルから実行する:
> publishSigned
手順 5: バンドルのアップロードまたはリリース
sbt シェルから実行する:
> sonaUpload
これでバンドルが Central Portal にアップロードされる。「Publish」ボタンをクリックして Central Repository に公開する。
公開を自動化する場合は、次を実行する:
> sonaRelease
公開したアーティファクトが Central Repository https://repo1.maven.org/maven2/ に表示されるまで、10 分から数時間かかることがある。
Metals のビルドサーバーとして sbt を使う
目的
VS Code で Metals のビルドサーバーとして sbt を使いたい。
手順
VS Code で Metals を使うには:
- Extensions タブから Metals をインストールする:
build.sbtを含むディレクトリを開く。- メニューバーから View > Command Palette...(macOS では
Cmd-Shift-P)から「Metals: Switch build server」を実行し「sbt」を選択する:
- インポートが完了したら、Scala ファイルを開いてコード補完が動作することを確認する:
一部のサブプロジェクトを BSP から除外するには、次のセッティングを使う:
bspEnabled := false
コードを変更して保存すると(macOS では Cmd-S)、Metals が sbt を呼び出して実際のビルドを行う。
sbt セッションへのログイン
Metals が sbt をビルドサーバーとして使っている間、シンクライアントで同じ sbt セッションにログインすることもできる。
- Terminal セクションで
sbt --clientと入力する:
これで Metals が起動した sbt セッションにログインできる。その中で testOnly や他のタスクを、すでにコンパイル済みのコードに対して呼び出せる。
IntelliJ IDEA へのインポート
目的
sbt を使ったビルドを IntelliJ IDEA にインポートしたい。
手順
IntelliJ IDEA は JetBrains社が開発した IDE で、Community Edition は Apache v2 ライセンスの元で公開されている。IntelliJ は sbt を含む多くのビルドツールと連携してプロジェクトをインポートする。
IntelliJ IDEA にビルドをインポートするには:
- Plugins タブから Scala プラグインをインストールする:
- Projects から
build.sbtを含むディレクトリを開く:
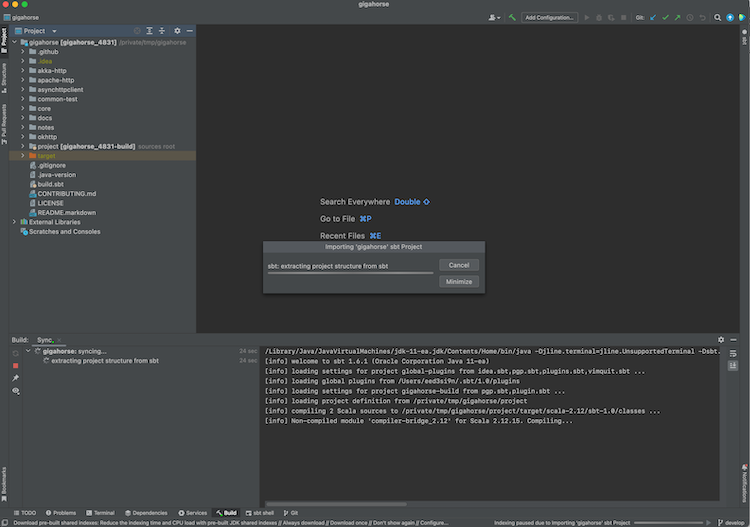
- インポートが完了したら、Scala ファイルを開いてコード補完が動作することを確認する。
IntelliJ Scala プラグインは独自の軽量コンパイルエンジンでエラーを検出する。高速だが誤検出することもある。compiler-based highlighting に従い、IntelliJ を Scala コンパイラでエラーハイライトするよう設定できる。
IntelliJ IDEA のデバッガー
- IntelliJ は、コードにブレークポイントを設置できるデバッガーを持つ:
- ユニットテストを右クリックして「Debug '<test name>'」を選択すると対話的デバッグを開始できる。または、ユニットテスト近くのエディタ左側の緑の run アイコンをクリックしてもよい。テストがブレークポイントに達すると、変数の値を確認できる:
デバッガーセッションの操作方法の詳細は、IntelliJ ドキュメントのコードのデバッグを参照。
代替方法
IntelliJ IDEA のビルドサーバーとして sbt を使う(上級者向け)
IntelliJ にビルドをインポートするということは、実質 IntelliJ をビルドツール兼コンパイラとして使うことになる(compiler-based highlighting も参照)。多くのユーザーはその方式で満足しているが、コードベースによってはコンパイルエラーの一部が誤検出になる、ソースを生成するプラグインとうまく連携しないなど、sbt と同一のビルドセマンティクスでコーディングしたい、といった場合がある。幸い、現代の IntelliJ は Build Server Protocol (BSP) 経由で sbt を含む代替の「ビルドサーバー」をサポートしている。
IntelliJ で Build Server Protocol (BSP) を使う利点は、実際のビルド作業に sbt を使うことである。横で sbt セッションを起動していたようなプログラマーなら、二重コンパイルを避けられる。
| Import to IntelliJ | BSP with IntelliJ | |
|---|---|---|
| Reliability | ✅ Reliable behavior | ⚠️ Less mature. Might encounter UX issues. |
| Responsiveness | ✅ | ⚠️ |
| Correctness | ⚠️ Uses its own compiler for type checking, but can be configured to use scalac | ✅ Uses Zinc + Scala compiler for type checking |
| Generated source | ❌ Generated source requires resync | ✅ |
| Build reuse | ❌ Using sbt side-by-side requires double build | ✅ |
IntelliJ で sbt をビルドサーバーとして使うには:
- Plugins タブから Scala プラグインをインストールする。
- BSP 方式を使うには、IntelliJ を終了し、既存の
.ideaディレクトリがあれば削除する。 - ターミナルで
sbt bspConfigを実行して.bspディレクトリを生成する。 - IntelliJ を開き、
build.sbtファイルを開く。プロンプトが表示されたら BSP project を選択する:
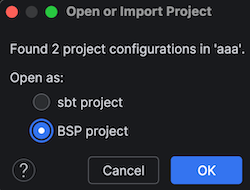
- インポートが完了したら、Scala ファイルを開いてコード補完が動作することを確認する:
一部のサブプロジェクトを BSP から除外するには、次のセッティングを使う:
bspEnabled := false
- Preferences を開き、BSP を検索して「build automatically on file save」にチェックを入れ、「export sbt projects to Bloop before import」のチェックを外す:
コードを変更して保存すると(macOS では Cmd-S)、IntelliJ が sbt を呼び出して実際のビルドを行う。
詳細は Igal Tabachnik さんの Using BSP effectively in IntelliJ and Scala も参照。
sbt セッションへのログイン
We can also log into the existing sbt session using the thin client.
- Terminal セクションで
sbt --clientと入力する:
これで IntelliJ が起動した sbt セッションにログインできる。その中で testOnly や他のタスクを、すでにコンパイル済みのコードに対して呼び出せる。
GitHub Actions の設定
レシピセクションは目的に焦点を当て、説明は最小限に留める。
GitHub Actions に関する一般的な概念については GitHub Actions documentation も参照。
目的
プロジェクトを GitHub Actions でビルド、テストしたい。
基本的な設定
GitHub Actions の設定は主に .github/workflows/ci.yml にて行われる。以下は、setup-java を用いた最小の CI ワークフローだ:
name: CI
on:
pull_request:
push:
jobs:
test:
runs-on: ubuntu-latest
steps:
- name: Checkout
uses: actions/checkout@v6
- name: Setup JDK
uses: actions/setup-java@v5
with:
distribution: temurin
java-version: 17
cache: sbt
- name: Setup sbt
uses: sbt/setup-sbt@v1
- name: Build and Test
run: sbt -v test
ディスク・キャッシュの拒否
setup-sbt は、sbt 2.x のディスクキャッシュを自動的に有効化する。これは以下のようにして拒否できる:
- uses: sbt/setup-sbt@v1
with:
disk-cache: false
ビルド・マトリックス
以下は、ビルド・マトリックスの使用例だ:
name: CI
on:
pull_request:
push:
jobs:
test:
strategy:
fail-fast: false
matrix:
include:
- os: ubuntu-latest
java: 17
distribution: temurin
jobtype: 1
- os: ubuntu-latest
java: 17
distribution: temurin
jobtype: 2
- os: windows-latest
java: 17
distribution: temurin
jobtype: 2
- os: ubuntu-latest
java: 17
distribution: temurin
jobtype: 3
runs-on: ${{ matrix.os }}}
env:
JAVA_OPTS: -Xms2048M -Xmx2048M -Xss6M -Dfile.encoding=UTF-8
steps:
- name: Checkout
uses: actions/checkout@v6
- name: Setup JDK
uses: actions/setup-java@v5
with:
distribution: ${{ matrix.distribution }}}
java-version: ${{ matrix.java }}}
cache: sbt
- name: Setup sbt
uses: sbt/setup-sbt@v1
- name: Build and test (1)
if: ${{ matrix.jobtype == 1 }}}
shell: bash
run: |
sbt -v "mimaReportBinaryIssues; scalafmtCheckAll; test;"
- name: Build and test (2)
if: ${{ matrix.jobtype == 2 }}}
shell: bash
run: |
sbt -v "scripted actions/*"
- name: Build and test (3)
if: ${{ matrix.jobtype == 3 }}}
shell: bash
run: |
sbt -v "scripted dependency-management/*"
sbt-github-actions
他にも Daniel Spiewak さんが作った sbt-github-actions という sbt プラグインがあり、これは build.sbt を用いてワークフローファイルを生成することができる。
ソース依存プラグイン
目的
Central Repo に公開せず、git リポジトリでホストされているプラグインを使いたい。
手順
-
sbt 2.x でビルドした sbt 2.x プラグインを git リポジトリでホストする。
-
project/plugins.sbtに以下を追加する:// In project/plugins.sbt lazy val jmhRef = ProjectRef( uri("https://github.com/eed3si9n/sbt-jmh.git#303c3e98e1d1523e6a4f99abe09c900165028edb"), "plugin") BareBuildSyntax.dependsOn(jmhRef) -
sbt を起動すると、リポジトリが
$HOME/.sbt/2/staging/の下に自動的にクローンされる。
上記において、https://github.com/eed3si9n/sbt-jmh.git は GitHub でホストされているプラグインの HTTP エンドポイントであり、303c3e98e1d1523e6a4f99abe09c900165028edb はデフォルトブランチのコミット ID である。
VirtualAxis に対するクロスビルド
目的
Apache Spark バージョンを表す VirtualAxis に対してクロスビルドしたい。
手順
- ローカルで弱い軸を定義する:
import sbt.*
case class SparkAxis(idSuffix: String, directorySuffix: String)
extends VirtualAxis.WeakAxis
- カスタム列を持つ project matrix を定義する。以下の例では、Spark 3 に対しては Scala 2.12 と 2.13、Spark 4 に対しては Scala 2.13 と 3 をビルドする。
lazy val scala212 = "2.12.21"
lazy val scala213 = "2.13.18"
lazy val scala3 = "3.8.4"
lazy val spark3 = SparkAxis(idSuffix = "Spark3", directorySuffix = "spark3")
lazy val spark4 = SparkAxis(idSuffix = "Spark4", directorySuffix = "spark4")
organization := "com.example"
version := "0.1.0-SNAPSHOT"
lazy val app = (projectMatrix in file("app"))
.settings(
name := "app"
)
.customRow(
scalaVersions = Seq(scala212, scala213),
axisValues = Seq(spark3, VirtualAxis.jvm),
settings = Seq(
moduleName := name.value + "_spark3",
libraryDependencies += "org.apache.spark" %% "spark-core" % "3.5.8",
)
)
.customRow(
scalaVersions = Seq(scala213, scala3),
axisValues = Seq(spark4, VirtualAxis.jvm),
settings = Seq(
moduleName := name.value + "_spark4",
libraryDependencies += ("org.apache.spark" %% "spark-core" % "4.1.0")
.cross(CrossVersion.for3Use2_13),
)
)
app/src/main/scala以下にソースを置く:
package example
import org.apache.spark.SparkContext
object A {
def main(args: Array[String]): Unit = {
val sc = new SparkContext("local", "test")
sc.stop()
}
}
実行を確認する:
sbt:virtual-axis-root> appSpark4/run
[info] running (fork) example.A
Using Spark's default log4j profile: org/apache/spark/log4j2-defaults.properties
26/05/05 00:00:00 INFO SparkContext: Running Spark version 4.1.0
Glossary
Symbols
:=, +=, ++=
These construct a Setting, which is the fundamental type in the settings system.
%
This is used to build up a ModuleID.
%%
This is similar to % except that it identifies a dependency that has been cross built.
%%%
This is defined in sbt-platform-deps in sbt 1.x.
C
コマンド
A system-level building block of sbt, often used to capture user interaction or IDE interaction. See Command basics.
クロスビルド
The idea of building multiple targets from the same set of source file. This includes Scala cross building, targetting multiple versions of Scala releases; platform cross building, targetting JVM, Scala.JS, and Scala Native; and custom virtual axis like Spark versions.
D
Dependency resolution
During library management, when multiple version candidates (e.g. foo:2.2.0 and foo:3.0.0) are found for a library foo within a dependency graph, it is called a dependency conflict. The process of mediating the conflict into a single version is called dependency resolution. Often, this would result in the older version beging removed from the dependency graph, which is called an eviction of foo:2.2.0. In some cases, an eviction is considered unsafe because the candidates are not replacable. See sbt update.
E
Eviction
V
value
.value is used to denote a happens-before relationship from one task or setting to another. This method is special (it is a macro) and cannot be used except in := or in the standalone construction methods Def.setting and Def.task.
Setup notes
See Installing sbt runner for the instruction on general setup. Using Coursier or SDKMAN has two advantages.
- They will install the official packaging by Eclipse Adoptium etc, as opposed to the "mystery meat OpenJDK builds".
- They will install
tgzpackaging of sbt that contains all JAR files. (DEB and RPM packages do not to save bandwidth)
This page describes alternative ways of installing the sbt runner. Note that some of the third-party packages may not provide the latest version.
OS specific setup
macOS
Homebrew
$ brew install sbt
Homebrew maintainers have added a dependency to JDK 13 because they want to use more brew dependencies (brew#50649). This causes sbt to use JDK 13 even when java available on PATH is JDK 8 or 11. To prevent sbt from running on JDK 13, install jEnv or switch to using SDKMAN.
Windows
Chocolatey
> choco install sbt
Scoop
> scoop install sbt
Linux
Ubuntu and other Debian-based distributions
DEB package is officially supported by sbt, but it does not contain JAR files to save bandwidth.
Ubuntu and other Debian-based distributions use the DEB format, but usually you don't install your software from a local DEB file. Instead they come with package managers both for the command line (e.g. apt-get, aptitude) or with a graphical user interface (e.g. Synaptic). Run the following from the terminal to install sbt (You'll need superuser privileges to do so, hence the sudo).
sudo apt-get update
sudo apt-get install apt-transport-https curl gnupg -yqq
curl -sL "https://keyserver.ubuntu.com/pks/lookup?op=get&search=0x2EE0EA64E40A89B84B2DF73499E82A75642AC823" | sudo gpg --dearmor -o /etc/apt/keyrings/scalasbt.gpg
echo "deb [signed-by=/etc/apt/keyrings/scalasbt.gpg] https://repo.scala-sbt.org/scalasbt/debian all main" | sudo tee /etc/apt/sources.list.d/sbt.list
sudo apt-get update
sudo apt-get install sbt
Package managers will check a number of configured repositories for packages to offer for installation. You just have to add the repository to the places your package manager will check.
Once sbt is installed, you'll be able to manage the package in aptitude or Synaptic after you updated their package cache. You should also be able to see the added repository at the bottom of the list in System Settings -> Software & Updates -> Other Software:

sudo apt-key adv --keyserver hkps://keyserver.ubuntu.com:443 --recv 2EE0EA64E40A89B84B2DF73499E82A75642AC823 may not work on Ubuntu Bionic LTS (18.04) since it's using a buggy GnuPG, so we are advising to use web API to download the public key in the above.
Red Hat Enterprise Linux and other RPM-based distributions
RPM package is officially supported by sbt, but it does not contain JAR files to save bandwidth.
Red Hat Enterprise Linux and other RPM-based distributions use the RPM format. Run the following from the terminal to install sbt (You'll need superuser privileges to do so, hence the sudo).
# remove old Bintray repo file
sudo rm -f /etc/yum.repos.d/bintray-rpm.repo
curl -L https://www.scala-sbt.org/sbt-rpm.repo > sbt-rpm.repo
sudo mv sbt-rpm.repo /etc/yum.repos.d/
sudo yum install sbt
On Fedora (31 and above), use sbt-rpm.repo:
# remove old Bintray repo file
sudo rm -f /etc/yum.repos.d/bintray-rpm.repo
curl -L https://www.scala-sbt.org/sbt-rpm.repo > sbt-rpm.repo
sudo mv sbt-rpm.repo /etc/yum.repos.d/
sudo dnf install sbt